11.24-11.26学习笔记
11.24
在RK3588上现在可以实现语音识别了,那么要实现对话就是VAD和picovoice的实现了,思路是将两个开源资料下载到U盘然后使用sherpa-onnx去执行这两个onnx模型
使用picovoice是关键词检测:Developer Console | Picovoice On-Device Voice Recognition
需要准备好这些文件依赖,以及key(上面链接登入),模型路径(开源链接下载),唤醒词模型路径(模型上面链接登入后,选择ARM Cortex-M)
root@ATK-DLRK3588-Ubuntu:/mnt/porcupine# ls
kws_demo libpv_porcupine.so picovoice.h pv_porcupine.h
kws_demo.c onboard_mic.wav porcupine_params.pv raspberry
root@ATK-DLRK3588-Ubuntu:/mnt/porcupine# cd raspberry/
root@ATK-DLRK3588-Ubuntu:/mnt/porcupine/raspberry# ls
LICENSE.txt nihao.ppn porcupine_raspberry-pi.ppn xiaoliang.ppn
root@ATK-DLRK3588-Ubuntu:/mnt/porcupine/raspberry#
以下是kws_demo.c的代码
#include <stdio.h>
#include <stdlib.h>
#include <string.h> // 用于双声道转单声道的内存操作
#include <alsa/asoundlib.h>
#include "pv_porcupine.h"
#include "picovoice.h"
// 音频配置(适配es8388声卡双声道)
#define AUDIO_DEVICE "hw:5,0" // 开发板es8388声卡
#define AUDIO_CHANNELS 2 // 双声道(声卡仅支持双声道)
#define TARGET_SAMPLE_RATE 16000 // Porcupine要求的采样率
// 手动定义Porcupine帧长度(512样本 = 32ms@16kHz)
#ifndef PV_PORCUPINE_FRAME_LENGTH
#define PV_PORCUPINE_FRAME_LENGTH 512
#endif
#define FRAME_LENGTH PV_PORCUPINE_FRAME_LENGTH
// 路径和密钥配置(替换为你的实际信息)
#define ACCESS_KEY "lorVTWgLnSX6iW3LFcUpu3urPHeh1CcwX5EQ77aFFp7hbLdgvvK4fQ==" // 你的AccessKey
#define MODEL_PATH "/mnt/porcupine/porcupine_params.pv" // 模型参数路径
#define KEYWORD_PATH "/mnt/porcupine/raspberry/porcupine_raspberry-pi.ppn" // 英文唤醒词模型
// 双声道转单声道(取左右声道平均值,适配Porcupine单声道要求)
void stereo_to_mono(int16_t *stereo_frame, int16_t *mono_frame, int frame_length) {
for (int i = 0; i < frame_length; i++) {
// 双声道数据格式:[左声道样本1, 右声道样本1, 左声道样本2, 右声道样本2, ...]
int32_t left = stereo_frame[2 * i]; // 左声道样本
int32_t right = stereo_frame[2 * i + 1]; // 右声道样本
mono_frame[i] = (int16_t)((left + right) / 2); // 合并为单声道
}
}
int main() {
// 1. 初始化Porcupine关键词检测引擎
const char* keyword_paths[] = {KEYWORD_PATH}; // 关键词路径数组
pv_porcupine_t *porcupine = NULL;
pv_status_t pv_status = pv_porcupine_init(
ACCESS_KEY,
MODEL_PATH,
1, // 关键词数量
keyword_paths, // 关键词路径数组
(const float[]){0.5}, // 灵敏度(0.5为默认)
&porcupine
);
if (pv_status != PV_STATUS_SUCCESS) {
fprintf(stderr, "Porcupine初始化失败!错误码:%d\n", pv_status);
fprintf(stderr, "可能原因:AccessKey无效/模型路径错误/文件损坏\n");
return 1;
}
printf("Porcupine初始化成功,监听唤醒词...\n");
// 2. 初始化ALSA音频采集(适配es8388双声道)
snd_pcm_t *pcm_handle;
snd_pcm_hw_params_t *params;
int alsa_status;
// 打开指定声卡(es8388,hw:3,0)
if ((alsa_status = snd_pcm_open(&pcm_handle, AUDIO_DEVICE, SND_PCM_STREAM_CAPTURE, 0)) < 0) {
fprintf(stderr, "无法打开麦克风(设备:%s):%s\n", AUDIO_DEVICE, snd_strerror(alsa_status));
pv_porcupine_delete(porcupine);
return 1;
}
// 配置音频参数
snd_pcm_hw_params_alloca(¶ms);
snd_pcm_hw_params_any(pcm_handle, params); // 初始化参数为默认值
// 设置访问模式(交错模式)
if ((alsa_status = snd_pcm_hw_params_set_access(pcm_handle, params, SND_PCM_ACCESS_RW_INTERLEAVED)) < 0) {
fprintf(stderr, "无法设置访问模式:%s\n", snd_strerror(alsa_status));
snd_pcm_close(pcm_handle);
pv_porcupine_delete(porcupine);
return 1;
}
// 设置音频格式(16bit小端,Porcupine要求)
if ((alsa_status = snd_pcm_hw_params_set_format(pcm_handle, params, SND_PCM_FORMAT_S16_LE)) < 0) {
fprintf(stderr, "无法设置音频格式(S16_LE):%s\n", snd_strerror(alsa_status));
snd_pcm_close(pcm_handle);
pv_porcupine_delete(porcupine);
return 1;
}
// 设置声道数(双声道,适配声卡)
if ((alsa_status = snd_pcm_hw_params_set_channels(pcm_handle, params, AUDIO_CHANNELS)) < 0) {
fprintf(stderr, "无法设置双声道:%s\n", snd_strerror(alsa_status));
snd_pcm_close(pcm_handle);
pv_porcupine_delete(porcupine);
return 1;
}
// 设置采样率(优先16000Hz)
unsigned int sample_rate = TARGET_SAMPLE_RATE;
if ((alsa_status = snd_pcm_hw_params_set_rate_near(pcm_handle, params, &sample_rate, NULL)) < 0) {
fprintf(stderr, "无法设置采样率(%dHz):%s\n", TARGET_SAMPLE_RATE, snd_strerror(alsa_status));
snd_pcm_close(pcm_handle);
pv_porcupine_delete(porcupine);
return 1;
}
if (sample_rate != TARGET_SAMPLE_RATE) {
fprintf(stderr, "警告:实际采样率为%dHz(要求%dHz),可能导致检测失效\n", sample_rate, TARGET_SAMPLE_RATE);
}
// 应用参数配置
if ((alsa_status = snd_pcm_hw_params(pcm_handle, params)) < 0) {
fprintf(stderr, "无法应用音频参数:%s\n", snd_strerror(alsa_status));
snd_pcm_close(pcm_handle);
pv_porcupine_delete(porcupine);
return 1;
}
printf("音频设备初始化成功(双声道,采样率:%dHz)\n", sample_rate);
// 3. 分配音频缓冲区(双声道需要2倍大小,单声道用于检测)
int16_t *stereo_frame = (int16_t*)malloc(FRAME_LENGTH * AUDIO_CHANNELS * sizeof(int16_t)); // 双声道缓冲区
int16_t *mono_frame = (int16_t*)malloc(FRAME_LENGTH * sizeof(int16_t)); // 单声道缓冲区(用于检测)
if (!stereo_frame || !mono_frame) {
fprintf(stderr, "内存分配失败(音频帧缓冲区)\n");
free(stereo_frame);
free(mono_frame);
snd_pcm_close(pcm_handle);
pv_porcupine_delete(porcupine);
return 1;
}
// 4. 实时采集音频并检测唤醒词(英文"Porcupine")
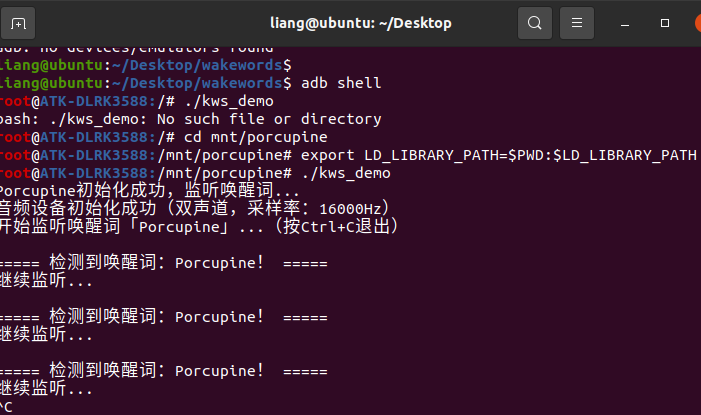
printf("开始监听唤醒词「Porcupine」...(按Ctrl+C退出)\n");
while (1) {
// 读取双声道音频(样本数=帧长度×声道数)
alsa_status = snd_pcm_readi(pcm_handle, stereo_frame, FRAME_LENGTH);
if (alsa_status != FRAME_LENGTH) {
fprintf(stderr, "音频读取错误(期望%d样本,实际%d):%s\n",
FRAME_LENGTH, alsa_status, snd_strerror(alsa_status));
snd_pcm_recover(pcm_handle, alsa_status, 0); // 尝试恢复音频流
continue;
}
// 双声道转单声道(适配Porcupine输入要求)
stereo_to_mono(stereo_frame, mono_frame, FRAME_LENGTH);
// 检测唤醒词
int32_t keyword_index = -1;
pv_status = pv_porcupine_process(porcupine, mono_frame, &keyword_index);
if (pv_status != PV_STATUS_SUCCESS) {
fprintf(stderr, "检测过程错误!错误码:%d\n", pv_status);
break;
}
// 检测到唤醒词(英文"Porcupine")
if (keyword_index >= 0) {
printf("\n===== 检测到唤醒词:Porcupine! =====\n");
printf("继续监听...\n");
}
}
// 5. 释放资源
free(stereo_frame);
free(mono_frame);
pv_porcupine_delete(porcupine); // 释放Porcupine引擎
snd_pcm_close(pcm_handle); // 关闭音频设备
printf("程序已退出\n");
return 0;
}
编译运行
gcc -o kws_demo kws_demo.c -L. -lpv_porcupine -lasound -ldl -pthread
export LD_LIBRARY_PATH=$PWD:$LD_LIBRARY_PATH
./kws_demo
但是遇到不管怎么说这个porcupine都没有成功识别,应该是咪头不能用。播放也没有声音。
11.25
今天问了客服才知道,他们写的Ubuntu镜像系统本身就是不支持摄像头和声卡,没有写驱动,所以是用不了的。只能换回build系统,换回后,之前的原因是模型的版本高,这次低版本的倒是可以运行。
换回后就可以使用咪头和喇叭了。
使用silero-vad进行断句:https://github.com/snakers4/silero-vad
下载好把onnx下到板子后可以直接运行
./sherpa-onnx-vad \
--silero-vad-model=/mnt/silero-vad-3.0/files/silero_vad.onnx \
/mnt/xiao/xiao_4.wav \
/mnt/xiao/xiao_4_processed.wav
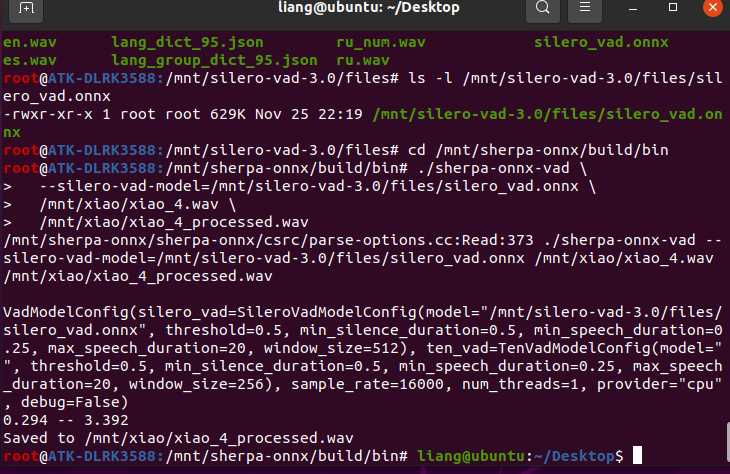 两个模型都成功运行
总结:换回了buildroot系统,成功可以运行之前的语音识别,并且使用porcupine来进行关键词检测,使用silero-vad来进行断句。有了这三个模型就完全可以实现离线语音识别!!
11.26
机器人五官里眼睛和耳朵我认为是最重要的传感器,“耳朵”的就是语音识别,把前几天的三个模型结合起来就🉑以实现。现在是研究一下眼睛是怎么实现的。上个星期的笔记说到使用yolov8来进行识别梳理一下流程:
摄像头视频解码——>使用retinaface人的头找出来——>使用facenet进行特征提取
以下是两个开源链接:
采集摄像头并解码观看视频学习:
认识V4L2框架观看视频学习:
人脸识别特征识别这部分的代码在网络上还是有很多的
《毕设有救了!三小时可弄懂的Arm+Qt+OpenCV嵌入式项目-基于人脸识别的考勤系统,AI大佬代码逐行解读!》
《上官志玩派Linux实战教程》
https://www.bilibili.com/video/BV1y8hgzhEV3/?spm_id_from=333.1387.favlist.content.click
跟着这上面的教程,完全可以实现人脸识别这块。
以上就是三天的学习内容,有什么错误和建议,欢迎留言谢谢!!

DAMO开发者矩阵,由阿里巴巴达摩院和中国互联网协会联合发起,致力于探讨最前沿的技术趋势与应用成果,搭建高质量的交流与分享平台,推动技术创新与产业应用链接,围绕“人工智能与新型计算”构建开放共享的开发者生态。
更多推荐

 13
13 0
0- 0


 已为社区贡献1条内容

所有评论(0)