上传模型/数据集到huggingface的三种方法
在进行上传之前,需要一个有仓库write权限的token,去这里创建:https://huggingface.co/settings/tokens (点击 Create New Token)
本文中出现的所有命令行都可以通过 加 ! 在JupterNotebook中运行,前提是需要在本地虚拟环境装好对应的包,例如方法三需要这样安装依赖pip install huggingface_hub[hf_transfer]
1. 首选:huggingface-cli
在使用pip等工具全局或者在代码目录下安装huggingface-cli后,可以运行
huggingface cli create repo 用户名/仓库名 手动初始化一个huggingface repo
假设用户名是steve,上传之后的模型名字是 whisper-large-v3-finetuned 那么需要运行的上传命令如下。
huggingface-cli upload steve/whisper-large-v3-finetuned . ./
其中第一个 . 表示上传文件的来源文件夹,例如我现在在 ./openai_whisper-large-v3-finetuned-20251010_225331/checkpoint-500 目录内运行这个huggingface-cli命令,那么直接写. 代表当前目录。如果在上一级运行目录,则填写 ./checkpoint-500 读取一下子目录里的文件
第二个 ./ 代表上传到huggingface里的repo库的目标存放路径,假设我这次只想上传到 zh 这个文件夹里下次继续上传,那就直接写 ./zh 。
注:如果你安装了 hf-cli则可以使用 hf upload 来替换上述命令,参数一样而且网络更稳定。安装方法: https://huggingface.co/docs/huggingface_hub/main/en/guides/cli
2. 次选: push_to_hub 方法
from transformers import WhisperForConditionalGeneration, WhisperProcessor
from huggingface_hub import notebook_login
from huggingface_hub.hf_api import HfFolder
a
# 登陆到huggingface
notebook_login()

# --- CONFIGURATION ---
# 1. Set the path to your best model's directory
best_model_dir="./openai_whisper-large-v3-finetuned-20251010_225331/checkpoint-500",
# 注意这里的文件路径下面就是`config.json`和 `model.safetensors`等文件

# 2. Set the name for your new repository on the Hugging Face Hub
hub_repo_name = "whisper-large-v3-finetuned"

# --- LOAD & PUSH ---
# Load the fine-tuned model and processor from your local directory
model = WhisperForConditionalGeneration.from_pretrained(best_model_dir)
processor = WhisperProcessor.from_pretrained(best_model_dir)

# Push the model and processor to the Hub
model.push_to_hub(hub_repo_name, private=True) # 这里可以设置是否公开这个repo
processor.push_to_hub(hub_repo_name, private=True)
3. 推荐:hf_transfer方法(最快最稳定)
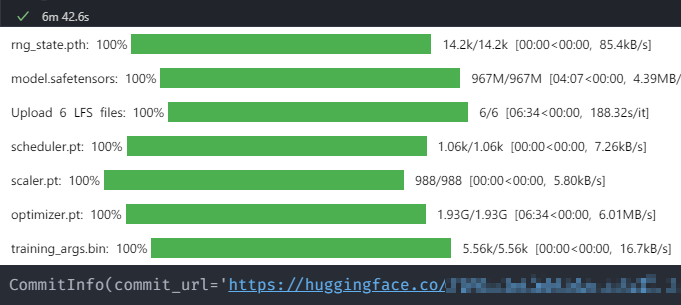
最近训练了个总大小不超过3gb的但由于网络问题。方法1和方法2频繁出错,最后尝试了 hf_transfer 一次成功:
先去命令行运行 huggingface cli create repo 用户名/仓库名 ,这一步其实就是在hf初始化git仓库。
然后回到python代码, 添加如下环境变量(平时下载多于上传的情形建议在Windows系统环境变量或bashrc中设置HF_ENDPOINT=https://hf_mirror.com 而不是 huggingface.co 确保速度,需要再改endpoint)
# 设置临时系统环境变量
os.environ["HF_HUB_ENABLE_HF_TRANSFER"] = "1"
os.environ["HF_ENDPOINT"] = "https://huggingface.co/"
我这里习惯存一个token到本地,这样运行和huggingface-cli交互的代码都不需要额外登录了。可以放在其它代码最前面
from huggingface_hub.hf_api import HfFolder
hf_token = HfFolder.save_token('hf_abdedaddqwdqw')
直接上传,这里速度要比前面两个方法快速和稳定很多:
api.upload_folder(
    folder_path="./openai_whisper-large-v3-finetuned-20251010_225331/checkpoint-500",
     # 注意这里的文件路径下面就是`config.json`和 `model.safetensors`等文件
    repo_id="hf用户名/你的模型名称",
    repo_type="model",  # or "model", "space"
)

DAMO开发者矩阵,由阿里巴巴达摩院和中国互联网协会联合发起,致力于探讨最前沿的技术趋势与应用成果,搭建高质量的交流与分享平台,推动技术创新与产业应用链接,围绕“人工智能与新型计算”构建开放共享的开发者生态。
更多推荐


 3
3 0
0- 0


 已为社区贡献2条内容

所有评论(0)