Spring Boot 3 集成 MyBatis 连接 MySQL 数据库
Spring Boot 3 默认使用 HikariCP 连接池,通过。如果 XML 与 Mapper 接口不在同一包,需在。如果 XML 文件未被编译到。确保 MySQL 数据库。
ps:How to Configure MyBatis with Spring Boot 这个更好
ORM: object \sql manager
自定义工具,
hibernate (全自动步枪)、
mybatis (半自动步枪): 需要写配置文件 ,配置文件当中有sql ,mybatis 框架 根据这个配置文件(给mybatis 的地图 或者 图纸),来为我们执行crud.
这个配置图纸应该有哪些要素:数据库表信息、对象信息、操作或者联系(crud)的信息,操作信息体现在mapper文件上。
整体操作步骤:
- 创建 Spring Boot 项目
application.yml当中添加数据库连接信息 +连接池配置信息- 编写实体类
- 写mapper,通过一个mapper 接口和mybatis 框架打交道
- 编写图纸(配置文件)相当于给mybatis 给这个翻译官一个对照字典
- 实际使用
Spring Boot 3 集成 MyBatis 连接 MySQL 数据库的步骤:
以下是集成 Spring Boot 3、MyBatis、HikariCP 连接池并操作 MySQL 数据库的完整步骤和代码:
一、创建 Spring Boot 项目
添加以下依赖:
<dependencies>
    <!-- Spring Web -->
    <dependency>
        <groupId>org.springframework.boot</groupId>
        <artifactId>spring-boot-starter-web</artifactId>
    </dependency>

    <!-- MyBatis -->
    <dependency>
        <groupId>org.mybatis.spring.boot</groupId>
        <artifactId>mybatis-spring-boot-starter</artifactId>
        <version>3.0.4</version>
    </dependency>

    <!-- MySQL 驱动 -->
    <dependency>
        <groupId>mysql</groupId>
        <artifactId>mysql-connector-java</artifactId>
        <scope>runtime</scope>
    </dependency>

    <!-- HikariCP 连接池 (默认集成,无需显式添加) -->

    <!-- Lombok (可选) -->
    <dependency>
        <groupId>org.projectlombok</groupId>
        <artifactId>lombok</artifactId>
        <optional>true</optional>
    </dependency>
</dependencies>
关键配置: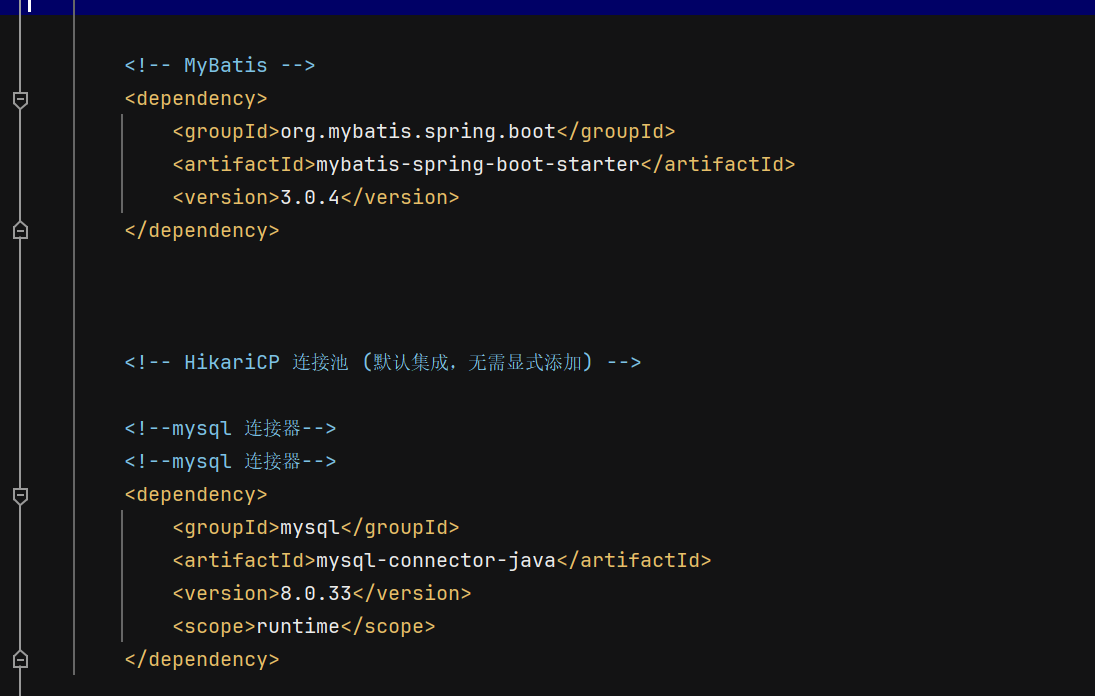
二、配置数据库连接
在 src/main/resources/application.yml 中添加配置:
spring:
  application:
    name: demo124

  datasource:
    # 数据库连接配置
    url: jdbc:mysql://localhost:3306/hisdb3?serverTimezone=Asia/Shanghai&useSSL=false&allowPublicKeyRetrieval=true
    username: root
    password: 1
    driver-class-name: com.mysql.cj.jdbc.Driver

    # HikariCP连接池配置
    hikari:
      # 连接池名称(用于监控和日志)
      pool-name: HisDB3HikariPool

      # 最大连接数(核心参数)
      # 建议值:数据库max_connections * 0.8
      maximum-pool-size: 200

      # 最小空闲连接数
      minimum-idle: 20

      # 连接超时时间(毫秒)
      connection-timeout: 30000

      # 空闲连接存活时间(毫秒)
      idle-timeout: 600000

      # 连接最大存活时间(毫秒)
      max-lifetime: 1800000

      # 连接测试查询语句
      connection-test-query: SELECT 1

      # 等待连接池分配连接的最大队列长度
      queue-length: 100

      # 是否自动提交事务
      auto-commit: true

      # 连接池初始化时创建的连接数
      initial-size: 5

      # 连接池配置的其他参数
      data-source-properties:
        cachePrepStmts: true
        prepStmtCacheSize: 250
        prepStmtCacheSqlLimit: 2048
        useServerPrepStmts: true
        useLocalSessionState: true
        rewriteBatchedStatements: true
        cacheResultSetMetadata: true
        cacheServerConfiguration: true
        elideSetAutoCommits: true
        maintainTimeStats: false

mybatis:
  mapper-locations:
    - classpath*:mapper/**/*.xml
  configuration:
    log-impl: org.apache.ibatis.logging.stdout.StdOutImpl
    map-underscore-to-camel-case: true  # 开启驼峰命名自动映射

# 自定义应用信息
author: neusoft
三、创建实体类
src/main/java/com/example/entity/User.java:
package com.example.demo124.entity;


import com.fasterxml.jackson.annotation.JsonProperty;
import lombok.Data;

import java.io.Serializable;


/**
 * <p>
 * </p>
 *
 * @author lynn
 * @since 2023-07-17
 */
@Data

public class User implements Serializable {

    private static final long serialVersionUID = 1L;

    /**
     * ID主键
     */

    private Integer id;
    /**
     * 登录名
     */
    private String userName;
    /**
     * 密码
     */
    @JsonProperty(access = JsonProperty.Access.WRITE_ONLY)
    private String password;
    /**
     * 真实姓名
     */
    private String realName;
    /**
     * 用户类别
     */
    private Integer useType;

    /**
     * 医生职称ID
     */
    private Integer docTitleID;

    /**
     * 是否参与排班
     */
    private String isScheduling;

    /**
     * 所在科室ID
     */
    private Integer deptID;

    /**
     * 挂号级别ID
     */
    private Integer registLeID;

    /**
     * 删除标记
     */
    @JsonProperty(access = JsonProperty.Access.WRITE_ONLY)

    private Integer delMark;

    @JsonProperty(access = JsonProperty.Access.WRITE_ONLY)
    private Integer db;


}
四、创建 Mapper 接口
src/main/java/com/example/mapper/UserMapper.java:

import com.example.entity.User;
import org.apache.ibatis.annotations.Mapper;

import java.util.List;

@Mapper
public interface UserMapper {
    // 查询所有用户
    List<User> selectAll();

    // 根据 ID 查询用户
    User selectById(Long id);

    // 插入用户
    int insert(User user);

    // 更新用户
    int update(User user);

    // 删除用户
    int deleteById(Long id);
}
五、创建 Mapper XML 文件
src/main/resources/mapper/UserMapper.xml:
<?xml version="1.0" encoding="UTF-8"?>
<!DOCTYPE mapper PUBLIC "-//mybatis.org//DTD Mapper 3.0//EN"
"http://mybatis.org/dtd/mybatis-3-mapper.dtd">
<mapper namespace="com.example.mapper.UserMapper">

    <resultMap id="BaseResultMap" type="User">
        <id column="id" property="id" />
        <result column="username" property="username" />
        <result column="password" property="password" />
        <result column="age" property="age" />
        <result column="email" property="email" />
        <result column="create_time" property="createTime" />
    </resultMap>

    <select id="selectAll" resultMap="BaseResultMap">
        SELECT * FROM user
    </select>

    <select id="selectById" resultMap="BaseResultMap">
        SELECT * FROM user WHERE id = #{id}
    </select>

    <insert id="insert" parameterType="User">
        INSERT INTO user (username, password, age, email, create_time)
        VALUES (#{username}, #{password}, #{age}, #{email}, #{createTime})
    </insert>

    <update id="update" parameterType="User">
        UPDATE user
        SET username = #{username},
            password = #{password},
            age = #{age},
            email = #{email}
        WHERE id = #{id}
    </update>

    <delete id="deleteById" parameterType="Long">
        DELETE FROM user WHERE id = #{id}
    </delete>
</mapper>
六、创建 Service 层
src/main/java/com/example/service/UserService.java:
import com.example.entity.User;

import java.util.List;

public interface UserService {
    List<User> getAllUsers();
    User getUserById(Long id);
    int saveUser(User user);
    int updateUser(User user);
    int deleteUser(Long id);
}
src/main/java/com/example/service/impl/UserServiceImpl.java:
import com.example.entity.User;
import com.example.mapper.UserMapper;
import org.springframework.beans.factory.annotation.Autowired;
import org.springframework.stereotype.Service;
import org.springframework.transaction.annotation.Transactional;

import java.util.List;

@Service
@Transactional
public class UserServiceImpl implements UserService {

    @Autowired
    private UserMapper userMapper;

    @Override
    public List<User> getAllUsers() {
        return userMapper.selectAll();
    }

    @Override
    public User getUserById(Long id) {
        return userMapper.selectById(id);
    }

    @Override
    public int saveUser(User user) {
        return userMapper.insert(user);
    }

    @Override
    public int updateUser(User user) {
        return userMapper.update(user);
    }

    @Override
    public int deleteUser(Long id) {
        return userMapper.deleteById(id);
    }
}
七、创建 Controller 层
src/main/java/com/example/controller/UserController.java:
import com.example.entity.User;
import com.example.service.UserService;
import org.springframework.beans.factory.annotation.Autowired;
import org.springframework.web.bind.annotation.*;

import java.util.List;

@RestController
@RequestMapping("/api/users")
public class UserController {

    @Autowired
    private UserService userService;

    // 获取所有用户
    @GetMapping
    public List<User> getAllUsers() {
        return userService.getAllUsers();
    }

    // 根据 ID 获取用户
    @GetMapping("/{id}")
    public User getUserById(@PathVariable Long id) {
        return userService.getUserById(id);
    }

    // 添加用户
    @PostMapping
    public int saveUser(@RequestBody User user) {
        return userService.saveUser(user);
    }

    // 更新用户
    @PutMapping("/{id}")
    public int updateUser(@PathVariable Long id, @RequestBody User user) {
        user.setId(id);
        return userService.updateUser(user);
    }

    // 删除用户
    @DeleteMapping("/{id}")
    public int deleteUser(@PathVariable Long id) {
        return userService.deleteUser(id);
    }
}
八、启用 MyBatis
在主应用类上添加 @MapperScan 注解:
import org.mybatis.spring.annotation.MapperScan;
import org.springframework.boot.SpringApplication;
import org.springframework.boot.autoconfigure.SpringBootApplication;

@SpringBootApplication
@MapperScan("com.example.mapper")
public class Application {
    public static void main(String[] args) {
        SpringApplication.run(Application.class, args);
    }
}
九、数据库表结构
确保 MySQL 数据库 his2 中存在 user 表:
CREATE DATABASE his2;

USE his2;

CREATE TABLE user (
    id BIGINT PRIMARY KEY AUTO_INCREMENT,
    username VARCHAR(50) NOT NULL,
    password VARCHAR(100) NOT NULL,
    age INT,
    email VARCHAR(50),
    create_time DATETIME DEFAULT CURRENT_TIMESTAMP
);
十、测试应用
启动应用后,使用工具(如 Postman)测试接口:
-
获取所有用户
GET http://localhost:8080/api/users -
获取单个用户
GET http://localhost:8080/api/users/1 -
添加用户
POST http://localhost:8080/api/users 请求体: { "username": "test", "password": "123456", "age": 25, "email": "test@example.com" } -
更新用户
PUT http://localhost:8080/api/users/1 请求体: { "username": "updated", "age": 26 } -
删除用户
DELETE http://localhost:8080/api/users/1
十一、连接池配置
Spring Boot 3 默认使用 HikariCP 连接池,通过 spring.datasource.hikari 配置:
maximum-pool-size: 最大连接数(默认 10)minimum-idle: 最小空闲连接数(默认与 maximum-pool-size 相同)idle-timeout: 空闲连接超时时间(默认 30000 毫秒)connection-timeout: 获取连接超时时间(默认 30000 毫秒)max-lifetime: 连接最大生命周期(默认 1800000 毫秒)
十二、同包存放
- 同包存放:Mapper 接口和 XML 文件放在同一包下时,无需额外配置
mapper-locations,MyBatis 会自动识别。 - 核心配置:确保
@MapperScan扫描到 Mapper 包,并通过application.yml配置数据库连接和连接池参数。 - 资源打包:若 XML 在 Java 源码目录下,需在
pom.xml中配置资源过滤,确保其被编译到类路径中。 -
问题 1:XML 文件未被打包到类路径中
如果 XML 文件未被编译到
target/classes目录下,需在pom.xml中配置资源过滤:<build> <resources> <resource> <directory>src/main/java</directory> <includes> <include>**/*.xml</include> <!-- 包含 Java 目录下的 XML 文件 --> </includes> </resource> <resource> <directory>src/main/resources</directory> </resource> </resources> </build>问题 2:手动指定 XML 路径(非必须)
如果 XML 与 Mapper 接口不在同一包,需在
application.yml中明确指定 XML 位置:mybatis: mapper-locations: classpath:/mapper/**/*.xml # 例如:XML 放在 resources/mapper 目录下十三、关于传统的MyBatis 中的
SqlMapConfig.xml
-
- 传统 Spring + MyBatis:需要
SqlMapConfig.xml配置 MyBatis 基础信息,再由 Spring 加载。 - Spring Boot + MyBatis:无需
SqlMapConfig.xml,通过自动配置和属性文件即可完成大部分配置,更简洁。 - 什么时候需要自定义配置?
当需要修改 MyBatis 全局行为(如添加插件、自定义类型处理器)时,可通过 Java 配置类(@Configuration+@Bean)替代传统的 XML 配置,例如:java
@Configuration
public class MyBatisConfig {
    @Bean
    public MyBatisConfiguration myBatisConfiguration() {
        MyBatisConfiguration configuration = new MyBatisConfiguration();
        configuration.setMapUnderscoreToCamelCase(true); // 开启驼峰映射
        return configuration;
    }
}
- 传统 Spring + MyBatis:需要

DAMO开发者矩阵,由阿里巴巴达摩院和中国互联网协会联合发起,致力于探讨最前沿的技术趋势与应用成果,搭建高质量的交流与分享平台,推动技术创新与产业应用链接,围绕“人工智能与新型计算”构建开放共享的开发者生态。
更多推荐


 6
6 0
0- 0


 已为社区贡献3条内容

所有评论(0)