最强开源扣图算法BiRefNet部署使用
本文介绍了如何使用GitHub开源的BiRefNet抠图工具。首先需配置开发环境(PyTorch+CUDA),通过conda创建虚拟环境并安装依赖。从Google Drive下载预训练模型后,提供了完整的Python执行代码(run.py),包含模型加载、图像处理、推理预测及后处理流程。该工具虽未达到发丝级抠图精度,但能满足一般应用需求。运行后生成透明背景的PNG文件。文中还提供了可能缺失文件的完
在github上开源的扣图工具直接下载下来
https://github.com/ZhengPeng7/BiRefNet
开发环境要求:
# PyTorch==2.5.1+CUDA12.4 (or 2.0.1+CUDA11.8) is used for faster training (~40%) with compilation.
conda create -n birefnet python=3.10 -y && conda activate birefnet
pip install -r requirements.txt
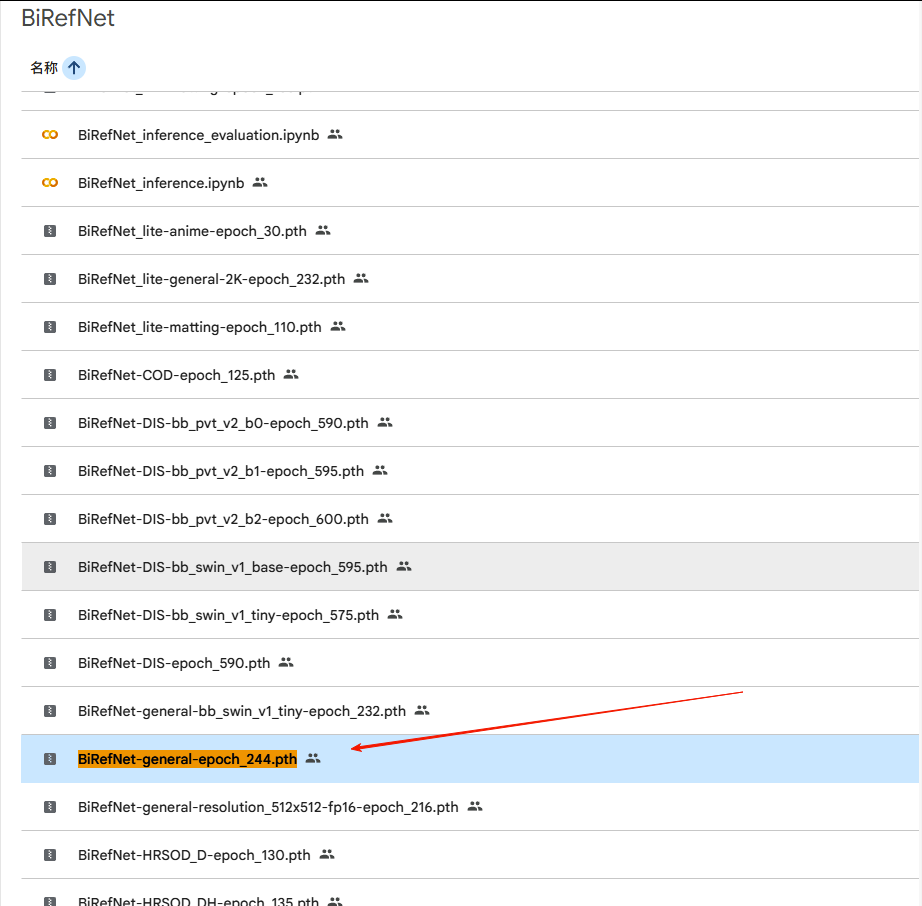
到Google Drive上下载模型BiRefNet-general-epoch_244.pth

自己写一段简单地执行程序(让AI帮你写就得了),命名为run.py
import torch
from models.birefnet import BiRefNet
from utils import check_state_dict
from PIL import Image
import numpy as np
from torchvision import transforms

# 1. 加载模型
birefnet = BiRefNet(bb_pretrained=False)
state_dict = torch.load('BiRefNet-general-epoch_244.pth', map_location='cpu', weights_only=True)
state_dict = check_state_dict(state_dict)
birefnet.load_state_dict(state_dict)

# 2. 设置设备
device = 'cuda' if torch.cuda.is_available() else 'cpu'
birefnet.to(device)
birefnet.eval()

# 3. 加载图像
image = Image.open('taskImage/test.png').convert("RGB")
original_size = image.size

# 4. 使用固定尺寸缩放 (官方推荐)
transform = transforms.Compose([
    transforms.Resize((1024, 1024)),
    transforms.ToTensor(),
    transforms.Normalize([0.485, 0.456, 0.406], [0.229, 0.224, 0.225])
])
input_tensor = transform(image).unsqueeze(0).to(device)

# 5. 进行推理
with torch.no_grad():
    preds = birefnet(input_tensor)[-1].sigmoid().cpu()
pred = preds[0].squeeze()

# 6. 二值化和后处理
threshold = 0.5
binary_mask = (pred > threshold).float().numpy() * 255
mask_image = Image.fromarray(binary_mask.astype(np.uint8))

# 7. 恢复原始尺寸
final_mask = mask_image.resize(original_size, Image.NEAREST)

# 8. 创建透明背景图
result = Image.new("RGBA", original_size, (0, 0, 0, 0))
result.paste(image, (0, 0), mask=final_mask)
result.save('output.png')
这个时候,在终端执行pyhton run.py
即可得到结果

效果如下:
原图:

扣除后:

效果并没有完美到发丝级别,但是对于我的应用场景也已经足够使用。
可能会有部分下载不到的,没有关系,我整理了要用到整个包,下载地址:

DAMO开发者矩阵,由阿里巴巴达摩院和中国互联网协会联合发起,致力于探讨最前沿的技术趋势与应用成果,搭建高质量的交流与分享平台,推动技术创新与产业应用链接,围绕“人工智能与新型计算”构建开放共享的开发者生态。
更多推荐
 已为社区贡献2条内容


所有评论(0)