【PointNet++】基于自建数据训练PointNet++场景语义分割网络
【PointNet++】基于自建数据训练PointNet场景语义分割网络
【PointNet++】基于自建数据训练PointNet++场景语义分割网络
PointNet++项目代码和相关数据集参考:【PointNet++】PointNet++复现(PyTorch版本)
0. 相关文章
PointNet模型搭建
基于自建数据训练PointNet分割网络
【PointNet++】PointNet++复现(PyTorch版本)
1. S3DIS数据集介绍
S3DIS数据集多用于室内点云的语义分割和实例分割,包括6个区域和13种语义元素,以及11种场景的应用。
1.1. 区域
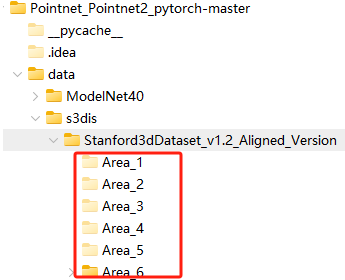
6个区域分别为(数据集目录名称):Area1、Area2、Area3、Area4、Area5、Area6,如图所示。
1.2. 语义
下面以Area_1为例详细介绍区域内的数据格式。
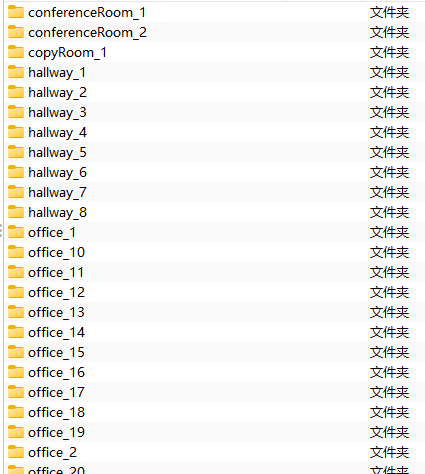
Area_1包含conferenceRoom、copyRoom、hallway、office、pantry和WC6中语义,每种语义单独存放于一个文件夹中,如图所示(图中语义展示不完整)。
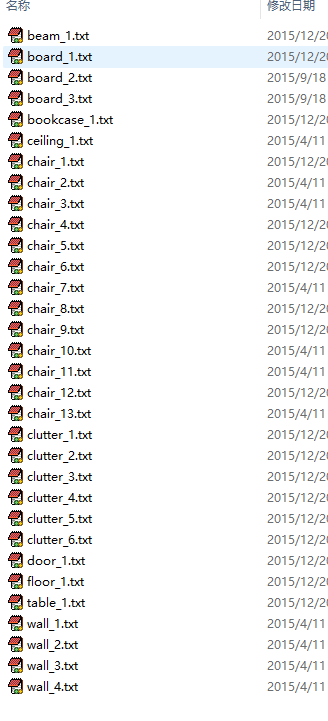
每个文件夹中包含一个txt文件和Annotations文件夹,如图所示: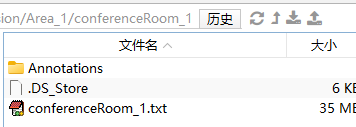
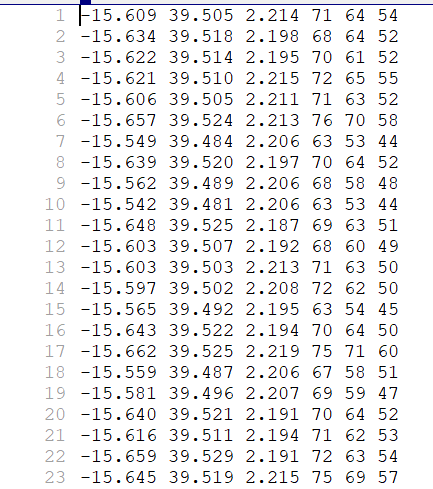
其中conferenceRoom_1.txt中包含此场景语义的全部点云数据,其内部数据格式为【x y z r g b】,如图所示,每一行表示一个点:
Annotations文件夹中是根据不同语义分割将conferenceRoom_1.txt文件数据分割开的子数据,同样是txt格式,此txt文件命名方式语义类别,如图所示:
2. 数据集制作
数据集标注方式参考:基于自建数据训练PointNet分割网络,数据标注可以导出pcd和txt格式,这里采用txt数据作为标注数据。
本文采用的数据集只有一种场景:隧道场景,其中包含三种语义:地面、围岩曲面、龙门钢架等,标注结果如图所示:

使用以下脚本将txt数据制作为S3DIS数据集的格式(此脚本执行效率较慢,可自行优化,仅供参考),S3DIS数据中包含rgb信息,本文采用的数据中并不包含,因此在脚本中额外添加了rgb信息:
import itertools
import os

def make_dataset(path, name, start_line, i):
    all_file_root_path = r"E:\07-code\Pointnet_Pointnet2_pytorch-master\myutils\data\res\Area_7"
    cls_name = f"tunnel_{i + 1}"
    dir = os.path.join(all_file_root_path, cls_name)
    os.makedirs(dir, exist_ok=True)
    ann_dir = os.path.join(dir, 'Annotations')
    os.makedirs(ann_dir, exist_ok=True)

    # 全部点文件路径
    all_file_path = os.path.join(dir, f"{cls_name}.txt")
    # 分类别文件路径:防水台车支架(holder,1);地面(Floor,2);围岩曲面(Tunnel,4);
    holder_file_path = os.path.join(ann_dir, 'holder_1.txt')
    floor_file_path = os.path.join(ann_dir, 'ground_1.txt')
    tunnel_file_path = os.path.join(ann_dir, 'tunnel_1.txt')

    # 写入点
    with open(path, 'r') as file:
        for line in itertools.islice(file, start_line, None):
            line_data = line.strip()
            x, y, z, label, obj = line_data.split(' ')
            if int(label) == 3:  # 50米以外的数据
                continue
            # 写入全部点
            with open(all_file_path, 'a') as f:
                f.write(f"{x} {y} {z} 0 1 0\n")
            # 分类别写入
            if int(label) == 1:
                with open(holder_file_path, 'a') as f:
                    f.write(f"{x} {y} {z} 0.55 0.30 0.22\n")
            elif int(label) == 2:
                with open(floor_file_path, 'a') as f:
                    f.write(f"{x} {y} {z} 0.55 0.04 0.31\n")
            elif int(label) == 4:
                with open(tunnel_file_path, 'a') as f:
                    f.write(f"{x} {y} {z} 0.15 0.25 0.55\n")


def main():
    root_path = r"E:\07-code\Pointnet_Pointnet2_pytorch-master\myutils\data\source"
    start_line = 10
    num = len(os.listdir(root_path))
    with os.scandir(root_path) as entries:
        for i, entry in enumerate(entries):
            if entry.is_file() and entry.name.endswith('.txt'):
                file_name = entry.name.split('.')[0]
                make_dataset(entry.path, file_name, start_line, i)
            print("\r[{}] processing [{}/{}]".format("制作数据", i + 1, num), end="")
        print()
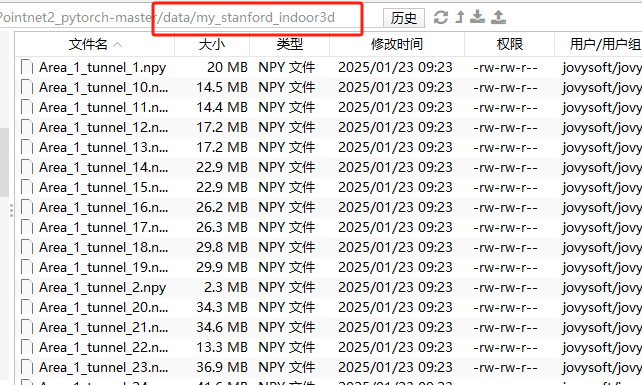
数据制作成S3DIS数据集格式后,将制作数据集分为两个场景:Area_1和Area_2,其中Area_2用于测试。然后在项目下data目录下创建自己的数据集文件夹myS3dis,如图所示:

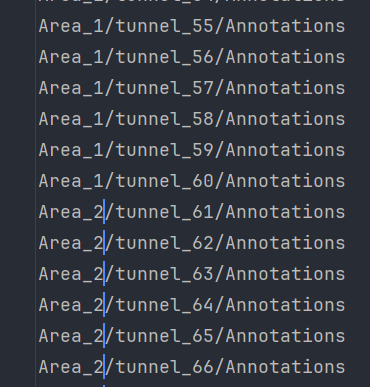
Area_1和Area_2为制作的场景语义数据,其内部通S3DIS数据集格式一样,如图所示:

然后使用同样的方式,参考【PointNet++】PointNet++复现(PyTorch版本),将数据制作成npy格式,在制作之前需要对数据处理脚本进行修改。
数据处理结果如图所示:
2.1. data_utils/meta/anno_paths.txt文件修改
在anno_paths.txt文件中写入数据集Annotations文件夹路径即可,本文采用新建my_anno_paths.txt文件的方式,文件内容如图所示:
新建文件需要修改相应的路径,见2.3. data_utils/collect_indoor3d_data.py脚本修改
2.2. data_utils/meta/class_names.txt文件修改
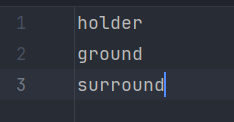
在class_names.txt文件中添加场景的语义类别,本文采用新建my_class_names.txt文件的方式,在文件中写入数据集所使用的语义类别,文件内容如图所示:
同样,新建文件需要修改相应的路径,见2.4. data_utils/indoor3d_util.py脚本修改
2.3. data_utils/collect_indoor3d_data.py脚本修改
修改anno_paths路径:

修改output_folder路径:

2.4. data_utils/indoor3d_util.py脚本修改
修改DATA_PATH路径:

修改g_classes路径:

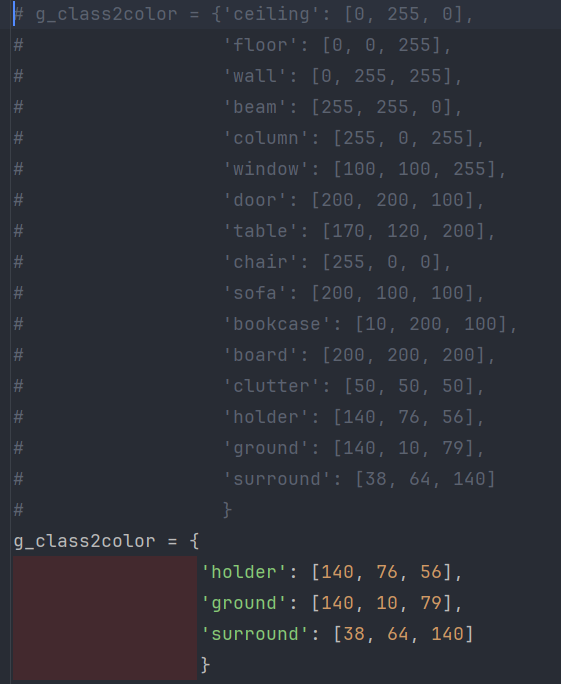
修改g_class2color值:
修改g_easy_view_labels值:

3. 训练代码修改
3.1. train_semseg.py脚本修改
修改语义类别classes:

修改root数据集根路径:

修改NUM_CLASSES值:

修改np.float,不修改训练可能会报错,可以先进行测试:

3.2. S3DISDataLoader.py脚本修改
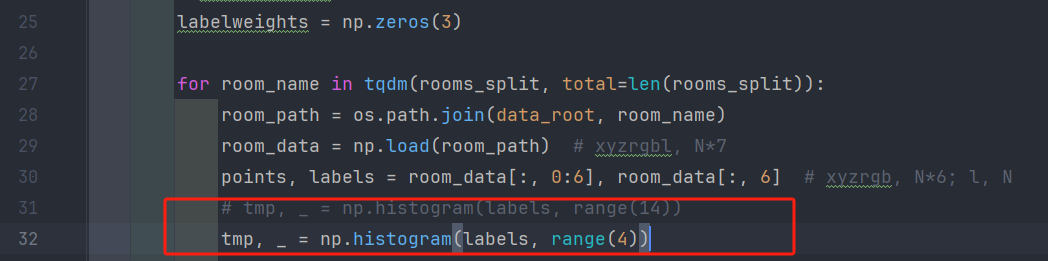
S3DISDataset类中的labelweights值修改,因为语义类别只有三种,因此此处维度修改为3:

同样紧接下面的range(14)修改为range(4):
4. 训练
在项目根目录下执行以下命令进行训练:
python train_semseg.py --model pointnet2_sem_seg --test_area 2 --log_dir pointnet2_sem_seg
5. 测试
5.1. test_semseg.py脚本修改
修改classes值:
修改NUM_CLASSES值:

修改root数据集根路径(生成的npy文件路径):

5.2. 执行测试
在项目根目录下执行以下命令进行测试:
python test_semseg.py --log_dir pointnet2_sem_seg --test_area 2 --visual
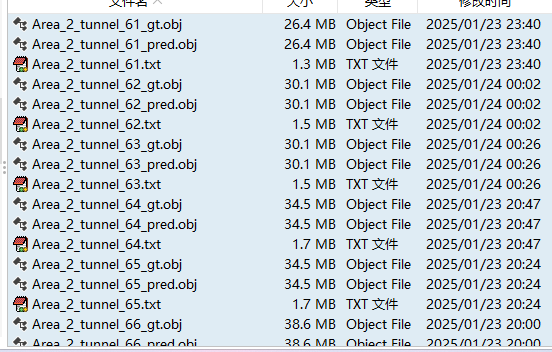
测试后在Pointnet_Pointnet2_pytorch-master/log/sem_seg/pointnet2_sem_seg/visual目录下生成obj文件:
对pred进行可视化如图所示:

可视化脚本如下所示:(PointCloud的colors属性值只能是[0, 1]区间内,否则无法显示)
import open3d as o3d
import numpy as np


def visual_obj(path):
    with open(path, "r") as obj_file:
        points = []
        colors = []

        for line in obj_file.readlines():
            line = line.strip()
            line_list = line.split(" ")
            color = line_list[4:7]
            if color == ['38', '64', '140']:
                color = [str(38/255), str(64/255), str(140/255)]
            elif color == ['140', '76', '56']:
                color = [str(140/255), str(76/255), str(56/255)]
            elif color == ['140', '10', '79']:
                color = [str(140/255), str(10/255), str(79/255)]
            points.append(np.array(line_list[1:4]))
            colors.append(np.array(color))

        pcd = o3d.geometry.PointCloud()
        pcd.points = o3d.utility.Vector3dVector(points)
        pcd.colors = o3d.utility.Vector3dVector(colors)
        o3d.visualization.draw_geometries([pcd])


def main():
    objt_file_path = r"E:\07-code\Pointnet_Pointnet2_pytorch-master\test\Area_2_tunnel_79_pred.obj"
    visual_obj(objt_file_path)


if __name__ == '__main__':
    main()

DAMO开发者矩阵,由阿里巴巴达摩院和中国互联网协会联合发起,致力于探讨最前沿的技术趋势与应用成果,搭建高质量的交流与分享平台,推动技术创新与产业应用链接,围绕“人工智能与新型计算”构建开放共享的开发者生态。
更多推荐


 40
40 0
0- 0


 已为社区贡献5条内容

所有评论(0)