JavaFX+SpringBoot2.7+JDK17+Launch4j+InnoSetup实现JVMTI的Jar包加密/H2数据库加密/安装序列号等一体化华丽界面框架的统一实现。
javaFX的界面框架有很多,实际业务中我们常常要将界面框架与整体业务框架融为一体,这里介绍一下如何将javaFX的界面框架与springboot相结合,并实现jar包加密、数据库加密、安装时在线校验序列号等一系列的过程。本文以一个图书管理模块为例,界面框架采用了atlantafx,数据库采用了h2。下面上几个界面图,如下图所示:闪屏界面登录界面列表界面黑色主题的列表界面系统设置界面主题设置界面2
一、前序说明
javaFX的界面框架有很多,实际业务中我们常常要将界面框架与整体业务框架融为一体,这里介绍一下如何将javaFX的界面框架与springboot相结合,并实现jar包加密、数据库加密、安装时在线校验序列号等一系列的过程。本文以一个图书管理模块为例,界面框架采用了atlantafx,数据库采用了h2。下面上几个界面图,如下图所示:

闪屏界面
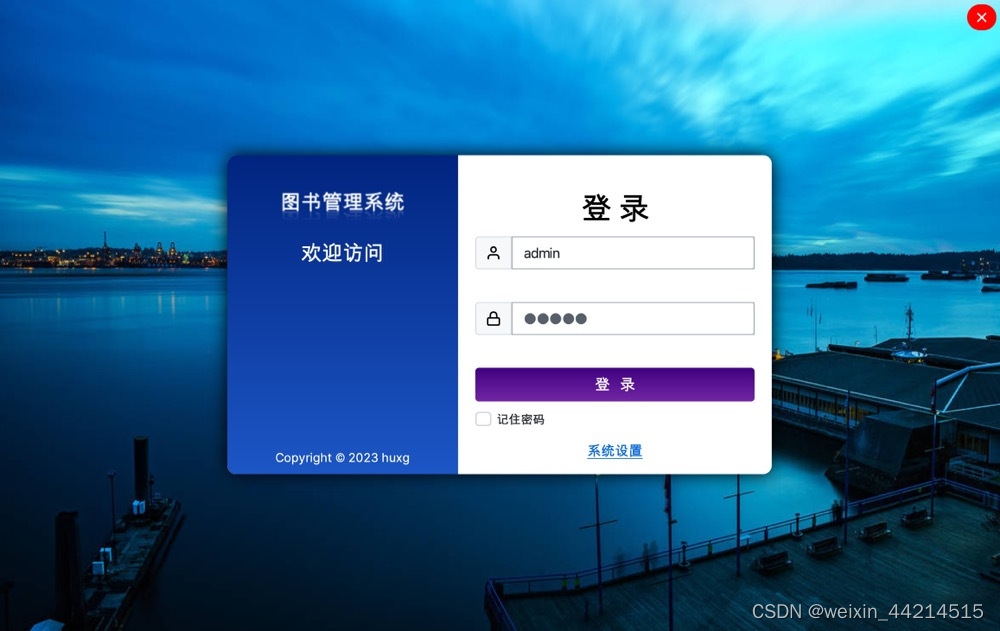
登录界面
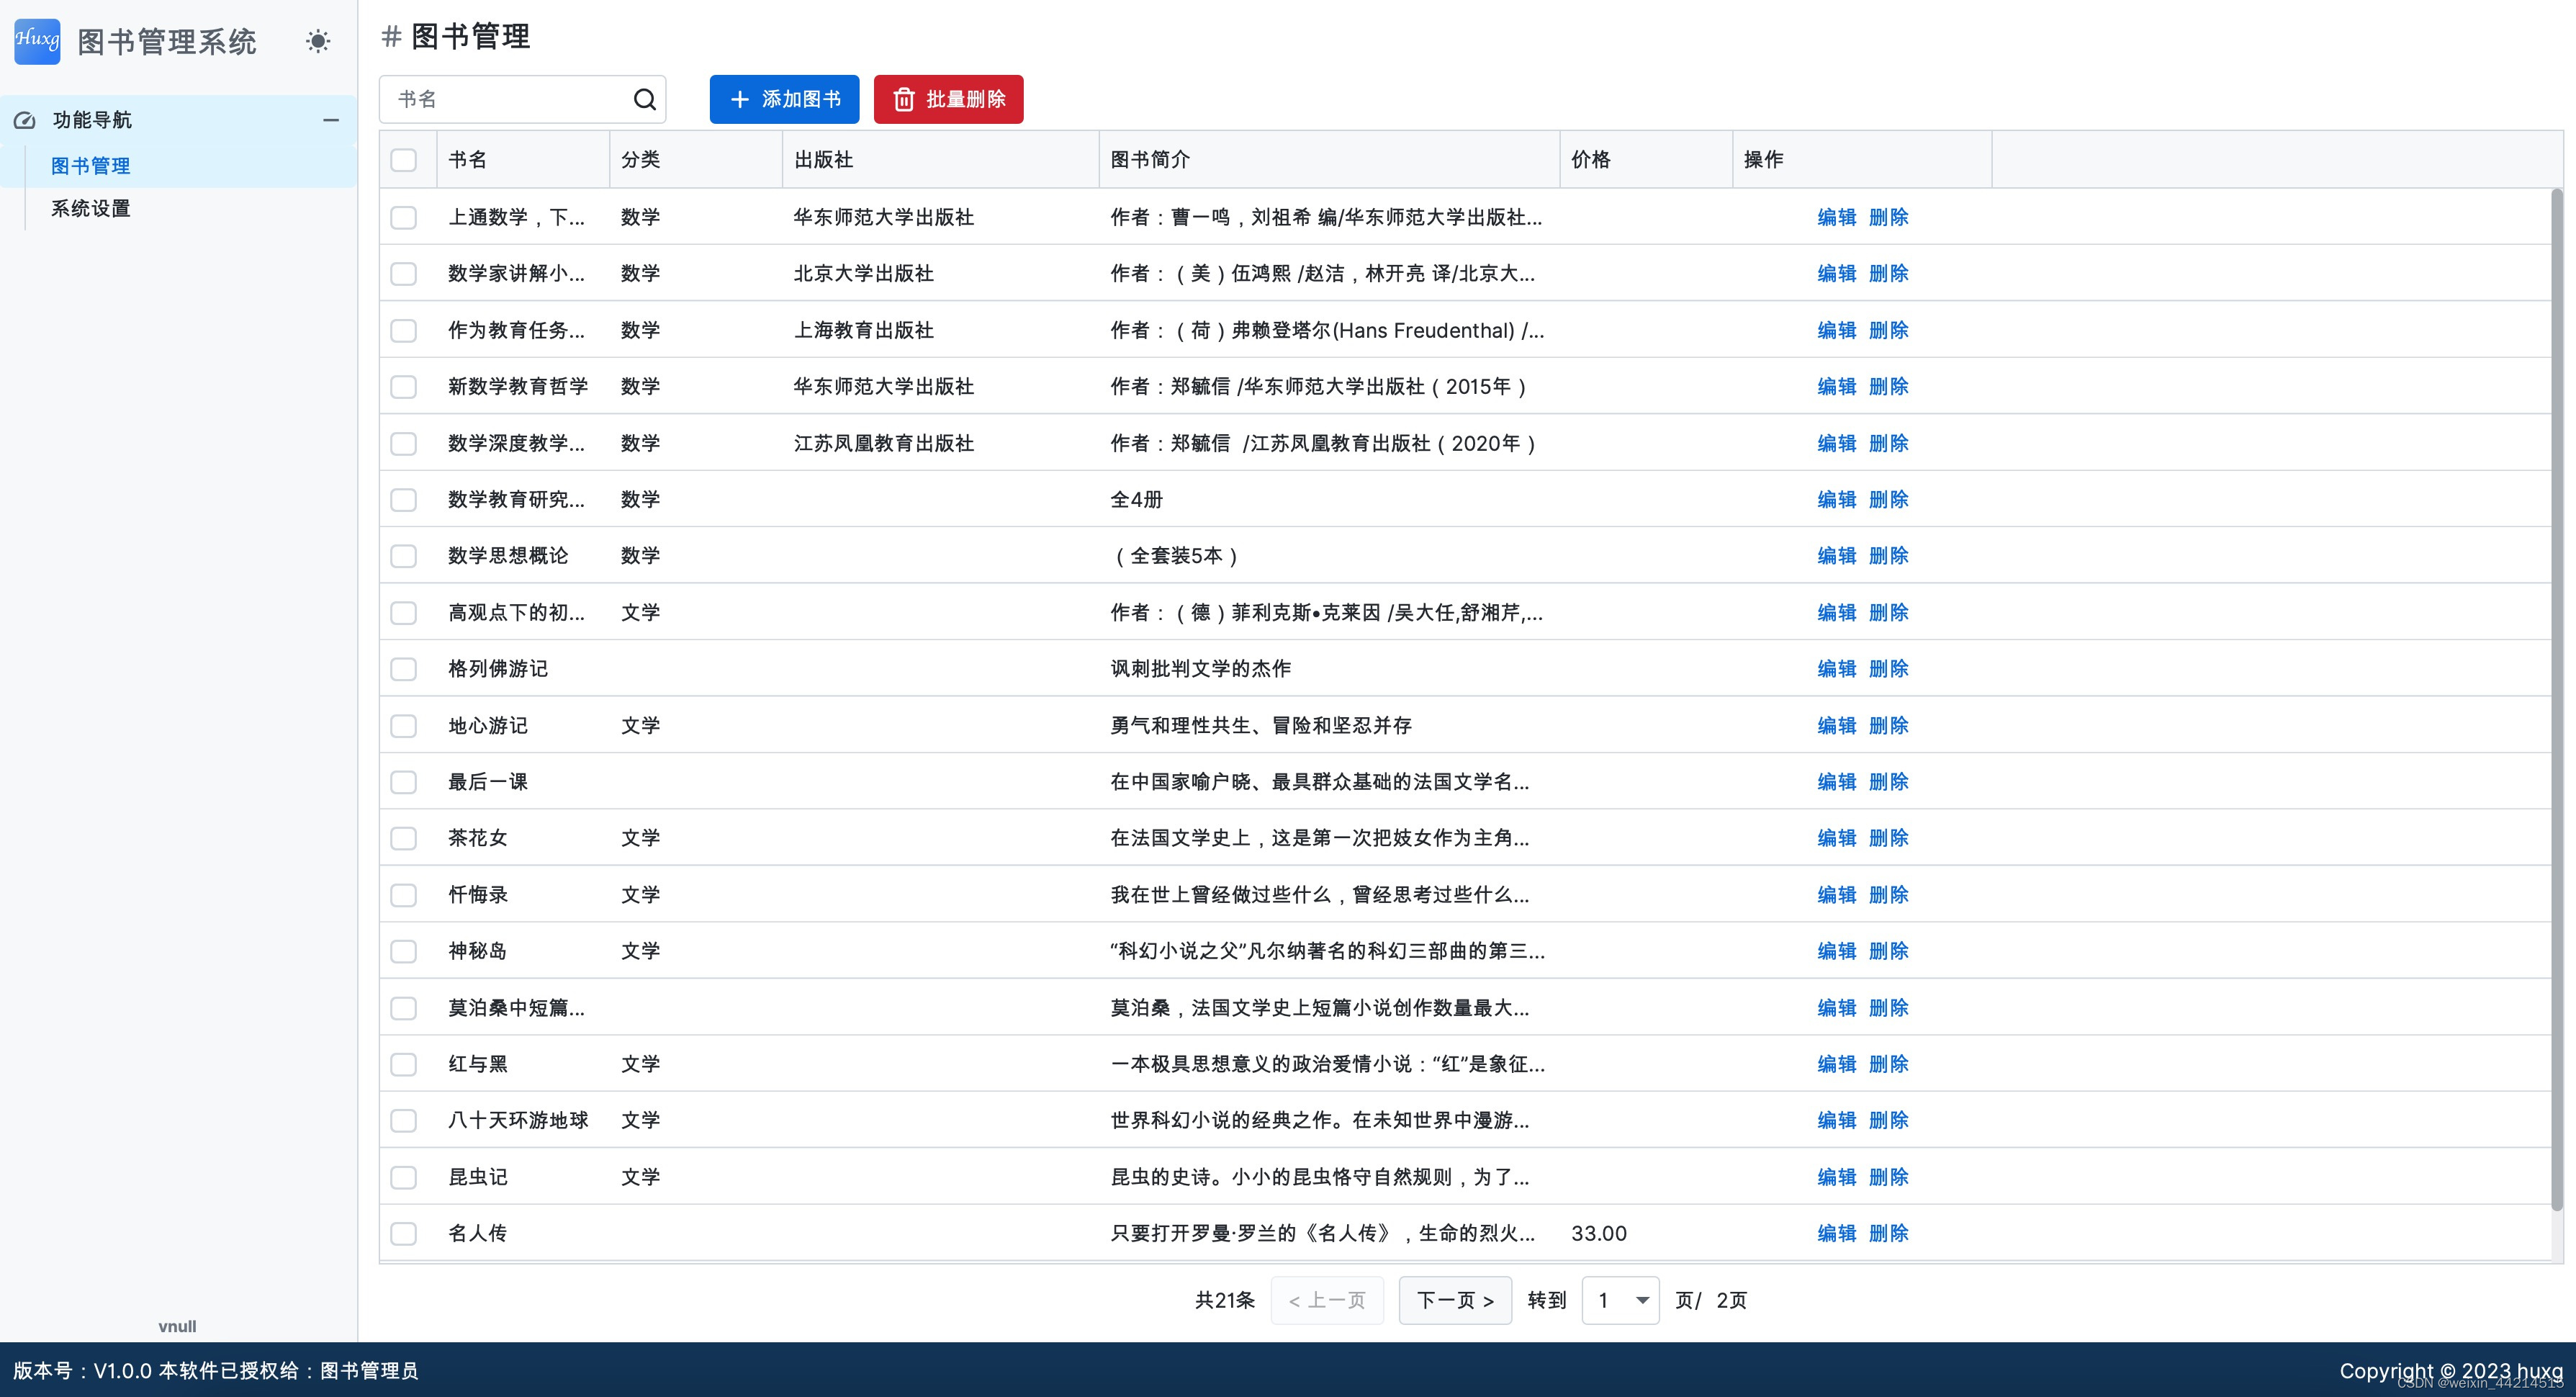
列表界面
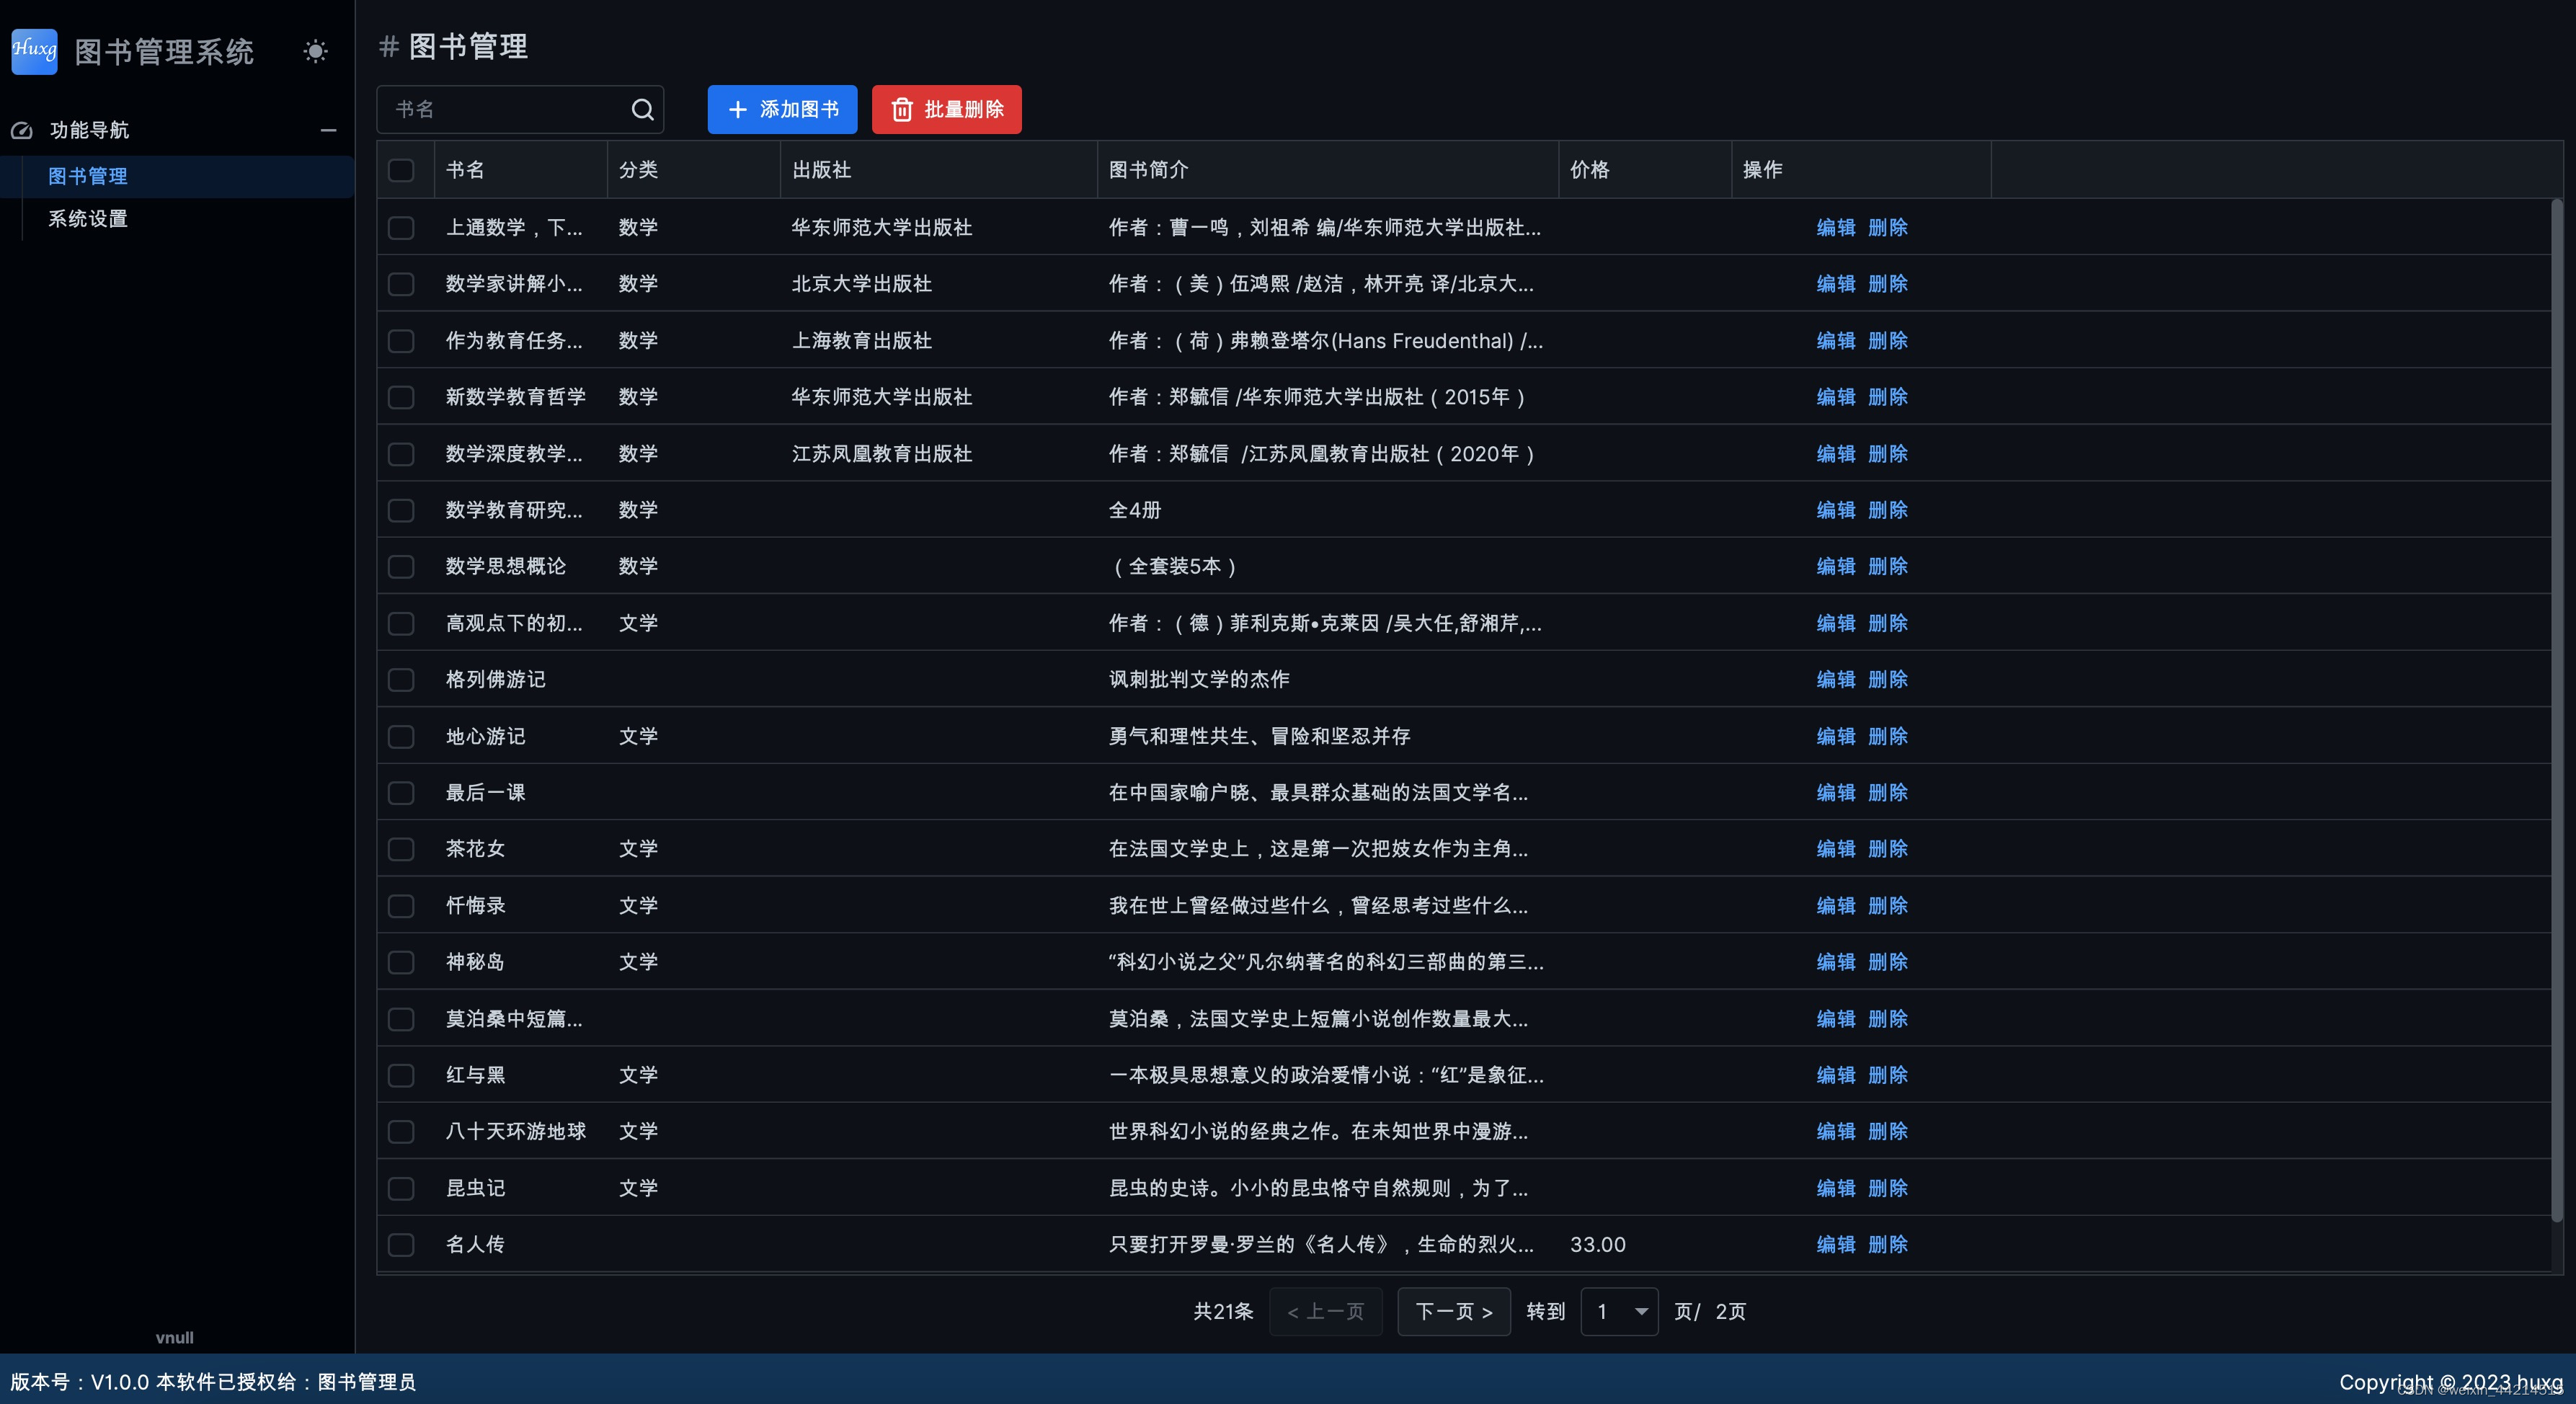
黑色主题的列表界面

系统设置界面
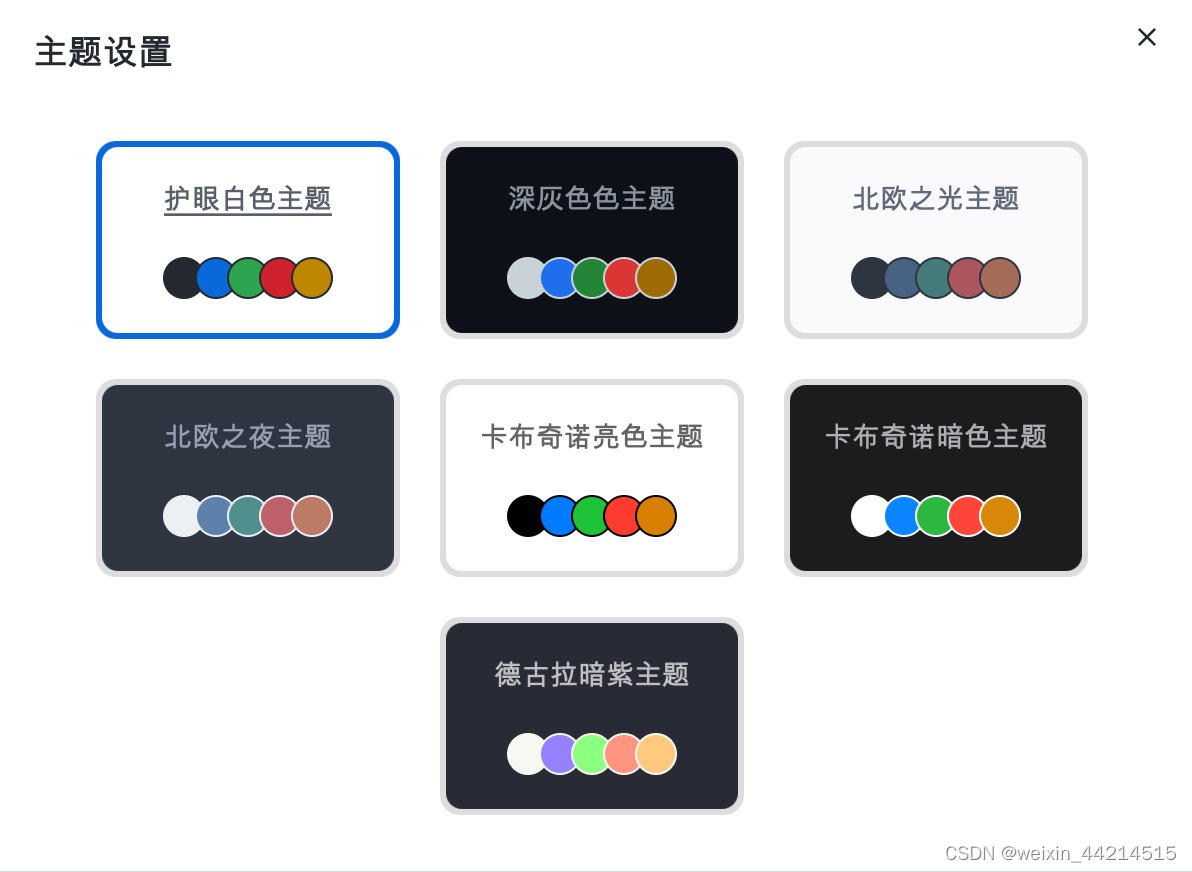
主题设置界面
1. JavaFX 20 ,
2. SpringBoot 2.7.5 这个就不给链接了,在pom.xml中。
3. JDK17 windows的下载地址:
4. Launch4j 3.5.0 用于制作和生成各平台可执行文件,windows下生成exe文件。链接地址:
5. JVMTI 制作dll,用于对Jar包加解密,防破解。这个自行编译出dll即可。我在框架下载地址中也放了我自己编译的dll。
6. Inno Setup 6.22 用于制作安装程序,同时在安装过程中提示输入序列号。
7.(可选)Python 3+ Python,用于执行的build.py来构建安装程序。
8. (可选) jad-ui,可通过该工具查看加密后的jar包中的类是否可反编译。链接地址:
9. 数据库,在本项目中我采用H2数据库,且数据库实现加密。
说明:我以windows平台为例,其他平台类似。示例中会以一个图书管理系统作为示例。在本文中,我会附带上所有需要的软件的链接。
二、项目结构说明
在本文中给出了两个项目,如下所示:
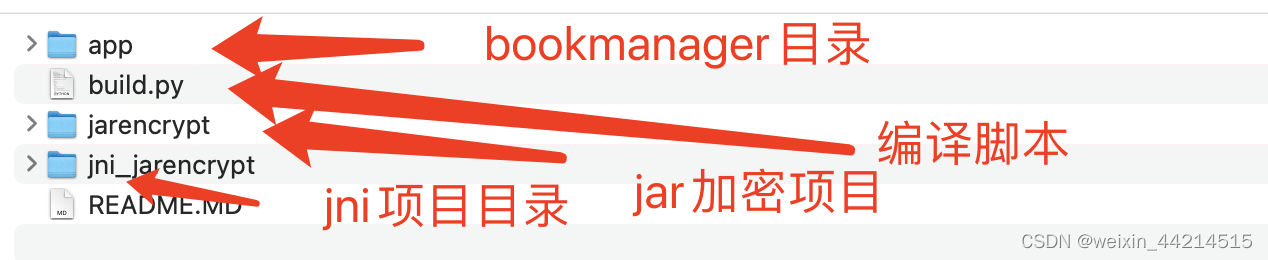
其中,bookemanager是图书管理系统的实现,jniencrypt是加解密dll源代码。
三、SpringBoot2.75+JavaFX20的图书管理系统实现说明
1. 组件说明:
lombok -- 没啥可说的,都懂
openjfx, controls/fxml/swing/media/web/base/
springboot 2.7.5+
springboot-javafx-support springboot对javafx的支持库
界面库:atlantafx,目前感觉这个还是挺不错的,而且支持java17以上版本。
图标库:ikonli
fasjson:json处理库
dao:mybatis-2.1.2
分页:google-pagehelper
数据库:h2 druid
sass编译组件:sass-cli-maven-plugin
2. pom.xml文件
<?xml version="1.0" encoding="UTF-8"?>
<project xmlns="http://maven.apache.org/POM/4.0.0"
	xmlns:xsi="http://www.w3.org/2001/XMLSchema-instance"
	xsi:schemaLocation="http://maven.apache.org/POM/4.0.0 http://maven.apache.org/xsd/maven-4.0.0.xsd">
	<modelVersion>4.0.0</modelVersion>
	<parent>
		<groupId>org.springframework.boot</groupId>
		<artifactId>spring-boot-starter-parent</artifactId>
		<version>2.7.5</version>
	</parent>
	<groupId>huxg</groupId>
	<artifactId>bookmanager</artifactId>
	<version>1.0.0</version>
	<properties>
		<app.launcher>huxg.bookmanager.BookManagerApplication</app.launcher>
		<java.version>17</java.version>
		<maven.compiler.encoding>UTF-8</maven.compiler.encoding>
		<project.build.sourceEncoding>UTF-8</project.build.sourceEncoding>
		<project.reporting.outputEncoding>UTF-8</project.reporting.outputEncoding>
		<maven.compiler.source>17</maven.compiler.source>
		<maven.compiler.target>17</maven.compiler.target>
		<openjfx.version>20</openjfx.version>
		<lib.cssfx.version>11.5.1</lib.cssfx.version>
		<lib.ikonli.version>12.3.1</lib.ikonli.version>
		<lib.datafaker.version>1.3.0</lib.datafaker.version>
		<lib.jetbrains-annotations.version>23.0.0</lib.jetbrains-annotations.version>
		<atlantafx.version>2.0.1</atlantafx.version>
	</properties>

	<profiles>
		<profile>
			<id>win64</id>
			<activation>
				<os>
					<family>windows</family>
				</os>
			</activation>
			<properties>
				<app.icon>
					${project.build.directory}\resources\icons\app-icon.ico</app.icon>
			</properties>
		</profile>
	</profiles>

	<dependencies>
		<dependency>
			<groupId>org.projectlombok</groupId>
			<artifactId>lombok</artifactId>
			<scope>provided</scope>
		</dependency>
		<dependency>
			<groupId>org.springframework.boot</groupId>
			<artifactId>spring-boot-starter</artifactId>
		</dependency>
		<dependency>
			<groupId>org.springframework.boot</groupId>
			<artifactId>spring-boot-configuration-processor</artifactId>
		</dependency>
		<dependency>
			<groupId>de.roskenet</groupId>
			<artifactId>springboot-javafx-support</artifactId>
			<version>2.1.6</version>
		</dependency>
		<dependency>
			<groupId>io.github.mkpaz</groupId>
			<artifactId>atlantafx-base</artifactId>
			<version>2.0.1</version>
		</dependency>
		<dependency>
			<groupId>org.openjfx</groupId>
			<artifactId>javafx-controls</artifactId>
			<version>${openjfx.version}</version>
		</dependency>
		<dependency>
			<groupId>org.openjfx</groupId>
			<artifactId>javafx-fxml</artifactId>
			<version>${openjfx.version}</version>
		</dependency>
		<dependency>
			<groupId>org.openjfx</groupId>
			<artifactId>javafx-swing</artifactId>
			<version>${openjfx.version}</version>
		</dependency>
		<dependency>
			<groupId>org.openjfx</groupId>
			<artifactId>javafx-media</artifactId>
			<version>${openjfx.version}</version>
		</dependency>
		<dependency>
			<groupId>org.openjfx</groupId>
			<artifactId>javafx-web</artifactId>
			<version>${openjfx.version}</version>
		</dependency>
		<dependency>
			<groupId>io.github.mkpaz</groupId>
			<artifactId>atlantafx-base</artifactId>
			<version>${atlantafx.version}</version>
		</dependency>
		<dependency>
			<groupId>org.kordamp.ikonli</groupId>
			<artifactId>ikonli-javafx</artifactId>
			<version>${lib.ikonli.version}</version>
		</dependency>
		<dependency>
			<groupId>org.kordamp.ikonli</groupId>
			<artifactId>ikonli-feather-pack</artifactId>
			<version>${lib.ikonli.version}</version>
		</dependency>
		<dependency>
			<groupId>org.kordamp.ikonli</groupId>
			<artifactId>ikonli-material2-pack</artifactId>
			<version>${lib.ikonli.version}</version>
		</dependency>
		<dependency>
			<groupId>org.jetbrains</groupId>
			<artifactId>annotations</artifactId>
			<version>${lib.jetbrains-annotations.version}</version>
		</dependency>
		<dependency>
			<groupId>fr.brouillard.oss</groupId>
			<artifactId>cssfx</artifactId>
			<version>${lib.cssfx.version}</version>
		</dependency>
		<dependency>
			<groupId>net.datafaker</groupId>
			<artifactId>datafaker</artifactId>
			<version>${lib.datafaker.version}</version>
		</dependency>
		<dependency>
			<groupId>commons-beanutils</groupId>
			<artifactId>commons-beanutils</artifactId>
			<version>1.9.3</version>
		</dependency>
		<dependency>
			<groupId>commons-codec</groupId>
			<artifactId>commons-codec</artifactId>
		</dependency>
		<dependency>
			<groupId>org.apache.commons</groupId>
			<artifactId>commons-collections4</artifactId>
			<version>4.2</version>
		</dependency>
		<dependency>
			<groupId>commons-httpclient</groupId>
			<artifactId>commons-httpclient</artifactId>
			<version>3.1</version>
		</dependency>
		<dependency>
			<groupId>commons-io</groupId>
			<artifactId>commons-io</artifactId>
			<version>2.5</version>
		</dependency>
		<dependency>
			<groupId>org.apache.commons</groupId>
			<artifactId>commons-lang3</artifactId>
			<version>3.12.0</version>
		</dependency>
		<dependency>
			<groupId>com.alibaba</groupId>
			<artifactId>druid</artifactId>
			<version>1.1.4</version>
			<exclusions>
				<exclusion>
					<groupId>com.alibaba</groupId>
					<artifactId>jconsole</artifactId>
				</exclusion>
				<exclusion>
					<groupId>com.alibaba</groupId>
					<artifactId>tools</artifactId>
				</exclusion>
			</exclusions>
		</dependency>
		<dependency>
			<groupId>com.alibaba</groupId>
			<artifactId>fastjson</artifactId>
			<version>1.2.62</version>
		</dependency>
		<dependency>
			<groupId>com.h2database</groupId>
			<artifactId>h2</artifactId>
			<version>2.2.224</version>
		</dependency>
		<dependency>
			<groupId>org.reflections</groupId>
			<artifactId>reflections</artifactId>
			<version>0.10.2</version>
		</dependency>
		<dependency>
			<groupId>org.apache.httpcomponents</groupId>
			<artifactId>httpmime</artifactId>
		</dependency>
		<dependency>
			<groupId>org.apache.httpcomponents</groupId>
			<artifactId>httpclient-cache</artifactId>
		</dependency>
		<dependency>
			<groupId>com.github.pagehelper</groupId>
			<artifactId>pagehelper-spring-boot-starter</artifactId>
			<version>1.2.12</version>
		</dependency>
		<!-- 通用mapper -->
		<dependency>
			<groupId>tk.mybatis</groupId>
			<artifactId>mapper-spring-boot-starter</artifactId>
			<version>2.1.2</version>
			<exclusions>
				<exclusion>
					<groupId>org.mybatis</groupId>
					<artifactId>mybatis</artifactId>
				</exclusion>
			</exclusions>
		</dependency>
		<dependency>
			<groupId>net.java.dev.jna</groupId>
			<artifactId>jna</artifactId>
			<version>5.3.1</version>
		</dependency>
		<dependency>
			<groupId>net.java.dev.jna</groupId>
			<artifactId>jna-platform</artifactId>
			<version>5.3.1</version>
		</dependency>
	</dependencies>
	<build>
		<finalName>${project.artifactId}-${project.version}</finalName>

		<plugins>
			<!-- compile SCSS -->
			<plugin>
				<groupId>us.hebi.sass</groupId>
				<artifactId>sass-cli-maven-plugin</artifactId>
				<configuration>
					<args>
						<arg>
							${project.basedir}/src/main/resources/styles/scss/index.scss:${project.build.directory}/classes/styles/index.css
						</arg>
						<arg>--no-source-map</arg>
					</args>
				</configuration>
				<executions>
					<execution>
						<id>run-sass</id>
						<phase>generate-resources</phase>
						<goals>
							<goal>run</goal>
						</goals>
					</execution>
				</executions>
			</plugin>
			<!-- check code style before compilation -->
			<plugin>
				<groupId>org.apache.maven.plugins</groupId>
				<artifactId>maven-checkstyle-plugin</artifactId>
				<executions>
					<execution>
						<id>validate</id>
						<phase>verify</phase>
						<goals>
							<goal>check</goal>
						</goals>
					</execution>
				</executions>
			</plugin>
			<!-- Generate springboot compile and jar file -->
			<plugin>
				<groupId>org.apache.maven.plugins</groupId>
				<artifactId>maven-jar-plugin</artifactId>
				<configuration>
					<archive>
						<manifest>
							<mainClass>${app.launcher}</mainClass>
						</manifest>
					</archive>
				</configuration>
			</plugin>
			<plugin>
				<groupId>org.apache.maven.plugins</groupId>
				<artifactId>maven-shade-plugin</artifactId>
				<dependencies>
					<dependency>
						<groupId>org.springframework.boot</groupId>
						<artifactId>spring-boot-maven-plugin</artifactId>
						<version>2.7.5</version>
					</dependency>
				</dependencies>
				<configuration>
					<createDependencyReducedPom>false</createDependencyReducedPom>
				</configuration>
				<executions>
					<execution>
						<phase>package</phase>
						<goals>
							<goal>shade</goal>
						</goals>
					</execution>
				</executions>

			</plugin>

			<plugin>
				<artifactId>maven-resources-plugin</artifactId>
				<executions>
					<!-- 复制jre -->
					<execution>
						<id>copy-jre</id>
						<phase>validate</phase>
						<goals>
							<goal>copy-resources</goal>
						</goals>
						<configuration>
							<outputDirectory>
								${project.basedir}/target/pre-deploy/jre/app</outputDirectory>
							<resources>
								<resource>
									<directory>
										${project.basedir}/../jre</directory>
									<filtering>false</filtering>
								</resource>
							</resources>
						</configuration>
					</execution>

					<!-- 复制图标 -->
					<execution>
						<id>copy-resources</id>
						<phase>validate</phase>
						<goals>
							<goal>copy-resources</goal>
						</goals>
						<configuration>
							<outputDirectory>
								${project.basedir}/target/pre-deploy/</outputDirectory>
							<resources>
								<resource>
									<directory>
										${project.basedir}/src/main/installer</directory>
									<filtering>true</filtering>
									<includes>
										<include>${project.artifactId}.ico</include>
										<include>license.txt</include>
									</includes>
								</resource>
							</resources>
						</configuration>
					</execution>
				</executions>
			</plugin>
		</plugins>
	</build>
</project>
3. h2数据库的加密
h2数据支持数据文件加密,下面给出一个示例代码。真实案例中,数据库的用户名、密码可以通过特定的加密算法来生成。示例代码如下:
@Bean
	@Order(1)
	public DataSource createDataSource() throws Exception {
		DruidDataSource ds = new DruidDataSource();
		ds.setDriverClassName("org.h2.Driver");
		ds.setUrl("jdbc:h2:./bookmanager;CIPHER=AES;TRACE_LEVEL_FILE=0;TRACE_LEVEL_SYSTEM_OUT=0");
		ds.setUsername("F74032E");
		ds.setPassword(
				"2BAAFB04E44ACAB6CA010EAEC7654C4C3BEB382BFC6814BB1CB2C3E0B3A130FBF8D00642E8CF2DAF1CB2C3E0B3A130FBF8D00642E8CF2DAF1CB2C3E0B3A130FBF8D00642E8CF2DAF1CB2C3E0B3A130FBF8D00642E8CF2DAF1CB2C3E0B3A130FBF8D00642E8CF2DAF1CB2C3E0B3A130FBF8D00642E8CF2DAF1CB2C3E0B3A130FBF8D00642E8CF2DAF1CB2C3E0B3A130FBF8D00642E8CF2DAF1CB2C3E0B3A130FBF8D00642E8CF2DAF1CB2C3E0B3A130FBF8D00642E8CF2DAF 6DC0D393029EFF18A9C1BAF74032E56FA9C1BAF74032E56FA9C1BAF74032E56FA9C1BAF74032E56FA9C1BAF74032E56FA9C1BAF74032E56FA9C1BAF74032E56FA9C1BAF74032E56FA9C1BAF74032E56FA9C1BAF74032E56F");
		ds.setInitialSize(4);
		ds.setMinIdle(4);
		ds.setMaxActive(20);
		ds.setMaxWait(60000);
		ds.setTimeBetweenEvictionRunsMillis(60000);
		ds.setMinEvictableIdleTimeMillis(300000);
		ds.setTestWhileIdle(true);
		ds.setTestOnBorrow(true);
		ds.setTestOnReturn(true);
		ds.setPoolPreparedStatements(true);
		ds.setMaxPoolPreparedStatementPerConnectionSize(30);
		ds.setRemoveAbandoned(true);
		ds.setRemoveAbandonedTimeout(18000);
		ds.setLogAbandoned(false);
		return ds;
	}
上面的代码只是个例子,这里我去掉了动态生成账号和密码的过程,仅将账号密码写死了在代码中。这段代码在AppConfiguration.class这个类中,可参加这个类的实现。
4. 机器码的生成
机器码是在安装程序时自动生成的,参见install-win64.iss中,具体代码如下:
function GenMachineID(SerialNum: LongInt): String;
var
 SN: LongInt;
 MID, tmp1, tmp2: string;
begin
  if SerialNum > 567890123 then
    SN:= SerialNum-567890123
  else
    SN:= 567890123-SerialNum;
  tmp1:= IntToStr(SN);
  while length(tmp1)>3 do
    begin
    tmp2:= copy(tmp1,1,3);
    delete(tmp1,1,3);
    MID:= MID+Chr(65+StrToInt(tmp2)*26/999)+tmp2;
    end;
  MID:= MID+Chr(65+StrToInt(tmp1)*26/999)+tmp1;
  tmp1:= MID;
  MID:= '';
  while length(tmp1)>3 do
    begin
    tmp2:= copy(tmp1,1,3);
    delete(tmp1,1,3);
    MID:= MID+tmp2+'-';
    end;
  MID:= MID+tmp1;
  If SerialNum > 567890123 then
    MID:='317-'+MID
  else
    MID:='V10-'+MID;
result:= MID;
end;
生成的机器经过加密存储到注册表中,可在install-win64.iss中查看具体实现。
5. 编译及运行
执行mvn clean package 即可。
四、jar包的加密
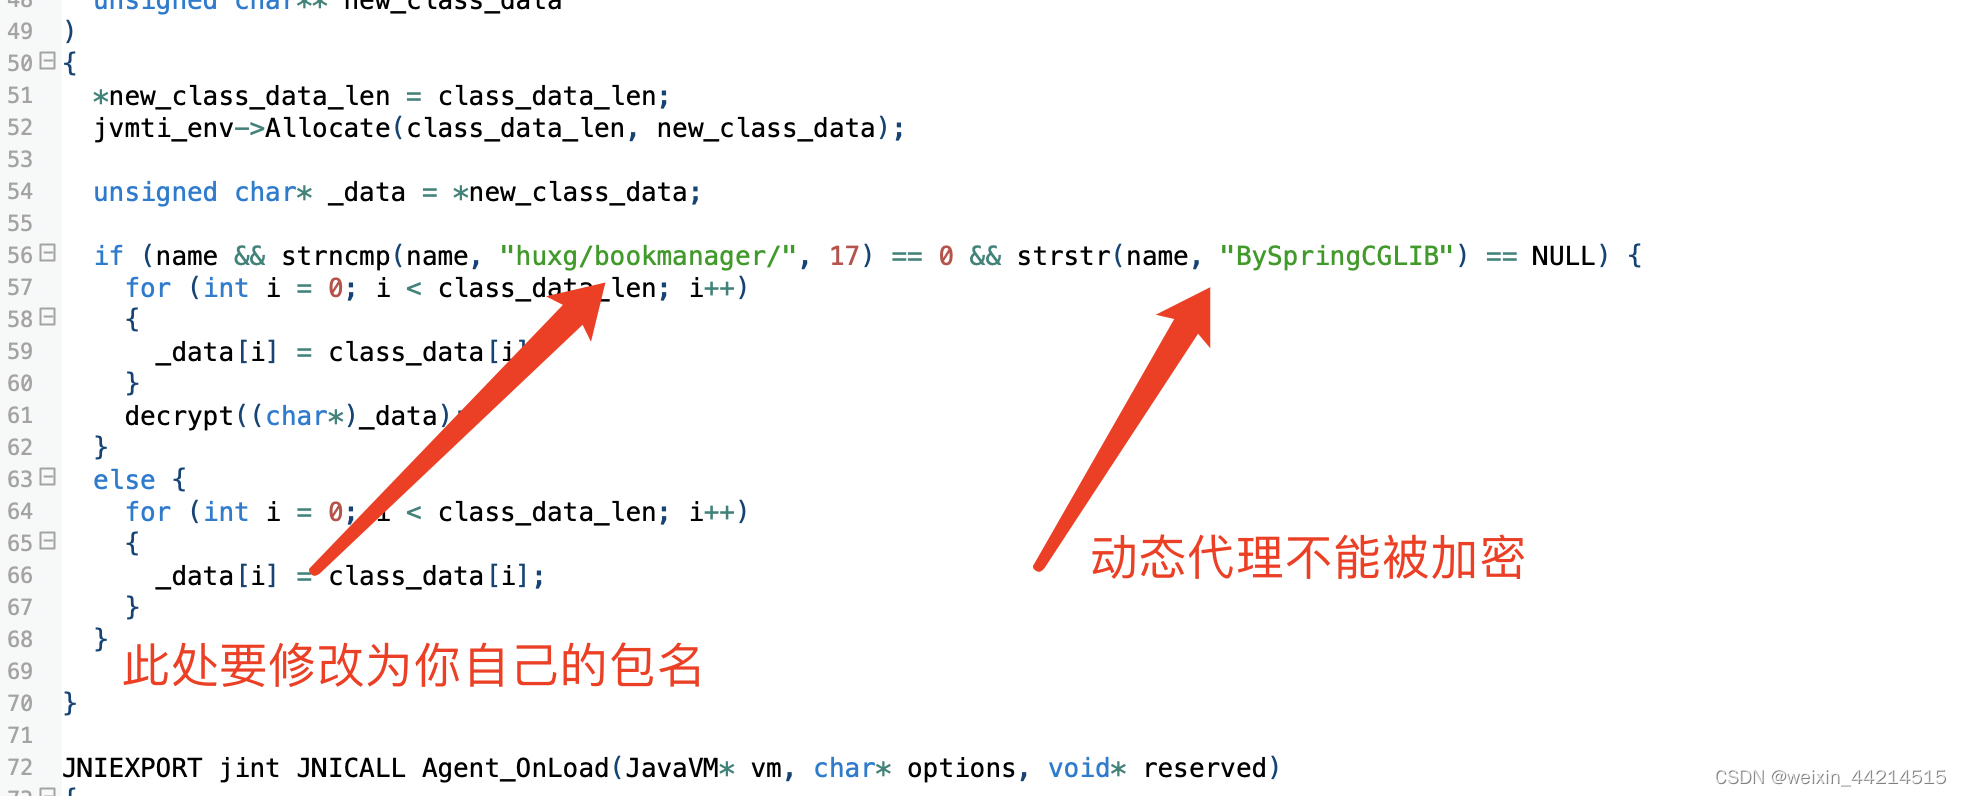
这里通过JVMTI的agentlib来对jar包进行加密和解密。具体相关概念可以百度一下,这里不再赘述了。将源代码下载下来,然后进入Visual Studio中,根据情况修改加解密算法。要注意一点,解密过程是需要判定包名的。特别注意一点:因为本项目是基于SpringBoot的,基于CGLIB动态代理的类这里不能加密,否则运行时会出错,所以要将其过滤掉,如下图所示:
![]()
我在示例项目中已经放了一个dll,仅供参考。
示例项目中,在build.py中对编译出来的jar包进行加密,并生成了一个“bookmanager-1.0.0_encrypted.jar”的加密后的jar包。后续生成exe时将使用这个jar。
五、生成EXE
首先需要制作一个launch4j的xml配置文件,如下所示:
<?xml version="1.0" encoding="UTF-8"?>
<launch4jConfig>
  <dontWrapJar>false</dontWrapJar>
  <headerType>gui</headerType>
  <jar>../../../target/bookmanager-1.0.0_encrypted.jar</jar>
  <outfile>../../../target/pre-deploy/jre/app/bookmanager.exe</outfile>
  <errTitle>图书管理系统</errTitle>
  <cmdLine></cmdLine>
  <chdir>.</chdir>
  <priority>normal</priority>
  <downloadUrl></downloadUrl>
  <supportUrl></supportUrl>
  <stayAlive>false</stayAlive>
  <restartOnCrash>false</restartOnCrash>
  <manifest></manifest>
  <icon>../../../src/main/resources/icons/app-icon.ico</icon>
  <singleInstance>
    <mutexName>图书管理系统</mutexName>
    <windowTitle>图书管理系统</windowTitle>
  </singleInstance>
  <classPath>
    <mainClass>huxg.bookmanager.BookManagerApplication</mainClass>
  </classPath>
  <jre>
    <path>./</path>
    <requiresJdk>false</requiresJdk>
    <requires64Bit>true</requires64Bit>
    <minVersion>17</minVersion>
    <maxVersion>19</maxVersion>
    <opt>-Xrunjarencrypt -Xms1024M -Xmx6144M -XX:+UseG1GC -XX:MetaspaceSize=512m -XX:MaxMetaspaceSize=512m </opt>
  </jre>
</launch4jConfig>
这里着重说明几点:
1. jvm的参数配置写在<opt></option>中,但是这里并不能添加-agentlib参数,必须使用-X参数,所以使用-Xrunhuxgd参数指定我们的解密dll
2. jre的路径,这里使用的是“./” 可以看出,exe将会放入到jre的目录下。当然你可以将exe放在与jre平级目录中,但我自己更偏向将exe放入到jre目录中,这样后面安装完毕后,整个jre目录都会被展开,看起来更好一些。
3. 生成的exe并不携带jre,仅仅是对jar包加了一层壳。从这一点来说,如果我们要破解和反编译,那么也是可以从其中取出来的。这也是为什么我们需要采用jvmti来对jar包进行加密的原因,要彻底防止关键代码被反编译。
生成exe的命令如下:
launch4jc.exe ./bookmanager/src/main/installer/launch4j-config-win64.xml六、生成安装程序
安装程序的生成是通过Inno Setup来生成的。所以这里我们需要制作一个安装程序配置脚本文件,我这里将其命名为:installer-win64.iss,具体代码如下所示:
; Script generated by the Inno Setup Script Wizard.
; SEE THE DOCUMENTATION FOR DETAILS ON CREATING INNO SETUP SCRIPT FILES!

#define MyAppName "ͼ�����ϵͳ"
#define MyAppVersion "V1.0.0"
#define MyAppPublisher "ͼ�����ϵͳ"
#define MyAppExeName "bookmanager.exe"

[Setup]
UserInfoPage=yes
; NOTE: The value of AppId uniquely identifies this application. Do not use the same AppId value in installers for other applications.
; (To generate a new GUID, click Tools | Generate GUID inside the IDE.)
AppId={{DDA4F3A1-1886-4742-8E7F-BF4AD486F0BD}
AppName={#MyAppName}
AppVersion={#MyAppVersion}
AppPublisher={#MyAppPublisher}
DefaultDirName={autopf}\bookmanager
DisableProgramGroupPage=yes
LicenseFile=.\license.rtf
PrivilegesRequiredOverridesAllowed=commandline
OutputDir=..\..\..\..\output\release\win64
OutputBaseFilename=ͼ�����ϵͳ_installer
SetupIconFile=..\resources\icons\app-icon.ico
Compression=lzma
SolidCompression=yes
WizardStyle=modern

[Languages]
Name: "chinesesimplified"; MessagesFile: "compiler:Languages\ChineseSimplified.isl"

[Tasks]
Name: "desktopicon"; Description: "{cm:CreateDesktopIcon}"; GroupDescription: "{cm:AdditionalIcons}"; Flags: unchecked

[Files]
Source: "..\..\..\target\pre-deploy\jre\app\*"; DestDir: "{app}"; Flags: ignoreversion recursesubdirs createallsubdirs

[Icons]
Name: "{autoprograms}\{#MyAppName}"; Filename: "{app}\{#MyAppExeName}"
Name: "{autodesktop}\{#MyAppName}"; Filename: "{app}\{#MyAppExeName}"; Tasks: desktopicon

[Run]
Filename: "{app}\{#MyAppExeName}"; Description: "{cm:LaunchProgram,{#StringChange(MyAppName, '&', '&&')}}"; Flags: nowait postinstall skipifsilent

[UninstallDelete]
Type: filesandordirs; Name: "{app}";

[Code]

function CheckSerial(Serial: String): Boolean;
begin
  if Serial <> '' then
  Result:=True;
end;

function getStringValue(str: String): longint;
var
  sum : longint;
  i: longint;
begin
  sum :=0;
  for i:=1 to length(str) do
    sum := sum + ord(str[i]);

  Result := sum;
end;

function GenMachineID(SerialNum: LongInt): String;
var
 SN: LongInt;
 MID, tmp1, tmp2: string;
begin
// ���ɻ�����
  if SerialNum > 567890123 then
    SN:= SerialNum-567890123
  else
    SN:= 567890123-SerialNum;
  tmp1:= IntToStr(SN);
  while length(tmp1)>3 do
    begin
    tmp2:= copy(tmp1,1,3);
    delete(tmp1,1,3);
    MID:= MID+Chr(65+StrToInt(tmp2)*26/999)+tmp2;
    end;
  MID:= MID+Chr(65+StrToInt(tmp1)*26/999)+tmp1;
  tmp1:= MID;
  MID:= '';
  while length(tmp1)>3 do
    begin
    tmp2:= copy(tmp1,1,3);
    delete(tmp1,1,3);
    MID:= MID+tmp2+'-';
    end;
  MID:= MID+tmp1;
  If SerialNum > 567890123 then
    MID:='317-'+MID
  else
    MID:='V10-'+MID;
result:= MID;
end;

function NextButtonClick(CurPageID: Integer): Boolean;
var
  WinHttpReq: Variant;
  Url: string;
  machineCode: longint;
  UID: string;
  regRet: string;
begin
  Result := True;
  if CurPageID = wpUserInfo then
  begin
    // ��װ�����д���ע�����ļ�
    machineCode := getStringValue(WizardForm.UserInfoSerialEdit.Text);
    UID := GenMachineID(machineCode);

    if WizardForm.UserInfoSerialEdit.Text <> '123456' then
		begin
			MsgBox('�������ע��������������������룡', mbError, MB_OK);
			Result := False;
		end
	else
	    begin
	        // д��ע���
	        RegWriteStringValue(HKEY_CURRENT_USER, 'Software\bookmanager', 'uid',   UID);
	    end;

	// ͨ���ӿ���֤��Ȩ���Ƿ���ȷ
    // WinHttpReq := CreateOleObject('WinHttp.WinHttpRequest.5.1');
    // Url := 'http://xxxxxx.com/...?serialNo=' + WizardForm.UserInfoSerialEdit.Text + '&muid=' + UID;
    // WinHttpReq.Open('GET', Url, False);
    // WinHttpReq.Send('');
    // if WinHttpReq.Status = 200 then
    //   begin
    //     if WinHttpReq.ResponseText = 'false' then
    //       begin
    //         MsgBox('�������ע��������������������룡', mbError, MB_OK);
    //         Result := False;
    //       end
    //     else
    //       begin
    //         // д��ע���
    //         RegWriteStringValue(HKEY_CURRENT_USER, 'Software\bookmanager', 'uid',   UID);
    //       end;
    //    end
    // else
    //   begin
    //     Result := False;
    //   end;
  end;
end;
这里着重说明几点:
1. 语言,简体中文的语言文件我在上面已经放了链接,可参见本文开头处。
2. 安装序列号:在安装过程中,会提示输入序列号,用户输入序列号后,会用该序列号去服务器端匹配。示例程序中正确的序列号为“123”输入这个即可。后面的一大堆Pascal程序都是在验证序列号是否正确的。这里WinHttpRequest对象请求服务器。
3. 生成机器码:pascal程序中生成了机器码,同时将其传递给了后端。
4. 生成注册表项:在验证序列号通过之后,将唯一的机器码保存到了注册表中,在Java程序中会检查此注册表项是否存在,同时使用该码进行各种加解密。
上面的示例中,我将提交至服务器这段代码注释掉了,只是通过字符串来进行判定。采用api接口进行验证时可以将注释打开,填入自己的api地址即可。
生成安装程序的命令如下:
iscc ./bookmanager/src/main/installer/installer-win64.iss七、Jlink生成JRE
jdk9以上已经没有了jre,所以这里我们要生成一份jre运行环境。其实这一步是在(六)之前要做的。生成jre的命令如下:
jlink --module-path D:\Program\Java\javafx-sdk-17.0.9\lib;D:\Program\Java\jdk-17\jmods --add-modules java.base,jdk.unsupported,java.compiler,java.datatransfer,java.desktop,java.instrument,java.logging,java.management,java.management.rmi,java.net.http,java.prefs,java.scripting,java.se,java.security.jgss,java.security.sasl,java.sql,java.sql.rowset,java.transaction.xa,java.xml,java.xml.crypto,javafx.controls,javafx.fxml,javafx.swing,javafx.web --compress=2 --strip-debug --output jre因为是javafx程序,需要javafx的相应模块,所以生成的jre环境同样要包含javafx的相关模块。这里一定要特别特别的注意,以上生成的jre环境是无法运行我们的jar包的,还需要将jfx-sdk下的bin目录复制到生成的jre中,这一点在其他的技术文章中都没有提及。
生成完jre后,通过(六)中的安装程序即可将exe与jre一同打包了。
八、JarEncrytpor.dll的编译
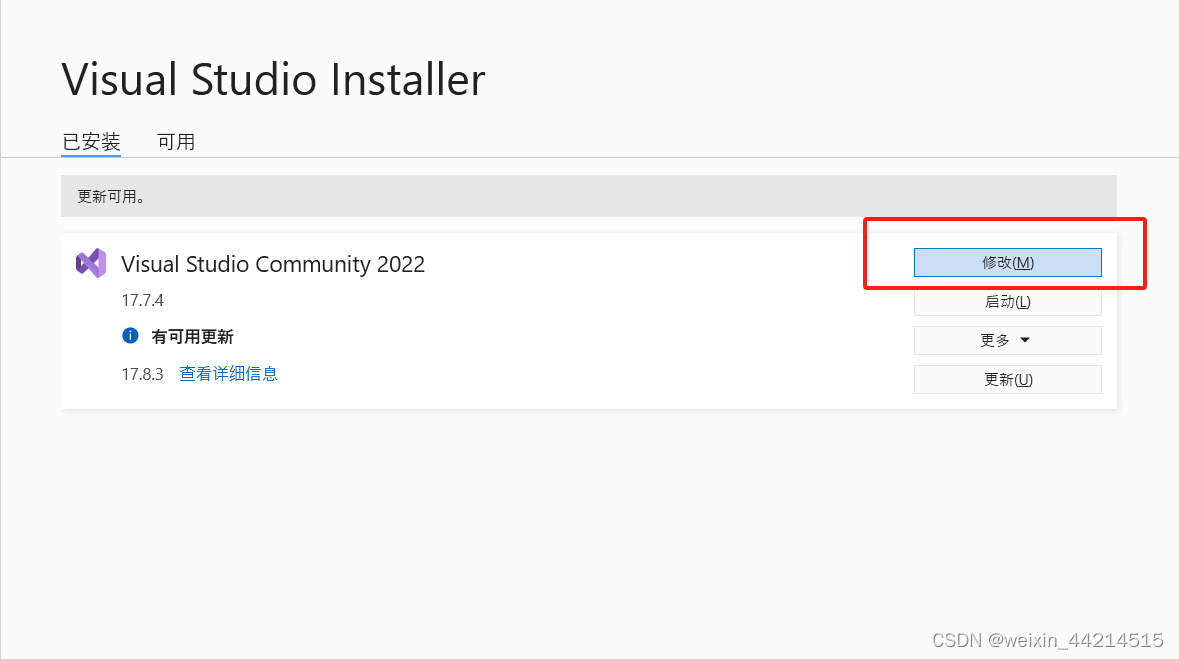
安装Visual Studio ,我贴上我自己的Visual Studio版本,如下托所示:

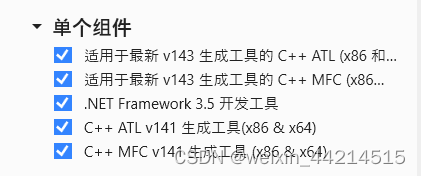
打开Visual Studio Installer,安装C++桌面开发选项,如下图所示:

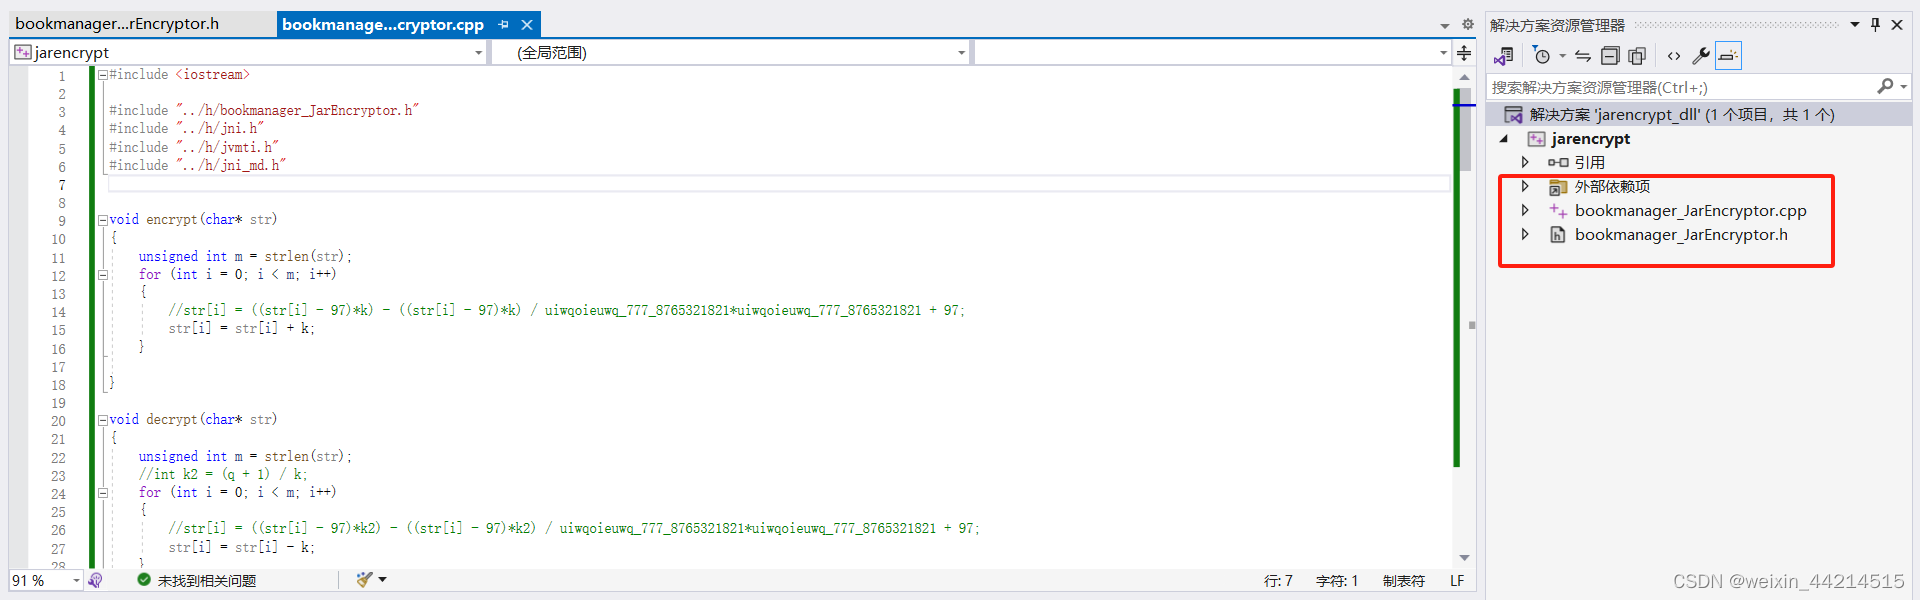
安装完毕后,双击jni_jarencrypt\jarencrypt_dll.sln,打开Visual Studio,如下图所示:
注意:将顶部编译版本修改为release,如下图所示:

加、解密都在bookmanager_JarEncryptor.cpp中,其中encrypt为加密函数,decrypt为解密函数。我只是给了一个示例的加密过程,你们可以定义自己的加密过程。
特别要注意一点,如下图所示:
一切处理完毕后,右键点击项目-》生成,即可生成jarEncrypt.dll了。生成的dll在output目录下。
九、运行项目
将生成dll直接放入到jre\bin目录下,然后执行命令:
jre\bin\java -Xrunjarencrypt target\bookmanager-1.0.0_encrypt.jar十、一键编译
本项目中提供了build.py脚本,该脚本需要python3环境,python3的下载地址我在上面已经提供了。同时还要安装其他几个软件,我在上面也提供了相应的链接。全部安装完毕,并设置好环境变量后,直接执行:
python build.py输入命令并回车后,如下图所示:
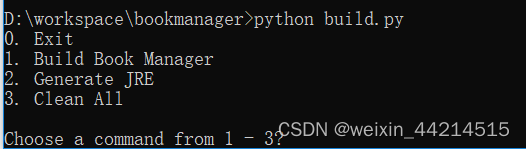
1. Build Book Manager -- 编译图书管理系统,并生成安装程序
2. Generate JRE -- 生成jre环境
3. Clean All -- 清除所有临时目录
特别说明:在运行(1)之前,需要先执行(2)来生成jre环境。这是一个前置过程。一旦生成jre环境,下次直接执行(1)即可。
完整的图书管理系统全部代码可以在这里下载。

DAMO开发者矩阵,由阿里巴巴达摩院和中国互联网协会联合发起,致力于探讨最前沿的技术趋势与应用成果,搭建高质量的交流与分享平台,推动技术创新与产业应用链接,围绕“人工智能与新型计算”构建开放共享的开发者生态。
更多推荐


 21
21 0
0- 0


 已为社区贡献2条内容

所有评论(0)