【金仓数据库征文】CentOS7 上玩转 KingbaseES V9:全链路部署实操指南
本文详细介绍了在Linux系统上安装金仓 KingbaseES(MySQL兼容版)V9数据库的全过程,包括安装前准备、数据库安装、数据库使用与管理以及与其他数据库系统的对比。通过实操命令流程,读者可以清晰地了解金仓 KingbaseES 的安装和使用方法。
作者:ShunWah
在运维管理领域,我拥有多年深厚的专业积累,兼具坚实的理论基础与广泛的实践经验。精通运维自动化流程,对于OceanBase、MySQL等多种数据库的部署与运维,具备从初始部署到后期维护的全链条管理能力。拥有OceanBase的OBCA和OBCP认证、OpenGauss社区认证结业证书,以及崖山DBCA、亚信AntDBCA、翰高HDCA、GBase 8a | 8c | 8s、Galaxybase的GBCA、Neo4j的Graph Data Science Certification、NebulaGraph的NGCI & NGCP、东方通TongTech TCPE等多项权威认证。
在OceanBase & 墨天轮的技术征文大赛中,多次荣获一、二、三等奖。同时,在OpenGauss第五届、第六届、第七届技术征文大赛,TiDB社区专栏征文大赛,金仓数据库有奖征文活动,以及YashanDB「产品体验官」征文等活动中,我也屡获殊荣。此外,我还活跃于墨天轮、CSDN、ITPUB等技术平台,经常发布原创技术文章,并多次被首页推荐。
引言
大家好!作为刚踏入金仓 KingbaseES 技术社区的新人,内心既激动又充满期待。看到这里汇聚了如此多数据库领域的资深专家与热情爱好者,我深感幸运,也渴望能与大家共同学习、共同进步。
初来乍到,我带着对金仓 KingbaseES(MySQL兼容版)V9数据库的浓厚兴趣而来。与MySQL相比,KingbaseES在事务处理、数据分析、高并发场景等方面具有显著优势。同时,KingbaseES支持多种国产CPU和Linux发行版,具有更好的国产化和自主可控性。此外,KingbaseES还提供了丰富的管理工具和优化手段,方便用户进行数据库管理和优化。KingbaseES 与 MySQL 兼容版特别适合希望无缝迁移到更强大平台的现有 MySQL 用户。之前在项目中接触过MySQL等主流数据库,但深知国产数据库在自主可控与特定场景下的独特优势。这次深入学习KingbaseES的安装与实操,不仅是对个人技术栈的一次拓展,更是对国产数据库生态的一次探索。本文将详细介绍如何在基于 Linux 的系统上安装和配置 KingbaseES V9,并提供一系列实用的数据库操作命令示例。
安装过程的细致打磨
在安装金仓 KingbaseES 时,我深刻体会到文档中每一步的严谨性。从系统环境配置到内核参数调优,再到资源限制的精细设置,每一步都关乎后续数据库的稳定运行。比如,在调整fs.aio-max-nr和kernel.shmmax等参数时,我通过查阅资料和多次测试,找到了最适合当前系统的配置值,为数据库的高效运行打下了坚实基础。我将安装步骤附上了每一步的结果与常见问题排查指南,极大降低学习门槛。实操命令的深度探索跟随教程完成数据库创建、表结构设计、数据增删改查等基础操作后,而且还进一步尝试了索引优化与查询性能分析。在浏览社区中关于金仓 KingbaseES与MySQL的对比讨论时,我感受到技术选型背后的复杂考量。性能基准测试、功能兼容性、运维工具链成熟度等维度,都需要结合具体业务场景综合评估。这种开放的技术讨论氛围,正是社区最宝贵的财富。
一、环境准备与系统配置
1、 硬件与操作系统要求
- CPU:支持x86_64、龙芯、飞腾等架构(最低双核2.0GHz)
- 内存:≥512MB(生产环境建议≥8GB)
- 存储:系统盘≥11GB,数据盘推荐RAID5配置
- 操作系统:CentOS 7.6+、银河麒麟V10等主流Linux发行版
1.1 系统信息检查
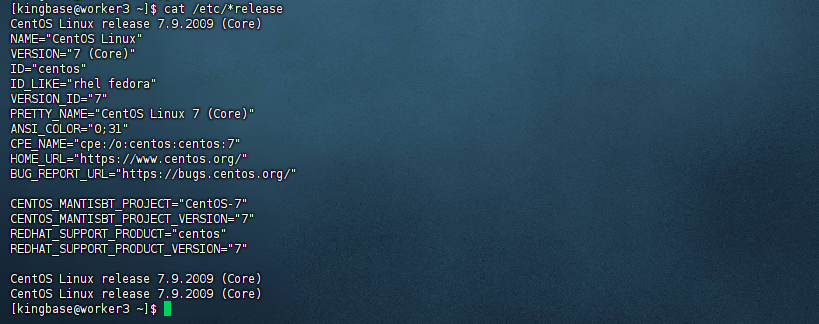
1.1.1 检查操作系统信息
您可以通过以下命令查看操作系统信息:
[kingbase@worker3 ~]$ cat /etc/*release
CentOS Linux release 7.9.2009 (Core)
NAME="CentOS Linux"
VERSION="7 (Core)"
ID="centos"
ID_LIKE="rhel fedora"
VERSION_ID="7"
PRETTY_NAME="CentOS Linux 7 (Core)"
ANSI_COLOR="0;31"
CPE_NAME="cpe:/o:centos:centos:7"
HOME_URL="https://www.centos.org/"
BUG_REPORT_URL="https://bugs.centos.org/"

CENTOS_MANTISBT_PROJECT="CentOS-7"
CENTOS_MANTISBT_PROJECT_VERSION="7"
REDHAT_SUPPORT_PRODUCT="centos"
REDHAT_SUPPORT_PRODUCT_VERSION="7"

CentOS Linux release 7.9.2009 (Core)
CentOS Linux release 7.9.2009 (Core)
[kingbase@worker3 ~]$
注意:
为避免安装失败,或安装结束后文件发生异常,请在安装前关闭操作系统的应用保护,或于安装时在操作系统界面手动点击允许程序执行。
1.1.2 检查系统内存与存储空间
您可以通过以下命令查看内存信息(以MB单位显示):
[kingbase@worker3 ~]$ free -hm
              total        used        free      shared  buff/cache   available
Mem:            27G        1.9G        5.4G        728M         20G         23G
Swap:          8.0G          0B        8.0G
[kingbase@worker3 ~]$

1.1.3 检查存储空间
您可以通过以下命令查看磁盘存储信息(以GB单位显示):
[kingbase@worker3 ~]$ df -lh
Filesystem               Size  Used Avail Use% Mounted on
devtmpfs                  14G     0   14G   0% /dev
tmpfs                     14G  8.0K   14G   1% /dev/shm
tmpfs                     14G  677M   14G   5% /run
tmpfs                     14G     0   14G   0% /sys/fs/cgroup
/dev/mapper/centos-root   91G   60G   27G  70% /
/dev/sda2                190M  119M   58M  68% /boot
/dev/sdb1                200G   17G  184G   9% /data
tmpfs                    2.8G   28K  2.8G   1% /run/user/0
/dev/loop0               2.5G  2.5G     0 100% /mnt
[kingbase@worker3 ~]$
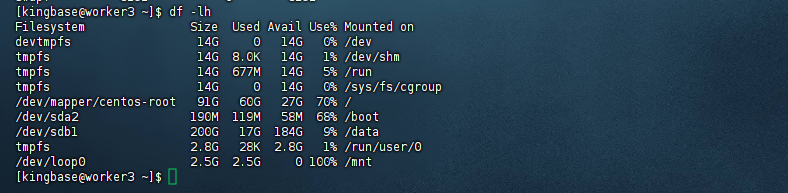
注意: /tmp目录需要至少10G空间。如果安装过程中出现存储空间不足的情况,请先释放足够的磁盘空间,再执行安装程序。如果硬件配置不满足要求,需要更换满足要求的硬件设备再进行安装。
1.2 系统参数优化
1.2.1 配置内核参数:
[root@worker3 ~]# vi /etc/sysctl.conf
添加或修改如下参数
fs.aio-max-nr = 1048576
fs.file-max = 6815744
kernel.shmall = 2097152
kernel.shmmax = 4294967295
kernel.shmmni = 4096
kernel.sem = 250 32000 100 128
net.ipv4.ip_local_port_range = 9000 65500
net.core.rmem_default = 262144
net.core.rmem_max = 4194304
net.core.wmem_default = 262144
net.core.wmem_max = 1048576

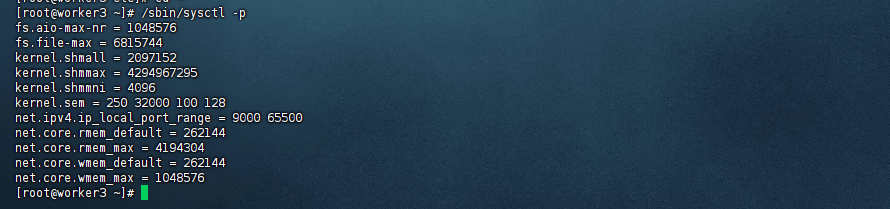
执行以下命令使配置生效
[root@worker3 ~]# /sbin/sysctl -p
fs.aio-max-nr = 1048576
fs.file-max = 6815744
kernel.shmall = 2097152
kernel.shmmax = 4294967295
kernel.shmmni = 4096
kernel.sem = 250 32000 100 128
net.ipv4.ip_local_port_range = 9000 65500
net.core.rmem_default = 262144
net.core.rmem_max = 4194304
net.core.wmem_default = 262144
net.core.wmem_max = 1048576
[root@worker3 ~]#
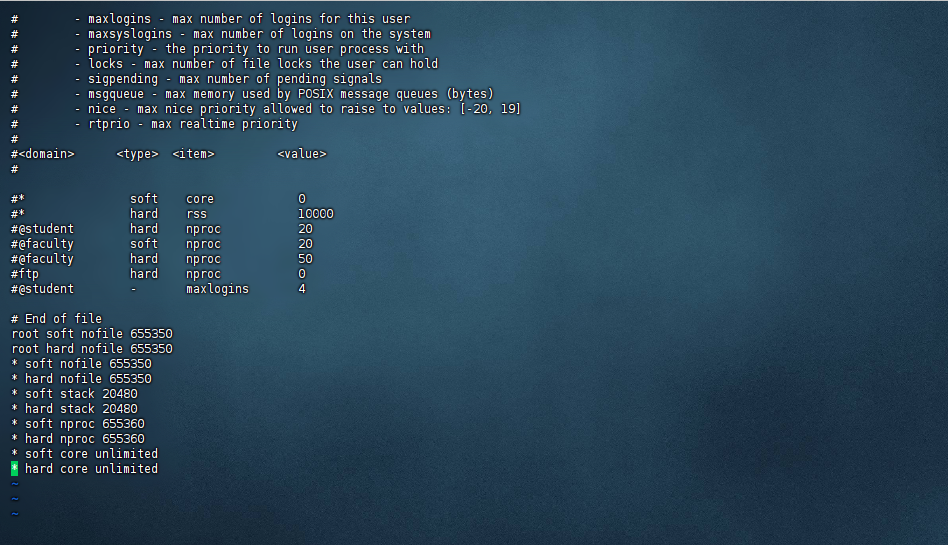
1.2.2 资源限制配置:
[root@worker3 ~]# vi /etc/security/limits.conf
[root@worker3 ~]#
添加如下行
- soft nofile 65536
- hard nofile 65535
- soft nproc 65536
- hard nproc 65535
- soft core unlimited
- hard core unlimited
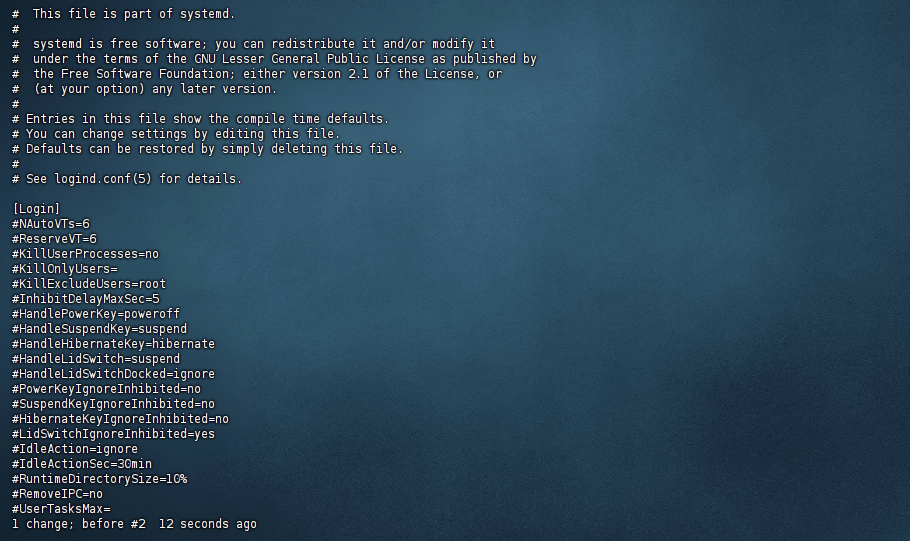
1.2.3 设置RemoveIPC参数:
[root@worker3 ~]# vi /etc/systemd/logind.conf
找到RemoveIPC参数,修改为no(如果默认是yes)
RemoveIPC=no
重启systemd-logind服务
[root@worker3 ~]# systemctl daemon-reload
[root@worker3 ~]# systemctl restart systemd-logind.service
[root@worker3 ~]#

关键点:shmmax需大于物理内存的50%,避免因共享内存不足导致数据库启动失败。
二、安装流程全实操
2.1 用户与目录创建
2.1.1 创建专用用户kingbase:
[root@worker3 ~]# useradd -m kingbase
[root@worker3 ~]# passwd kingbase
Changing password for user kingbase.
New password:
Retype new password:
passwd: all authentication tokens updated successfully.
[root@worker3 ~]#

2.1.2 创建安装目录:
[root@worker3 ~]# mkdir -p /opt/KingbaseES/V9 /data/kingbase_data
[root@worker3 ~]# chown -R kingbase:kingbase /opt/KingbaseES/V9 /data/kingbase_data
[root@worker3 ~]#

2.2 安装介质准备
2.2.1 下载并挂载安装包
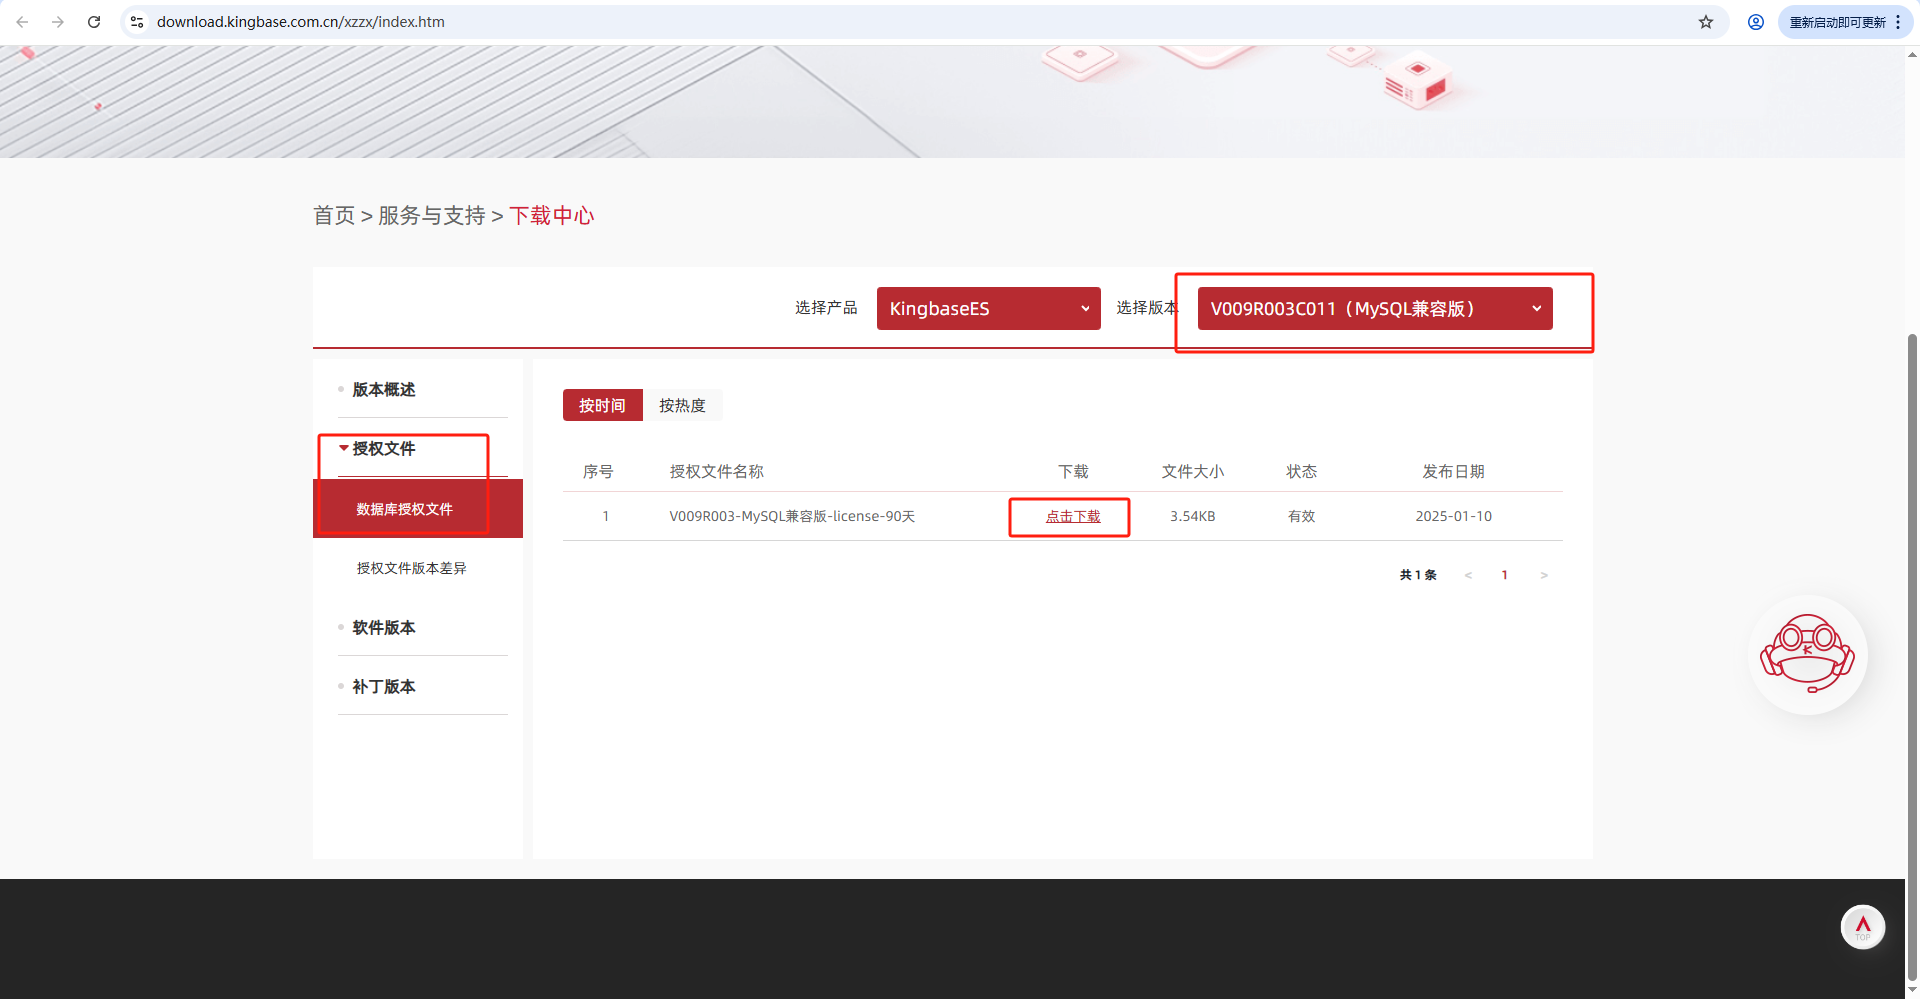
从金仓数据库官网下载KingbaseES V9安装包及授权文件《KingbaseES V009R003C011 MySQL兼容版》。
https://download.kingbase.com.cn/xzzx/index.htm
面向细分市场,高度兼容MySQL,最新发布版本为 V009R003C011
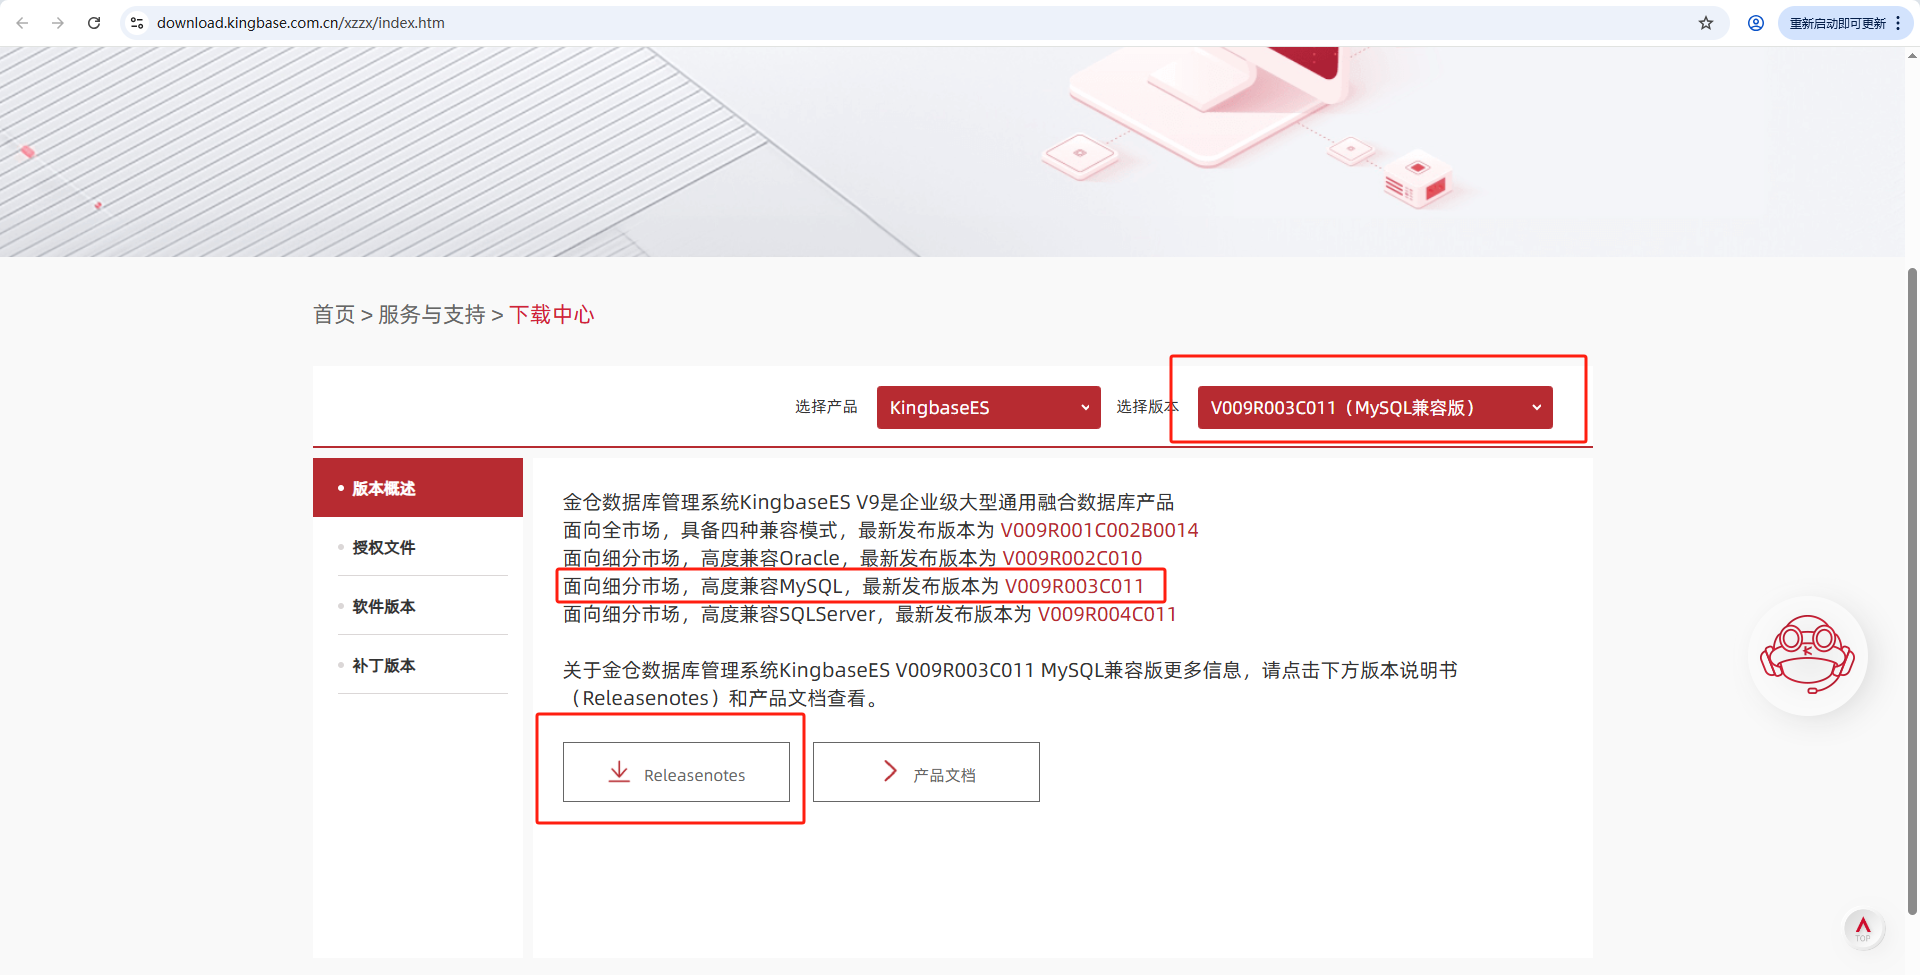
数据库选择对应的CPU架构
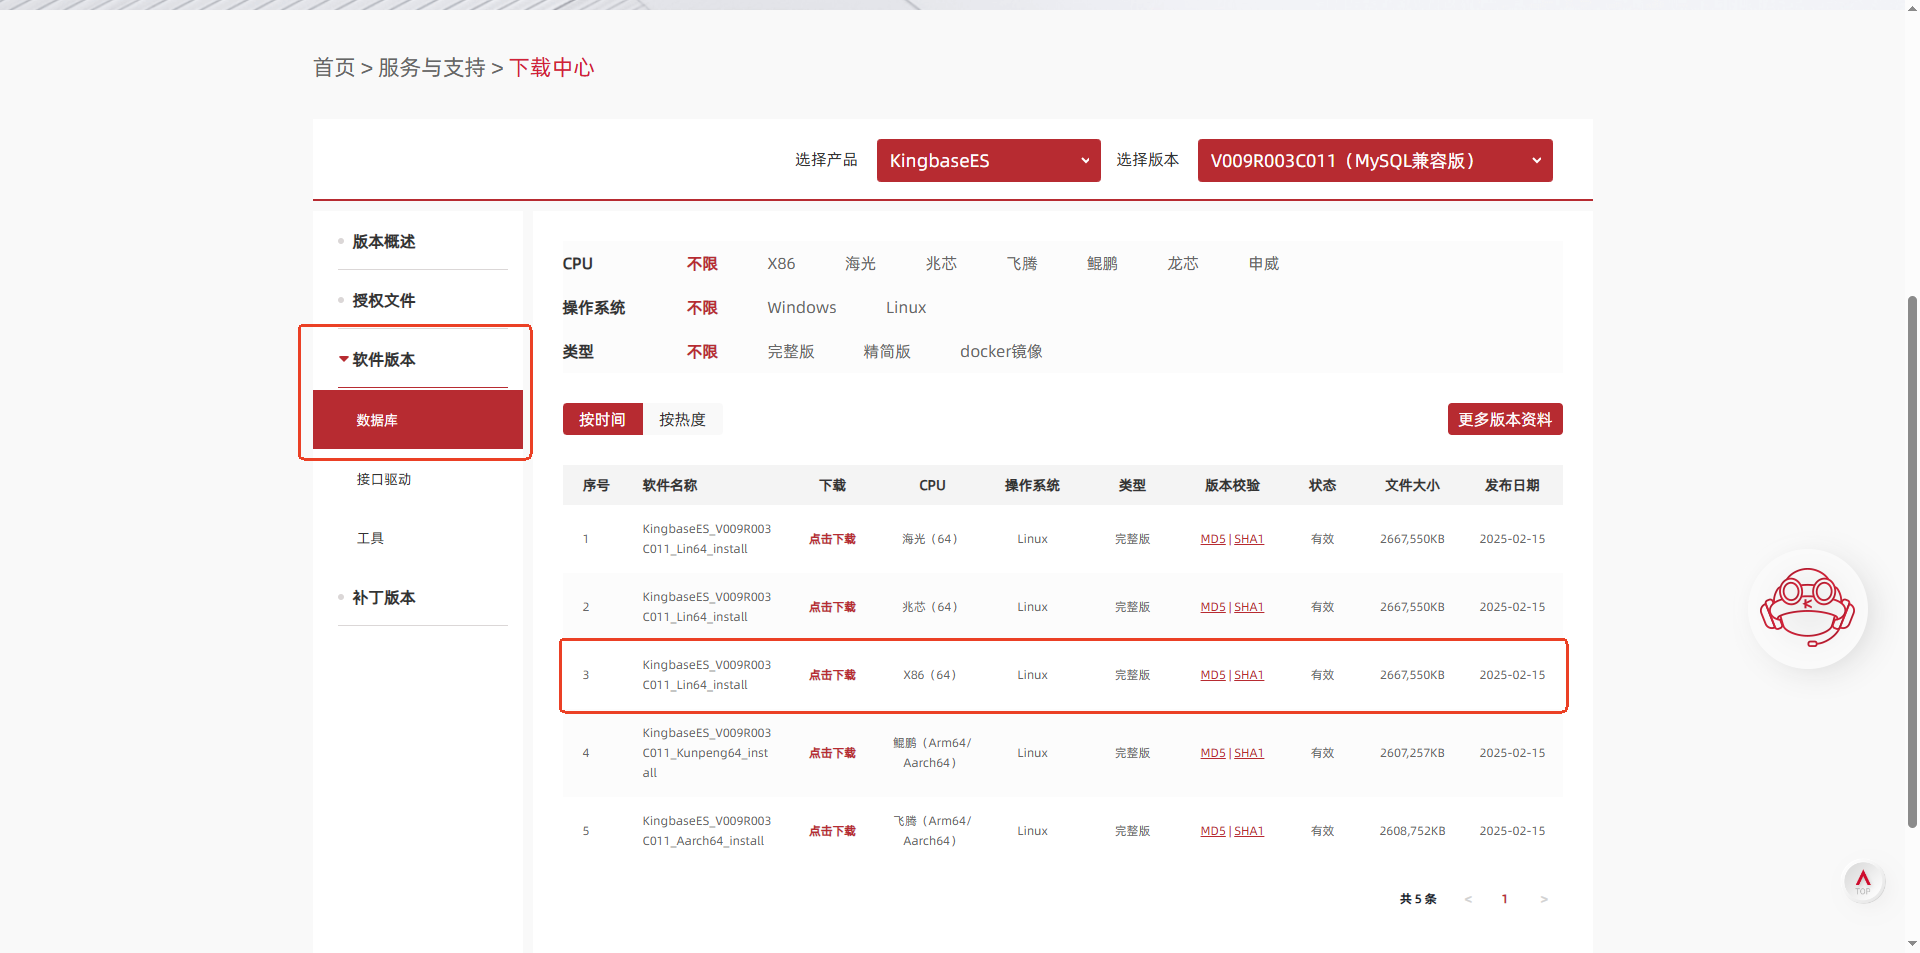
2.2.2 数据库授权文件下载
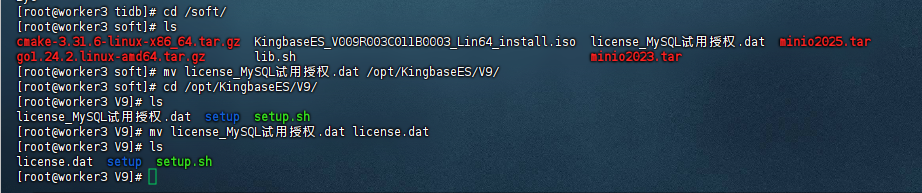
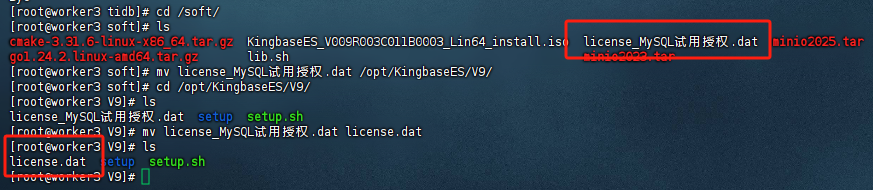
2.2.3 重命名授权
[root@worker3 soft]# ls
cmake-3.31.6-linux-x86_64.tar.gz  KingbaseES_V009R003C011B0003_Lin64_install.iso  license_MySQL试用授权.dat  minio2025.tar
go1.24.2.linux-amd64.tar.gz       lib.sh                                          minio2023.tar
[root@worker3 soft]# mv license_MySQL试用授权.dat /opt/KingbaseES/V9/
[root@worker3 soft]# cd /opt/KingbaseES/V9/
[root@worker3 V9]# ls
license_MySQL试用授权.dat  setup  setup.sh
[root@worker3 V9]# mv license_MySQL试用授权.dat license.dat
[root@worker3 V9]# ls
license.dat  setup  setup.sh
[root@worker3 V9]#
2.2.4 挂载ISO镜像
[root@worker3 soft]# mount -o loop KingbaseES_V009R003C011B0003_Lin64_install.iso /mnt/
mount: /dev/loop0 is write-protected, mounting read-only
[root@worker3 soft]#

2.2.5 复制安装文件
[root@worker3 mnt]# ls
setup  setup.sh
[root@worker3 mnt]# cp -r * /opt/KingbaseES/V9/
[root@worker3 mnt]# cd /opt/KingbaseES/V9/
[root@worker3 V9]# ls
setup  setup.sh
[root@worker3 V9]#

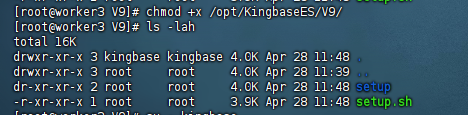
2.2.6 授权安装目录
[root@worker3 V9]# chmod +x /opt/KingbaseES/V9/
[root@worker3 V9]# ls -lah
total 16K
drwxr-xr-x 3 kingbase kingbase 4.0K Apr 28 11:48 .
drwxr-xr-x 3 root     root     4.0K Apr 28 11:39 ..
dr-xr-xr-x 2 root     root     4.0K Apr 28 11:48 setup
-r-xr-xr-x 1 root     root     3.9K Apr 28 11:48 setup.sh
[root@worker3 V9]#
2.3 命令行静默安装
2.3.1 切换kingbase普通用户
[root@worker3 V9]# su - kingbase
Last login: Mon Apr 28 11:43:34 CST 2025 on pts/0
[kingbase@worker3 ~]$ cd /opt/KingbaseES/V9
[kingbase@worker3 V9]$ ls
setup  setup.sh
[kingbase@worker3 V9]$

2.3.1 执行安装
[kingbase@worker3 ~]$ cd /opt/KingbaseES/V9
[kingbase@worker3 V9]$ ls
setup  setup.sh
[kingbase@worker3 V9]$ ./setup.sh -i console
Now launch installer...
Preparing to install
Extracting the JRE from the installer archive...
Unpacking the JRE...
Extracting the installation resources from the installer archive...
Configuring the installer for this system's environment...
          Verifying JVM........
Launching installer...
===============================================================================
KingbaseES V9                                    (created with InstallAnywhere)
-------------------------------------------------------------------------------

This installer will guide you through the installation of KingbaseES V9.

PRESS <ENTER> TO CONTINUE:    # 按回车
===============================================================================
License Agreement

The "software product" is protected by copyright laws, international copyright
treaty and other intellectual property laws and treaties.

The "software product" is licensed to use, not sold.

PRESS <ENTER> TO CONTINUE:    # 按回车

1. GRANT OF LICENSE. As long as you follow this EULA, Kingbase grants you the
following non-exclusive, non-transitive rights:

2. LIMITATIONS AND OTHER RIGHT

LIMITATION ON TRANSFER. Under any condition, without the written permission of
Kingbase, you may not transfer this license and any usage permission under
this license.

PRESS <ENTER> TO CONTINUE:    # 按回车

EXPORT LIMITATION. You admit that the "software product" is governed by the
export laws of People's Republic of China. You agree to obey all the
international and domestic laws applicable to this "software product",
including "Foreign Trade Law of the People's Republic of China", and other
restrictions and regulations issued by the Chinese government related to
software exportation.

PRESS <ENTER> TO CONTINUE:    # 按回车

3. UPGRADES. If the "software product" is labeled as an upgrade, you must be
properly licensed to use a product identified by Kingbase as being eligible
for the upgrade in order to use the "software product". Kingbase reserves the
right to charge the upgrade version or upgrade. "software product" labeled as

PRESS <ENTER> TO CONTINUE:    # 按回车

4. INTELLECTUAL PROPERTY. The ownership, copyright and other intellectual
property of the "software product" (including but not limited to the picture,
photo, animation, video, recordings, music, text and supplemental programs
contained in the "software product"), enclosed printed materials and any
copies of the "software product", is owner by Kingbase and its suppliers. The
ownership and intellectual property accessed by this "software product"
belongs to the owner of the contents, and may be protected by copyright laws,
and other intellectual property laws and treaties. This EULA does not grant
you the right to use these contents. If this "software product" include
documents only provided electronically, you can print one copy of the
electronic documents. You may not remove the copyright declaration from the
software, and ensures that the copyright declaration is copied for the replica
(whole or part) of the "software product". You agree to stop any forms of
illegal copying this software and the documents. You cannot copy the enclosed

PRESS <ENTER> TO CONTINUE:    # 按回车

7. CONFIDENTIALITY. "Confidential information" includes program(including the
methods and concepts used in the program) and any information that Kingbase
identifies as exclusive or confidential. Unless expressly granted by this
EULA, you may not expose or provide the confidential information by other

PRESS <ENTER> TO CONTINUE:    # 按回车

1. LIMITED WARRANTY.
As long as you have valid license, Kingbase warrants that: (1) The "software
product" will perform substantially in accordance with the accompanying
materials for a period of ninety (90) days after the date of receipt. (2) The
provided support will perform substantially in accordance with the
accompanying materials, and Kingbase engineers will try their best to solve
any problems permitted by commercial range. If the product is not compliant to
the warranty, Kingbase will fix, replace the product or refund you for the
product, and you have to return the "software product" to Kingbase along with
the invoice held by you. If the malfunction of the product is due to accident,
abuse or misuse, then the warranty is not effective. The replaced product has
the residual of the original warranty period, or thirty days, whichever is
longer. To the maximum extent permitted by applicable law, except for the
above warranty, all expressed or implied warranties, conditions and other

PRESS <ENTER> TO CONTINUE:     # 按回车

2. LIMITATION OF LIABILITY
GOVERNING LAWS
This EULA is governed by the laws of the People's Republic of China (including
but not restricted to "Copyright Law of the People's Republic of China",
"Regulations for the Protection of Computer Software of the People's Republic

PRESS <ENTER> TO CONTINUE:     # 按回车

Add: 2 layer, E block, Information Industrial Park, Rongda Road 7, Chaoyang
District, Beijing, 100102 China
Tel: 86-10-5885 1118
Http: //www.kingbase.com.cn
National Hotline: 400-601-1188
Support E-mail: support@kingbase.com.cn

DO YOU ACCEPT THE TERMS OF THIS LICENSE AGREEMENT? (Y/N): y   # 输入Y
===============================================================================
Choose Install Set
------------------
Please choose the Install Set to be installed by this installer.

  ->1- Full
    2- Client

    3- Custom

ENTER THE NUMBER FOR THE INSTALL SET, OR PRESS <ENTER> TO ACCEPT THE DEFAULT
   : 1    # 输入1
===============================================================================
Choose License File
-------------------
File Path : /opt/KingbaseES/V9/license.dat   # 输入 license.dat 授权文件目录地址
License序列号 --- 启用 --- 22456E40-D15E-11EF-8CB3-000C29CBE49F
生产日期 --- 启用 --- 2025-01-13
产品名称 --- 启用 --- KingbaseES
细分版本模板名 --- 启用 --- SALES-企业版
产品版本号 --- 启用 --- V009R003C
浮动基准日期 ------ 启用
有效期间 --- 启用 --- 90
用户名称 --- 启用 --- MySQL试用授权
项目名称 --- 启用 --- MySQL试用授权
CPU检查 --- 启用 --- 0
容器名称 --- 禁用 --- 0
MAC地址 --- 启用 --- 00:00:00:00:00:00
最大连接数 --- 启用 --- 0
分区 --- 启用 --- 0
物理同步 --- 启用 --- 0
读写分离模块 --- 启用 --- 0
恢复到指定时间点 --- 启用 --- 0
集群对网络故障的容错 --- 启用 --- 0
快速加载 --- 启用 --- 0
日志压缩 --- 启用 --- 0
全文检索 --- 启用 --- 0
性能优化包(性能诊断) --- 启用 --- 0
性能优化包(性能调优) --- 启用 --- 0
保密通讯协议 --- 启用 --- 0
审计 --- 启用 --- 0
三权分立 --- 启用 --- 0
透明加密 --- 启用 --- 0
强制访问控制 --- 启用 --- 0
列加密 --- 启用 --- 0
密码复杂度 --- 启用 --- 0
用户锁定 --- 启用 --- 0
集群管理软件 --- 启用 --- 0
集群配置工具 --- 启用 --- 0
集群高级管理包 --- 启用 --- 0
并行查询 --- 启用 --- 0
并行备份还原 --- 启用 --- 0
异构数据源 --- 启用 --- 0
日志解析 --- 启用 --- 0
GIS --- 启用 --- 0
日志解析为SQL --- 启用 --- 0
操作系统类型 --- 启用 --- 0
数据守护集群 --- 启用 --- 0
多活共享存储集群 --- 启用 --- 0
===============================================================================
Ready To Install
----------------
InstallAnywhere is now ready to install KingbaseES V9 onto your system at the
following location:

   /opt/KingbaseES/V9
PRESS <ENTER> TO INSTALL: /data/kingbase_data   # 输入 /data/kingbase_data 安装目录地址
==============================================================================
Installing...
-------------
Please choose a folder. The folder must be empty.
Data folder (Default: /opt/KingbaseES/V9/data): /data/kingbase_data    # 输入 /data/kingbase_data 安装目录地址
===============================================================================
Port
----
Please enter database service listened port, default 54321.

Port (Default: 54321): 54321   # 输入端口 54321
===============================================================================
User
----
Please enter database administrator user name.
User (Default: system): system   # 输入管理员用户 system
===============================================================================
Enter Password
--------------
Please Enter the Password: Please Enter the Password:************  # 输入管理员用户:密码
===============================================================================
Enter Password again
--------------------
Please Enter the Password Again: Please Enter the Password Again:************ # 输入管理员用户:密码
===============================================================================
Server Encoding
---------------
Please enter server character set encoding.

    1- default
  ->2- UTF8
    3- GBK
    4- GB2312
    5- GB18030
ENTER THE NUMBER FOR YOUR CHOICE, OR PRESS <ENTER> TO ACCEPT THE DEFAULT: 2  # 输入数据库编码:2
Please enter the Database Locale.
    1- C
  ->2- zh_CN.UTF-8
    3- en_US.UTF-8
ENTER THE NUMBER FOR YOUR CHOICE, OR PRESS <ENTER> TO ACCEPT THE DEFAULT: 2 # 输入数据库编码:2
===============================================================================
Database Mode
-------------
Please enter database mode.
  ->1- MySQL
ENTER THE NUMBER FOR YOUR CHOICE, OR PRESS <ENTER> TO ACCEPT THE DEFAULT: 1 # 输入数据库模式:1
===============================================================================
Case Sensitivity
----------------
Please enter the case sensitivity.
    1- YES
  ->2- NO

ENTER THE NUMBER FOR YOUR CHOICE, OR PRESS <ENTER> TO ACCEPT THE DEFAULT: 2  # 是否区分大小写输入:2
===============================================================================
Block Size
----------
Please enter block size used in storing data.

  ->1- 8k
    2- 16k
    3- 32k

ENTER THE NUMBER FOR YOUR CHOICE, OR PRESS <ENTER> TO ACCEPT THE DEFAULT: 1   # 输入数据块大小:1
===============================================================================
Authentication Method
---------------------
Please enter the authentication method.

  ->1- scram-sha-256
    2- scram-sm3
    3- sm4
    4- sm3
ENTER THE NUMBER FOR YOUR CHOICE, OR PRESS <ENTER> TO ACCEPT THE DEFAULT:  # 输入身份验证:1或回车
===============================================================================
Custom
------
Please enter database custom parameters.
Custom (Default:  ):  # 输入自定义:或回车
===============================================================================
Tips
----
The database will be initialized, which may take some time. Please be patient.
PRESS <ENTER> TO CONTINUE:  # 输入:回车
===============================================================================
Installation Complete
---------------------
Congratulations. KingbaseES V9 has been successfully installed to:
/opt/KingbaseES/V9
If you want to register KingbaseES V9 as OS service, please run
    /opt/KingbaseES/V9/install/script/root.sh

PRESS <ENTER> TO EXIT THE INSTALLER:    # 输入:回车 结束安装
Complete.

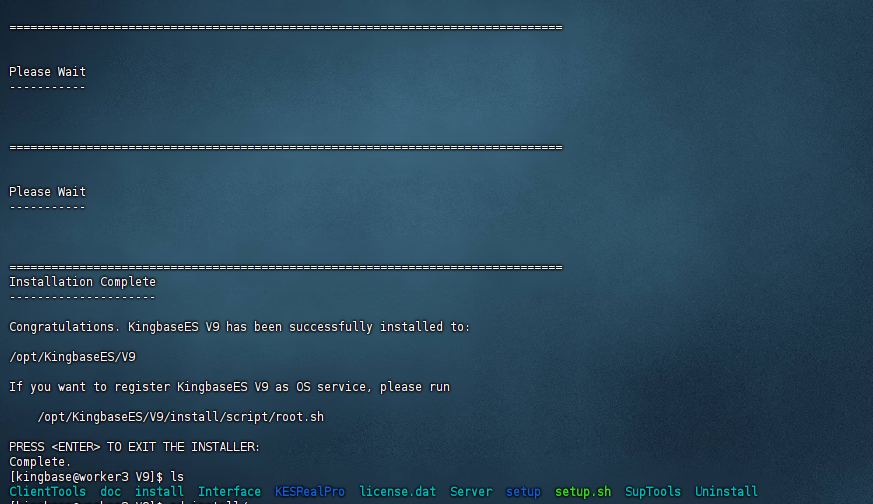
按提示进行安装,选择“完全安装”,指定安装路径为/data/kingbase_data,选择授权文件并完成安装。
参数解析:
MySQL兼容模式支持90%的MySQL语法- 数据块大小8k平衡OLTP与OLAP场景性能
三、数据库操作全流程
3.1 服务管理
3.1.1 以root用户执行注册服务脚本:
[root@worker3 V9]# ls
ClientTools  doc  install  Interface  KESRealPro  license.dat  Server  setup  setup.sh  SupTools  Uninstall
[root@worker3 V9]# /opt/KingbaseES/V9/install/script/root.sh
Starting KingbaseES V9:
waiting for server to start.... done
server started
KingbaseES V9 started successfully
[root@worker3 V9]#

3.1.2 启动服务
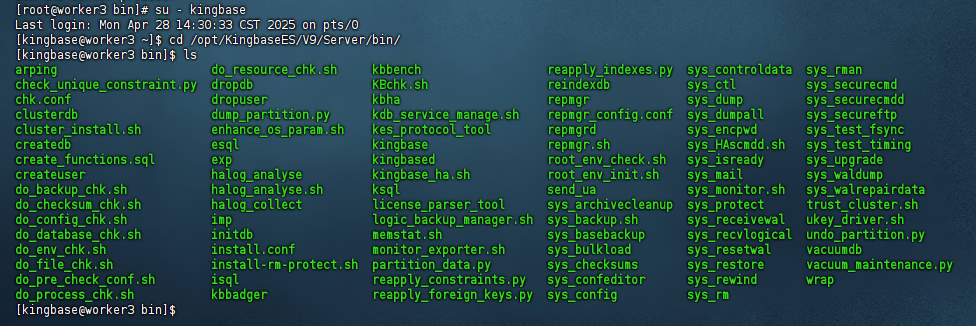
如果想启动或停止数据库服务,进入${安装目录}/Server/bin目录执行如下命令:kingbase用户登录,进入安装目录
[root@worker3 bin]# su - kingbase
Last login: Mon Apr 28 14:30:33 CST 2025 on pts/0
[kingbase@worker3 ~]$ cd /opt/KingbaseES/V9/Server/bin/
[kingbase@worker3 bin]$ ls
arping                      do_resource_chk.sh     kbbench                  reapply_indexes.py  sys_controldata  sys_rman
check_unique_constraint.py  dropdb                 KBchk.sh                 reindexdb           sys_ctl          sys_securecmd
chk.conf                    dropuser               kbha                     repmgr              sys_dump         sys_securecmdd
clusterdb                   dump_partition.py      kdb_service_manage.sh    repmgr_config.conf  sys_dumpall      sys_secureftp
cluster_install.sh          enhance_os_param.sh    kes_protocol_tool        repmgrd             sys_encpwd       sys_test_fsync
createdb                    esql                   kingbase                 repmgr.sh           sys_HAscmdd.sh   sys_test_timing
create_functions.sql        exp                    kingbased                root_env_check.sh   sys_isready      sys_upgrade
createuser                  halog_analyse          kingbase_ha.sh           root_env_init.sh    sys_mail         sys_waldump
do_backup_chk.sh            halog_analyse.sh       ksql                     send_ua             sys_monitor.sh   sys_walrepairdata
do_checksum_chk.sh          halog_collect          license_parser_tool      sys_archivecleanup  sys_protect      trust_cluster.sh
do_config_chk.sh            imp                    logic_backup_manager.sh  sys_backup.sh       sys_receivewal   ukey_driver.sh
do_database_chk.sh          initdb                 memstat.sh               sys_basebackup      sys_recvlogical  undo_partition.py
do_env_chk.sh               install.conf           monitor_exporter.sh      sys_bulkload        sys_resetwal     vacuumdb
do_file_chk.sh              install-rm-protect.sh  partition_data.py        sys_checksums       sys_restore      vacuum_maintenance.py
do_pre_check_conf.sh        isql                   reapply_constraints.py   sys_confeditor      sys_rewind       wrap
do_process_chk.sh           kbbadger               reapply_foreign_keys.py  sys_config          sys_rm
[kingbase@worker3 bin]$
3.1.3 配置环境变量
将KingbaseES的bin目录添加到系统的PATH环境变量中,以便在命令行中方便地使用KingbaseES的命令。
编辑~/.bashrc或/etc/profile文件,在文件末尾添加以下内容:
export PATH=/opt/KingbaseES/V9/bin:$PATH
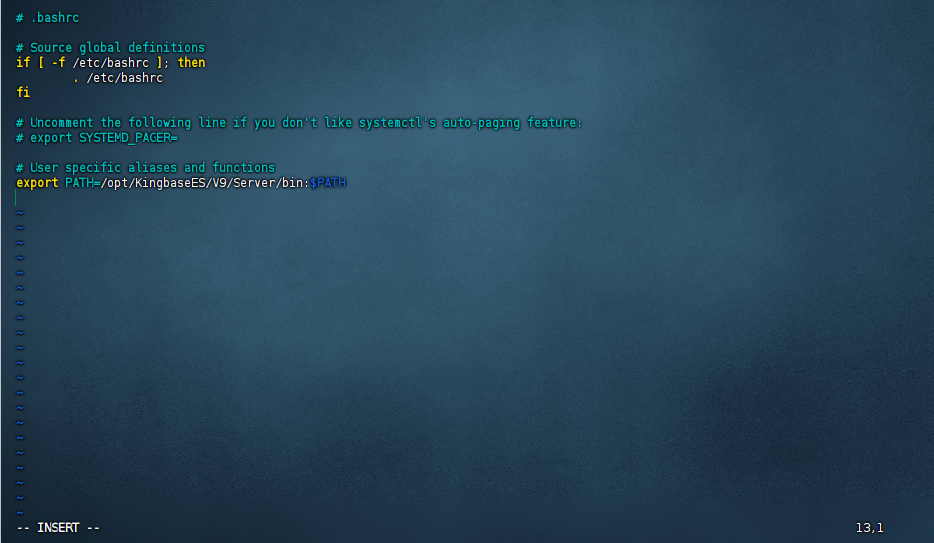
然后执行source ~/.bashrc或source /etc/profile使更改生效。
[kingbase@worker3 bin]$ vi ~/.bashrc
[kingbase@worker3 bin]$ source ~/.bashrc
[kingbase@worker3 bin]$

3.2 连接数据库
默认密码在安装时设置,登录后可修改。
[kingbase@worker3 bin]$ ksql -U system -d test -p 54321
Password for user system:
Licesen Type: SALES-企业版.
Type "help" for help.

test=#

3.3 查看已安装数据库的版本信息
进入${安装目录}/Server/bin目录,执行./kingbase –V;
或在交互式终端(ksql)中执行select version();
[kingbase@worker3 bin]$ ./kingbase -V;
kingbase (KingbaseES) V009R003C011
[kingbase@worker3 bin]$ pwd
/opt/KingbaseES/V9/Server/bin
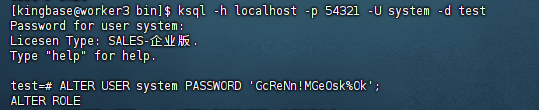
[kingbase@worker3 bin]$ ksql -h localhost -p 54321 -U system -d test
Password for user system:
Licesen Type: SALES-企业版.
Type "help" for help.
test=#

四、数据库使用与管理
4.1 登录数据库
- 使用ksql工具登录数据库:
[kingbase@worker3 bin]$ ksql -h localhost -p 54321 -U system -d test Password for user system: Licesen Type: SALES-企业版. Type "help" for help. test=#

- 默认密码在安装时设置,登录后可修改。
4.2 用户管理
一般情况下,系统管理员可以修改所有普通用户密码。普通用户可以修改自己的密码,但不能修改其他用户的密码,除非有CREATEROLE权限。使用ALTER USER PASSWORD语句修改密码,例如:
4.2.1 修改管理员密码
test=# ALTER USER system PASSWORD 'GcReNn!MGeOsk%Ok';
ALTER ROLE
test=#
4.2.2 创建普通用户
使用 CREATE USER 语句创建新的普通用户帐户,例如:
test=# CREATE USER test WITH PASSWORD '123456abc';
CREATE ROLE
test=#

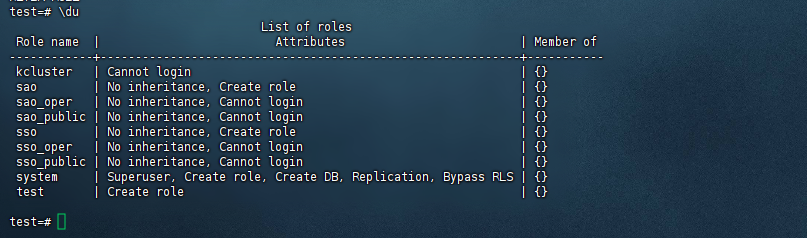
4.2.3 查看用户
test=# \du
                                    List of roles
 Role name  |                         Attributes                         | Member of
------------+------------------------------------------------------------+-----------
 kcluster   | Cannot login                                               | {}
 sao        | No inheritance, Create role                                | {}
 sao_oper   | No inheritance, Cannot login                               | {}
 sao_public | No inheritance, Cannot login                               | {}
 sso        | No inheritance, Create role                                | {}
 sso_oper   | No inheritance, Cannot login                               | {}
 sso_public | No inheritance, Cannot login                               | {}
 system     | Superuser, Create role, Create DB, Replication, Bypass RLS | {}
 test       | Create role                                                | {}

test=#
4.2.4 修改普通用户密码
当数据库开启三权分立状态后, sso_update_user_enable 参数处于打开状态时,只有sso 和普通用户本身可以更改普通用户的密码。超级用户只能修改超级用户,或超级用户权限选项。
test=# ALTER USER test PASSWORD 'abc456PASSWORD';
ALTER ROLE
test=#

4.2.5 修改用户的权限
已被授予 CREATEROLE 的系统权限的用户可以创建用户帐户。创建一个有权创建用户的用户,需要授予 CREATEROLE 权限,例如:
test=# ALTER USER test CREATEROLE;
ALTER ROLE
test=#

CREATEROLE是一种特殊系统权限,不允许转授。通常只有数据库管理员或安全管理员具有此系统特权。
4.3 创建数据库和表
4.3.1 创建数据库:
test=# CREATE DATABASE mydb; CREATE DATABASE test=#

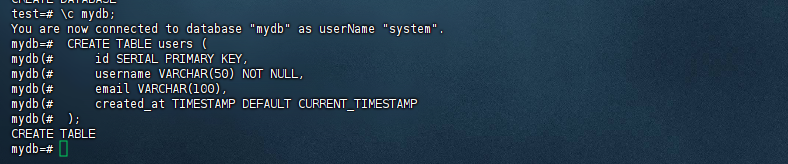
4.3.2 切换到新数据库创建表:
test=# \c mydb;
You are now connected to database "mydb" as userName "system".
mydb=#  CREATE TABLE users (
mydb(#      id SERIAL PRIMARY KEY,
mydb(#      username VARCHAR(50) NOT NULL,
mydb(#      email VARCHAR(100),
mydb(#      created_at TIMESTAMP DEFAULT CURRENT_TIMESTAMP
mydb(#  );
CREATE TABLE
mydb=#
4.3.3 数据插入与查询
- 插入数据:
mydb=# INSERT INTO users (username, email) VALUES ('john_doe', 'john@example.com');
INSERT 0 1
mydb=#

4.3.4 查询数据:
mydb=# SELECT * FROM users;
 id | username |      email       |     created_at
----+----------+------------------+---------------------
  1 | john_doe | john@example.com | 2025-04-28 15:40:50
(1 row)

mydb=#

4.4 数据库优化
4.4.1 索引优化:为常用查询字段创建索引。
mydb=# CREATE INDEX idx_username ON users(username);
CREATE INDEX
mydb=#

4.4.2 查询优化:使用EXPLAIN分析查询计划,优化SQL语句。
mydb=# EXPLAIN SELECT * FROM users WHERE username = 'john_doe';
                      QUERY PLAN
-------------------------------------------------------
 Seq Scan on users  (cost=0.00..1.01 rows=1 width=352)
   Filter: ((username)::text = 'john_doe'::text)
(2 rows)

mydb=#

4.5 数据库备份与恢复
4.5.1 创建备份文件
[root@worker3 KingbaseES]# mkdir backup
[root@worker3 KingbaseES]# chown -R kingbase:kingbase  /opt/KingbaseES/backup/
[root@worker3 KingbaseES]# chmod +x /opt/KingbaseES/backup/
[root@worker3 KingbaseES]#

4.5.2 备份数据库:
[kingbase@worker3 backup]$ sys_dump -h localhost -p 54321 -U system -d mydb > /opt/KingbaseES/backup/mybackup.sql
Password:
[kingbase@worker3 backup]$ ls
mybackup.sql
[kingbase@worker3 backup]$ pwd
/opt/KingbaseES/backup
[kingbase@worker3 backup]$

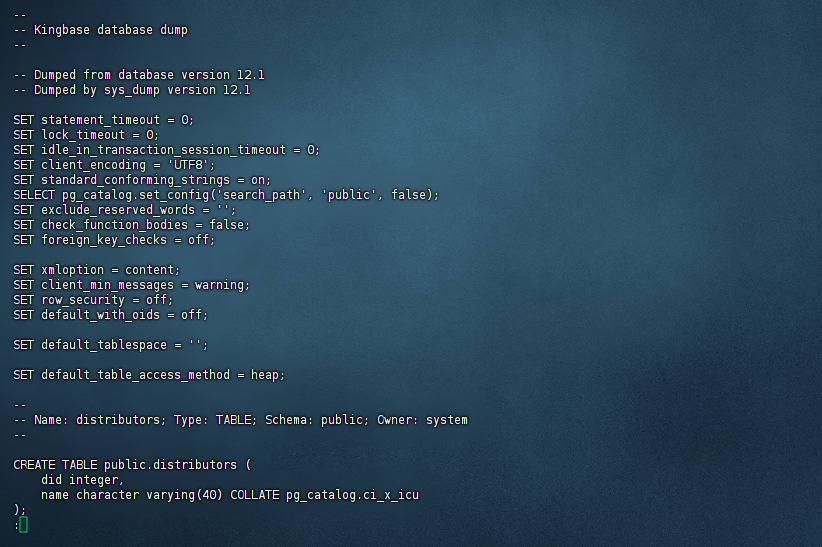
4.5.3 检查备份文件内容
在恢复之前,可以通过以下命令查看备份文件的内容,了解其中的操作:
[kingbase@worker3 backup]$ cat /opt/KingbaseES/backup/mybackup.sql | less
4.5.4 清理目标数据库
为了测试数据,可以在恢复之前清理目标数据库中的现有对象(如表、索引等)。以下是一些可能的操作:
删除现有表(如果可以接受数据丢失)
mydb=# \dt
                 List of relations
 Schema |     Name     |       Type        | Owner
--------+--------------+-------------------+--------
 public | distributors | table             | system
 public | measurement  | partitioned table | system
 public | users        | table             | system
(3 rows)

mydb=# DROP TABLE IF EXISTS users CASCADE;
DROP TABLE
mydb=# DROP TABLE IF EXISTS distributors CASCADE;
DROP TABLE
mydb=# DROP TABLE IF EXISTS measurement CASCADE;
DROP TABLE
mydb=# \dt
Did not find any relations.
mydb=#
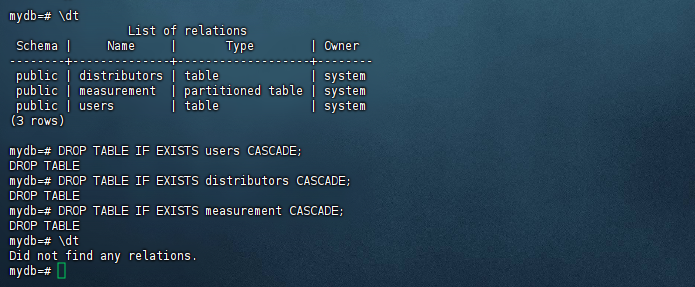
如果你有其它表需要清理,可以类似地执行 DROP TABLE。
4.5.5 步骤 3:尝试恢复
完成上述清理后运行恢复命令:
[kingbase@worker3 backup]$ ksql -U system -h localhost -p 54321 -d mydb < /opt/KingbaseES/backup/mybackup.sql Password for user system: SET SET SET SET SET set_config ------------ public (1 row) SET SET SET SET SET SET SET SET SET CREATE TABLE ALTER TABLE CREATE TABLE ALTER TABLE CREATE TABLE ALTER TABLE COMMENT COPY 0 COPY 0 ALTER TABLE ALTER TABLE ALTER TABLE ALTER TABLE ALTER TABLE ALTER TABLE setval -------- 1 (1 row) SET [kingbase@worker3 backup]$

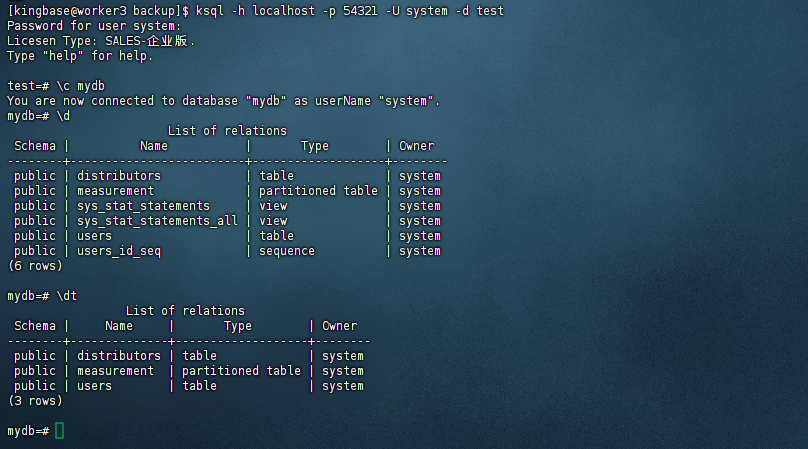
4.5.6 查看恢复数据
[kingbase@worker3 backup]$ ksql -h localhost -p 54321 -U system -d test
Password for user system:
Licesen Type: SALES-企业版.
Type "help" for help.

test=# \c mydb
You are now connected to database "mydb" as userName "system".
mydb=# \d
                       List of relations
 Schema |          Name           |       Type        | Owner
--------+-------------------------+-------------------+--------
 public | distributors            | table             | system
 public | measurement             | partitioned table | system
 public | sys_stat_statements     | view              | system
 public | sys_stat_statements_all | view              | system
 public | users                   | table             | system
 public | users_id_seq            | sequence          | system
(6 rows)

mydb=# \dt
                 List of relations
 Schema |     Name     |       Type        | Owner
--------+--------------+-------------------+--------
 public | distributors | table             | system
 public | measurement  | partitioned table | system
 public | users        | table             | system
(3 rows)

mydb=#
注意:
- 在生产环境中,建议在恢复之前备份目标数据库,以便在出现问题时能够回滚。
- 定期检查备份文件的内容,确保其符合恢复需求。
- 使用专用工具(如
sys_restore)进行恢复,以减少手动操作带来的风险。
按照上述步骤操作,你应该能够成功恢复数据库。
五、避坑指南
5.1 安装目录和脚本不在同一目录
[kingbase@worker3 V9]$ ./setup.sh -i console
./setup.sh: line 81: cd: ./setup: No such file or directory
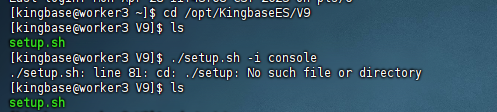
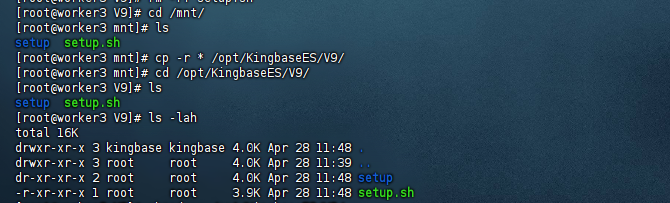
5.1.1 解决办法,复制到同一目录
[root@worker3 V9]# cd /mnt/
[root@worker3 mnt]# ls
setup  setup.sh
[root@worker3 mnt]# cp -r * /opt/KingbaseES/V9/
[root@worker3 mnt]# cd /opt/KingbaseES/V9/
[root@worker3 V9]# ls
setup  setup.sh
[root@worker3 V9]# ls -lah
total 16K
drwxr-xr-x 3 kingbase kingbase 4.0K Apr 28 11:48 .
drwxr-xr-x 3 root     root     4.0K Apr 28 11:39 ..
dr-xr-xr-x 2 root     root     4.0K Apr 28 11:48 setup
-r-xr-xr-x 1 root     root     3.9K Apr 28 11:48 setup.sh
5.2 授权文件找不到
Use the Trial license if no license is selected.
Please replace the offical license before expiration.

File Path : /opt/KingbaseES/V9/license.dat

/opt/KingbaseES/V9/license.dat (No such file or directory)
License File Error

5.2.1 解决办法,重命名,移动到指定目录
[root@worker3 soft]# ls
cmake-3.31.6-linux-x86_64.tar.gz  KingbaseES_V009R003C011B0003_Lin64_install.iso  license_MySQL试用授权.dat  minio2025.tar
go1.24.2.linux-amd64.tar.gz       lib.sh                                          minio2023.tar
[root@worker3 soft]# mv license_MySQL试用授权.dat /opt/KingbaseES/V9/
[root@worker3 soft]# cd /opt/KingbaseES/V9/
[root@worker3 V9]# ls
license_MySQL试用授权.dat  setup  setup.sh
[root@worker3 V9]# mv license_MySQL试用授权.dat license.dat
[root@worker3 V9]# ls
license.dat  setup  setup.sh
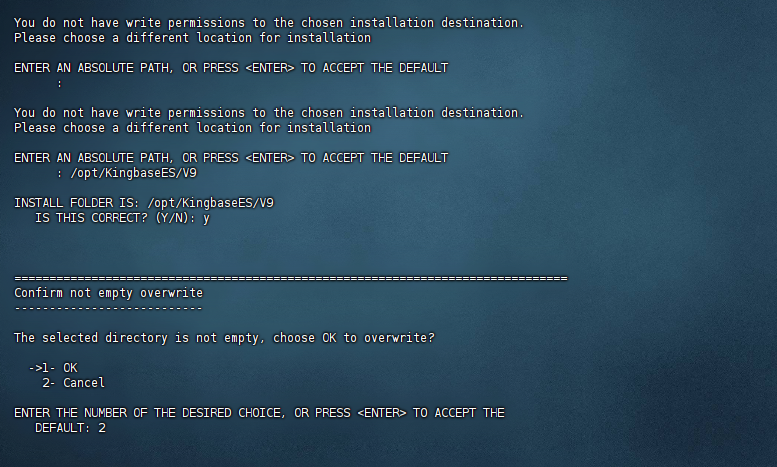
5.3 安装目录选错,默认会覆盖/opt/KingbaseES/V9/
You do not have write permissions to the chosen installation destination.
Please choose a different location for installation

ENTER AN ABSOLUTE PATH, OR PRESS <ENTER> TO ACCEPT THE DEFAULT
      :

You do not have write permissions to the chosen installation destination.
Please choose a different location for installation

ENTER AN ABSOLUTE PATH, OR PRESS <ENTER> TO ACCEPT THE DEFAULT
      : /opt/KingbaseES/V9

INSTALL FOLDER IS: /opt/KingbaseES/V9
   IS THIS CORRECT? (Y/N): y
===============================================================================
Confirm not empty overwrite
---------------------------

The selected directory is not empty, choose OK to overwrite?

  ->1- OK
    2- Cancel

ENTER THE NUMBER OF THE DESIRED CHOICE, OR PRESS <ENTER> TO ACCEPT THE
   DEFAULT: 2
5.3.1 解决办法、修改安装目录
InstallAnywhere is now ready to install KingbaseES V9 onto your system at the
following location:

   /opt/KingbaseES/V9

PRESS <ENTER> TO INSTALL: /data/kingbase_data

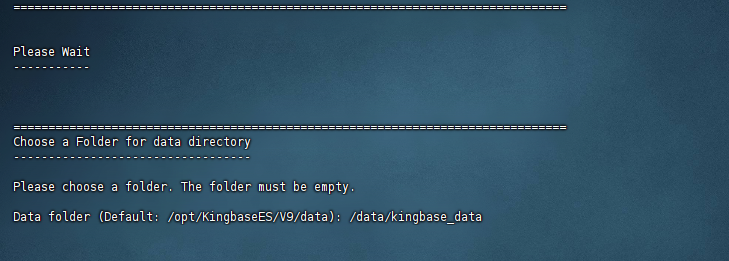
===============================================================================
Choose a Folder for data directory
----------------------------------

Please choose a folder. The folder must be empty.

Data folder (Default: /opt/KingbaseES/V9/data): /data/kingbase_data
5.4 注册服务时出错,非root用户,没有权限
[kingbase@worker3 V9]$ /opt/KingbaseES/V9/install/script/root.sh
Must be root to run this script, and root.sh should be executed in the '/opt/KingbaseES/V9/install/script/root.sh' way, not 'sh /opt/KingbaseES/V9/install/script/root.sh'.
[kingbase@worker3 V9]$ exit

5.4.1 解决办法,切换root用户下执行
[kingbase@worker3 V9]$ exit
logout
[root@worker3 V9]# ls
ClientTools  doc  install  Interface  KESRealPro  license.dat  Server  setup  setup.sh  SupTools  Uninstall
[root@worker3 V9]# /opt/KingbaseES/V9/install/script/root.sh
Starting KingbaseES V9:
waiting for server to start.... done
server started

5.5 sys_ctl 工具没有权限
[root@worker3 bin]# ./sys_ctl start -D /data/kingbase_data -l /data/kingbase_data/sys_log/startup.log
sys_ctl: cannot be run as root
Please log in (using, e.g., "su") as the (unprivileged) user that will
own the server process.

5.5.1 解决办法,切换 kingbase 普通用户下执行
[root@worker3 bin]# su - kingbase
Last login: Mon Apr 28 14:30:33 CST 2025 on pts/0

[kingbase@worker3 bin]$ ./sys_ctl start -D /data/kingbase_data -l /data/kingbase_data/sys_log/startup.log
sys_ctl: another server might be running; trying to start server anyway
waiting for server to start.... stopped waiting
sys_ctl: could not start server
Examine the log output.
[kingbase@worker3 bin]$

5.6 sys_ctl 工具找不到
[kingbase@worker3 bin]$ sys_ctl start -D /data/kingbase_data -l /data/kingbase_data/sys_log/startup.log
bash: sys_ctl: command not found...
[kingbase@worker3 bin]

5.6.1 解决办法,添加环境变量
编辑~/.bashrc或/etc/profile文件,添加如下行:
[kingbase@worker3 bin]$ vi ~/.bashrc
export PATH=$PATH:/path/to/kingbaseES/bin

然后执行source ~/.bashrc或source /etc/profile使更改生效。
[kingbase@worker3 bin]$ source ~/.bashrc
![]()
作为金仓 KingbaseES 社区新人,我期待在社区中持续沉淀技术认知,从基础安装配置到高级性能调优,逐步构建完整的金仓 KingbaseES 知识体系。同时,我也希望能将自己的学习笔记、踩坑经验整理成系列教程,为其他初学者提供这份"避坑指南"。
总结
本文详细介绍了在Linux系统上安装金仓 KingbaseES(MySQL兼容版)V9数据库的全过程,包括安装前准备、数据库安装、数据库使用与管理以及与其他数据库系统的对比。通过实操命令流程,读者可以清晰地了解金仓 KingbaseES 的安装和使用方法。同时,金仓 KingbaseES作为国产关系型数据库管理系统的重要产品之一,具有广泛的应用前景和发展潜力。金仓 KingbaseES技术社区的魅力,在于不同背景的开发者因共同热爱而相聚。无论是对某个命令的深入探讨,还是对系统架构的宏观思考,都将成为推动国产数据库技术发展的星星之火。期待各位前辈大佬指教,并在评论区与大家深入交流!
—— 仅供参考。如果有更多具体的问题或需要进一步的帮助,请随时告知。

DAMO开发者矩阵,由阿里巴巴达摩院和中国互联网协会联合发起,致力于探讨最前沿的技术趋势与应用成果,搭建高质量的交流与分享平台,推动技术创新与产业应用链接,围绕“人工智能与新型计算”构建开放共享的开发者生态。
更多推荐


 25
25 0
0- 0


 已为社区贡献2条内容

所有评论(0)