4. vla环境搭建与运用
·
下面给你一份可直接照着做、从环境搭建到训练 / 推理的完整 VLA(Vision-Language-Action)实现步骤,偏向开源路线(OpenVLA / π0 / RDT 通用流程),Ubuntu 22.04 + CUDA 11.8/12.1 实测可用。
一、硬件与系统要求
1.1 最低 / 推荐配置
- 系统:Ubuntu 20.04/22.04(Windows 用 WSL2,macOS 仅推理)
- GPU:RTX 3090/4090 24GB+(训练);RTX 3060+(推理)
- CUDA:11.8 / 12.1(必须与 PyTorch 匹配)
- 内存:≥32GB;存储:≥500GB NVMe
1.2 系统基础依赖
sudo apt update && sudo apt install -y build-essential git curl wget \
  libglfw3-dev libgles2-mesa-dev libusb-1.0-0-dev pkg-config
二、conda 环境搭建(隔离依赖)
2.1 安装 Miniconda
wget https://repo.anaconda.com/miniconda/Miniconda3-latest-Linux-x86_64.sh
bash Miniconda3-latest-Linux-x86_64.sh -b -p ~/miniconda3
source ~/miniconda3/bin/activate
conda init bash
source ~/.bashrc
2.2 创建 VLA 专属环境
conda create -n vla python=3.10 -y
conda activate vla
三、核心依赖安装(PyTorch + CUDA + VLA 库)
3.1 安装 PyTorch(匹配 CUDA)
# CUDA 11.8
pip install torch==2.1.0 torchvision==0.16.0 torchaudio==2.1.0 --index-url https://download.pytorch.org/whl/cu118

# CUDA 12.1(推荐新卡)
pip install torch==2.2.0 torchvision==0.17.0 torchaudio==2.2.0 --index-url https://download.pytorch.org/whl/cu121
3.2 安装 VLA 通用依赖
pip install transformers==4.37.2 accelerate==0.27.2 datasets==2.18.0 \
opencv-python==4.9.0.80 pillow==10.2.0 numpy==1.26.4 scipy==1.11.4 \
matplotlib==3.8.3 tqdm==4.66.2 h5py==3.10.0 wandb==0.16.3 \
-i https://pypi.tuna.tsinghua.edu.cn/simple
3.3 开源 VLA 模型库(选一个,以 OpenVLA 为例)
# 克隆 OpenVLA
git clone https://github.com/openvla/openvla.git
cd openvla
pip install -e .

# 或 π0(物理智能)
git clone https://github.com/physical-intelligence/pi0.git
cd pi0
pip install -e .
3.4 模型下载
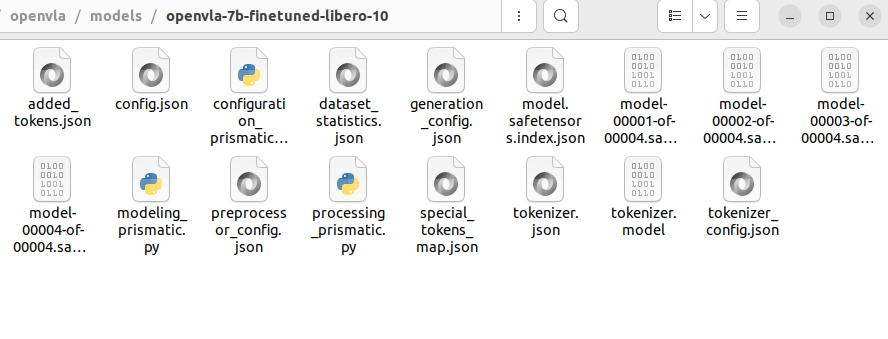
模型路径和下载的文件如下图:
3.5 文本代码测试
代码如下:
# test_step_loading.py
import os
import torch
import json
from safetensors.torch import load_file
from transformers import LlamaConfig, LlamaForCausalLM
import gc
import psutil

model_dir = "/home/wyq/openvla/models/openvla-7b-finetuned-libero-10"

print(f"分步加载模型,最大限度节省内存...")

# 1. 检查内存
print(f"可用内存: {psutil.virtual_memory().available / 1024 ** 3:.2f} GB")

# 2. 创建配置
vocab_size = 32064
config = LlamaConfig(
    vocab_size=vocab_size,
    hidden_size=4096,
    intermediate_size=11008,
    num_hidden_layers=32,
    num_attention_heads=32,
    num_key_value_heads=32,
    max_position_embeddings=2048,
    rms_norm_eps=1e-5,
    use_cache=True,
)

print("步骤 1/6: 创建模型结构...")
model = LlamaForCausalLM(config)

# 3. 准备权重文件
print("步骤 2/6: 准备权重文件...")
safetensors_files = sorted([f for f in os.listdir(model_dir) if f.endswith('.safetensors')])
print(f"找到 {len(safetensors_files)} 个权重文件")

# 加载索引
with open(os.path.join(model_dir, "model.safetensors.index.json"), "r") as f:
    index = json.load(f)
    weight_map = index.get("weight_map", {})
    print(f"权重映射: {len(weight_map)} 个键")

# 4. 逐层加载(这是关键优化)
print("步骤 3/6: 逐层加载权重...")

# 获取所有层的索引
layer_indices = set()
for key in weight_map.keys():
    if 'layers.' in key and key.startswith('language_model.'):
        parts = key.split('.')
        for i, part in enumerate(parts):
            if part == 'layers' and i + 1 < len(parts):
                try:
                    layer_idx = int(parts[i + 1])
                    layer_indices.add(layer_idx)
                except ValueError:
                    pass

layer_indices = sorted(layer_indices)
print(f"找到 {len(layer_indices)} 层: {layer_indices[:5]}...")

# 分批处理:每批处理 4 层
batch_size = 4
for batch_start in range(0, len(layer_indices), batch_size):
    batch_layers = layer_indices[batch_start:batch_start + batch_size]
    print(f"\n处理层 {batch_layers}...")

    # 加载这一批的权重
    batch_state_dict = {}
    for sf in safetensors_files:
        part = load_file(os.path.join(model_dir, sf))
        for key, tensor in part.items():
            if not key.startswith('language_model.'):
                continue
            # 检查是否属于当前批次
            is_in_batch = False
            for layer_idx in batch_layers:
                if f'layers.{layer_idx}.' in key:
                    is_in_batch = True
                    break
            if is_in_batch:
                new_key = key.replace('language_model.', '', 1)
                batch_state_dict[new_key] = tensor
        del part
        gc.collect()

    print(f"  加载了 {len(batch_state_dict)} 个权重")

    # 应用这批权重
    model.load_state_dict(batch_state_dict, strict=False)

    # 清理
    del batch_state_dict
    gc.collect()

    # 检查内存
    mem = psutil.Process().memory_info().rss / 1024 ** 3
    print(f"  当前内存: {mem:.2f} GB")

# 5. 加载非层权重(embedding, lm_head, norm)
print("\n步骤 4/6: 加载非层权重...")
non_layer_state_dict = {}
for sf in safetensors_files:
    part = load_file(os.path.join(model_dir, sf))
    for key, tensor in part.items():
        if key.startswith('language_model.'):
            # 只保留非层的权重
            if 'layers.' not in key:
                new_key = key.replace('language_model.', '', 1)
                non_layer_state_dict[new_key] = tensor
    del part
    gc.collect()

print(f"加载了 {len(non_layer_state_dict)} 个非层权重")
model.load_state_dict(non_layer_state_dict, strict=False)
del non_layer_state_dict
gc.collect()

# 6. 清理和转换
print("步骤 5/6: 清理和转换...")
model = model.half()
print(f"当前内存: {psutil.Process().memory_info().rss / 1024 ** 3:.2f} GB")

# 7. 推理测试
print("步骤 6/6: 测试推理...")
try:
    model.eval()
    input_ids = torch.tensor([[1, 2, 3, 4]], dtype=torch.long)
    with torch.no_grad():
        outputs = model(input_ids)
    print(f"✅ 推理成功!输出形状: {outputs.logits.shape}")
except Exception as e:
    print(f"⚠️ 推理失败: {e}")

print("✅ 模型加载完成!")
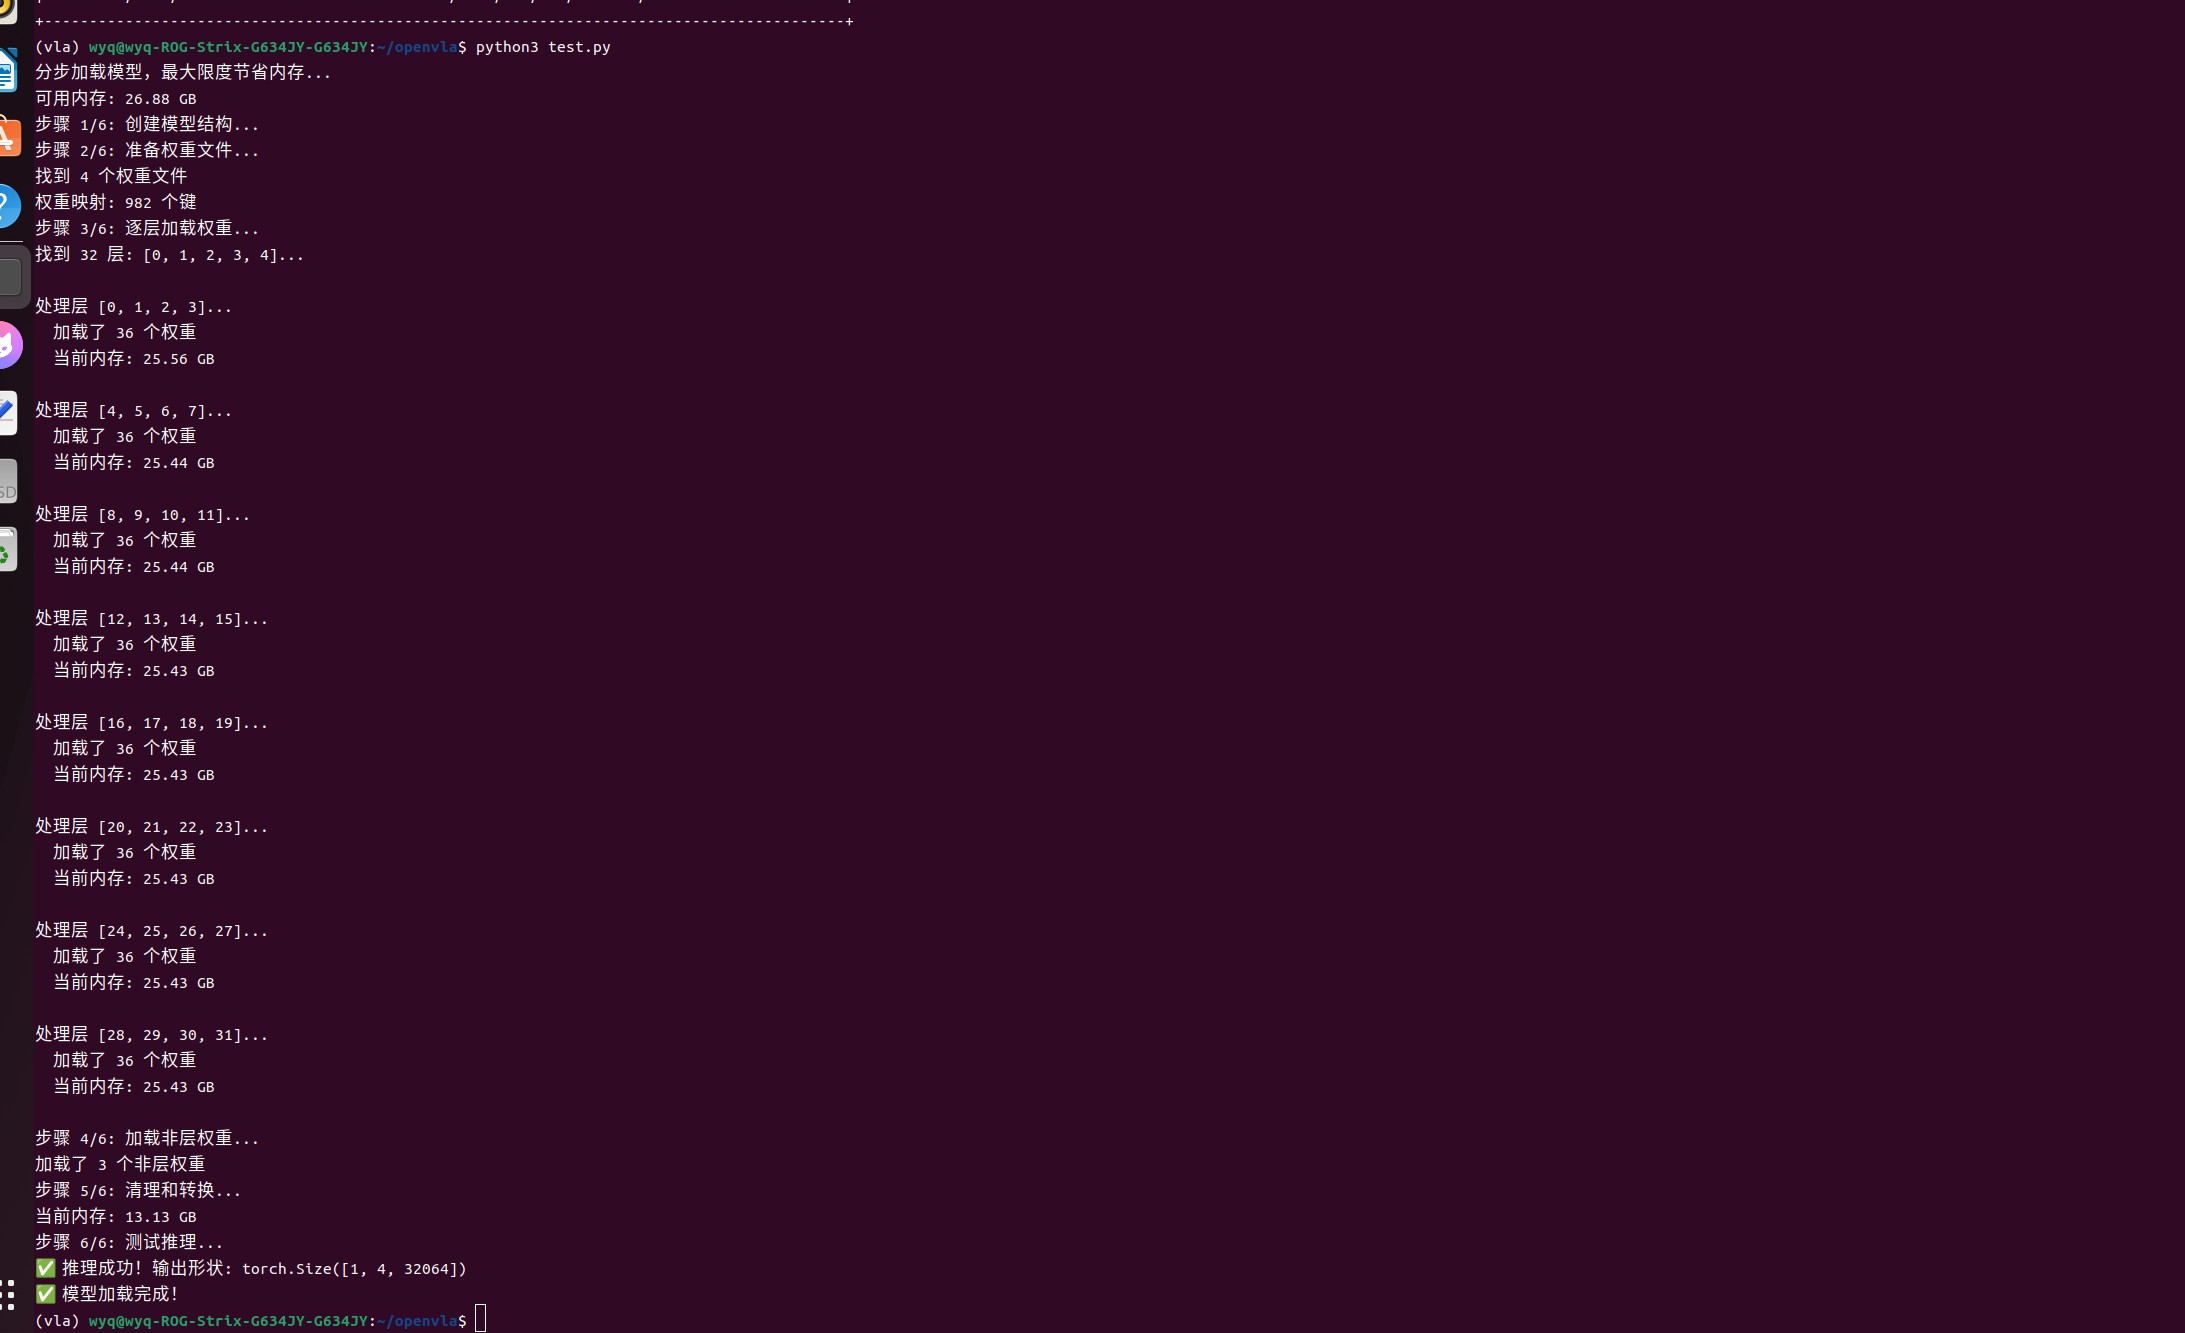
运行结果如下:
3.6 完整的模型加载及推理
import torch
import os
import sys
from transformers import AutoModelForVision2Seq, AutoProcessor
from PIL import Image
import numpy as np
import time

# ===== 设置离线模式 =====
os.environ["HF_HUB_OFFLINE"] = "1"
os.environ["TRANSFORMERS_OFFLINE"] = "1"

# 将模型目录添加到Python路径,以便加载自定义模块
model_path = '/home/wyq/openvla/models/openvla-7b-finetuned-libero-10'
sys.path.insert(0, model_path)

print("=" * 60)
print("🚀 VLA模型离线加载")
print("=" * 60)

print(f"✅ GPU: {torch.cuda.get_device_name(0)}")
print(f"✅ 显存: {torch.cuda.get_device_properties(0).total_memory / 1024 ** 3:.2f} GB")
print(f"✅ 离线模式: 已启用")


def load_model_and_processor(model_path):
    """离线加载模型和处理器"""
    print("\n📦 加载模型...")

    # 检查本地文件
    required_files = [
        "modeling_prismatic.py",
        "processing_prismatic.py",
        "configuration_prismatic.py"
    ]

    print("检查本地文件:")
    for f in required_files:
        fpath = os.path.join(model_path, f)
        if os.path.exists(fpath):
            print(f"  ✅ {f} 存在 ({os.path.getsize(fpath)} bytes)")
        else:
            print(f"  ❌ {f} 不存在")
            print(f"  请确保文件在: {fpath}")

    # 加载模型 - 强制使用本地文件
    model = AutoModelForVision2Seq.from_pretrained(
        model_path,
        torch_dtype=torch.bfloat16,
        device_map='auto',
        trust_remote_code=True,
        local_files_only=True,  # 关键: 只使用本地文件
        use_safetensors=True
    )

    print("📦 加载处理器...")
    processor = AutoProcessor.from_pretrained(
        model_path,
        trust_remote_code=True,
        local_files_only=True  # 关键: 只使用本地文件
    )

    print("✅ 加载完成!")
    return model, processor


def predict_action(model, processor, image, prompt, max_new_tokens=50):
    """预测动作"""
    print(f"\n📝 指令: {prompt}")
    print(f"📷 图像尺寸: {image.size}")

    # 处理输入
    inputs = processor(
        images=image,
        text=prompt,
        return_tensors='pt'
    )

    # 移到GPU并转换数据类型
    for key in inputs.keys():
        if isinstance(inputs[key], torch.Tensor):
            inputs[key] = inputs[key].cuda()
            if inputs[key].dtype in [torch.float32, torch.float64]:
                inputs[key] = inputs[key].to(torch.bfloat16)

    print("⚡ 执行推理...")
    start = time.time()

    with torch.no_grad():
        outputs = model.generate(
            **inputs,
            max_new_tokens=max_new_tokens,
            do_sample=False,
            pad_token_id=32000,
            eos_token_id=2,
        )

    end = time.time()
    print(f"⏱️ 推理时间: {(end - start) * 1000:.2f}ms")

    return outputs


def main():
    # 加载模型和处理器
    model, processor = load_model_and_processor(model_path)

    # 显示模型信息
    print(f"\n📊 模型信息:")
    print(f"  类型: {type(model).__name__}")
    print(f"  设备: {model.device}")

    # 显示模型组件
    print("\n📊 模型组件:")
    for name, module in model.named_children():
        params = sum(p.numel() for p in module.parameters()) / 1e6
        print(f"  - {name}: {type(module).__name__} ({params:.1f}M参数)")

    # 创建测试图像
    print("\n创建测试图像...")
    if os.path.exists("test.jpg"):
        print("使用现有图像: test.jpg")
        image = Image.open("test.jpg").convert('RGB').resize((224, 224))
    else:
        image = Image.new('RGB', (224, 224), color='red')
        image.save('test.jpg')
        print("✅ 创建 test.jpg")

    # 测试不同的指令
    prompts = [
        "Pick up the red block from the table.",
        "Move the robot arm to the left.",
        "Grasp the blue cube.",
    ]

    for prompt in prompts:
        print("\n" + "=" * 60)
        print(f"🧪 测试: {prompt}")
        print("=" * 60)

        try:
            outputs = predict_action(model, processor, image, prompt)

            # 解码输出
            if hasattr(processor, 'decode'):
                decoded = processor.decode(outputs[0], skip_special_tokens=True)
                print(f"📤 解码输出: {decoded}")

            print(f"📊 输出形状: {outputs.shape}")
            print(f"📊 输出token (前20个): {outputs[0][:20].tolist()}")

        except Exception as e:
            print(f"❌ 推理错误: {e}")
            import traceback
            traceback.print_exc()

    print("\n" + "=" * 60)
    print("✅ 所有测试完成!")
    print("=" * 60)


if __name__ == "__main__":
    main()
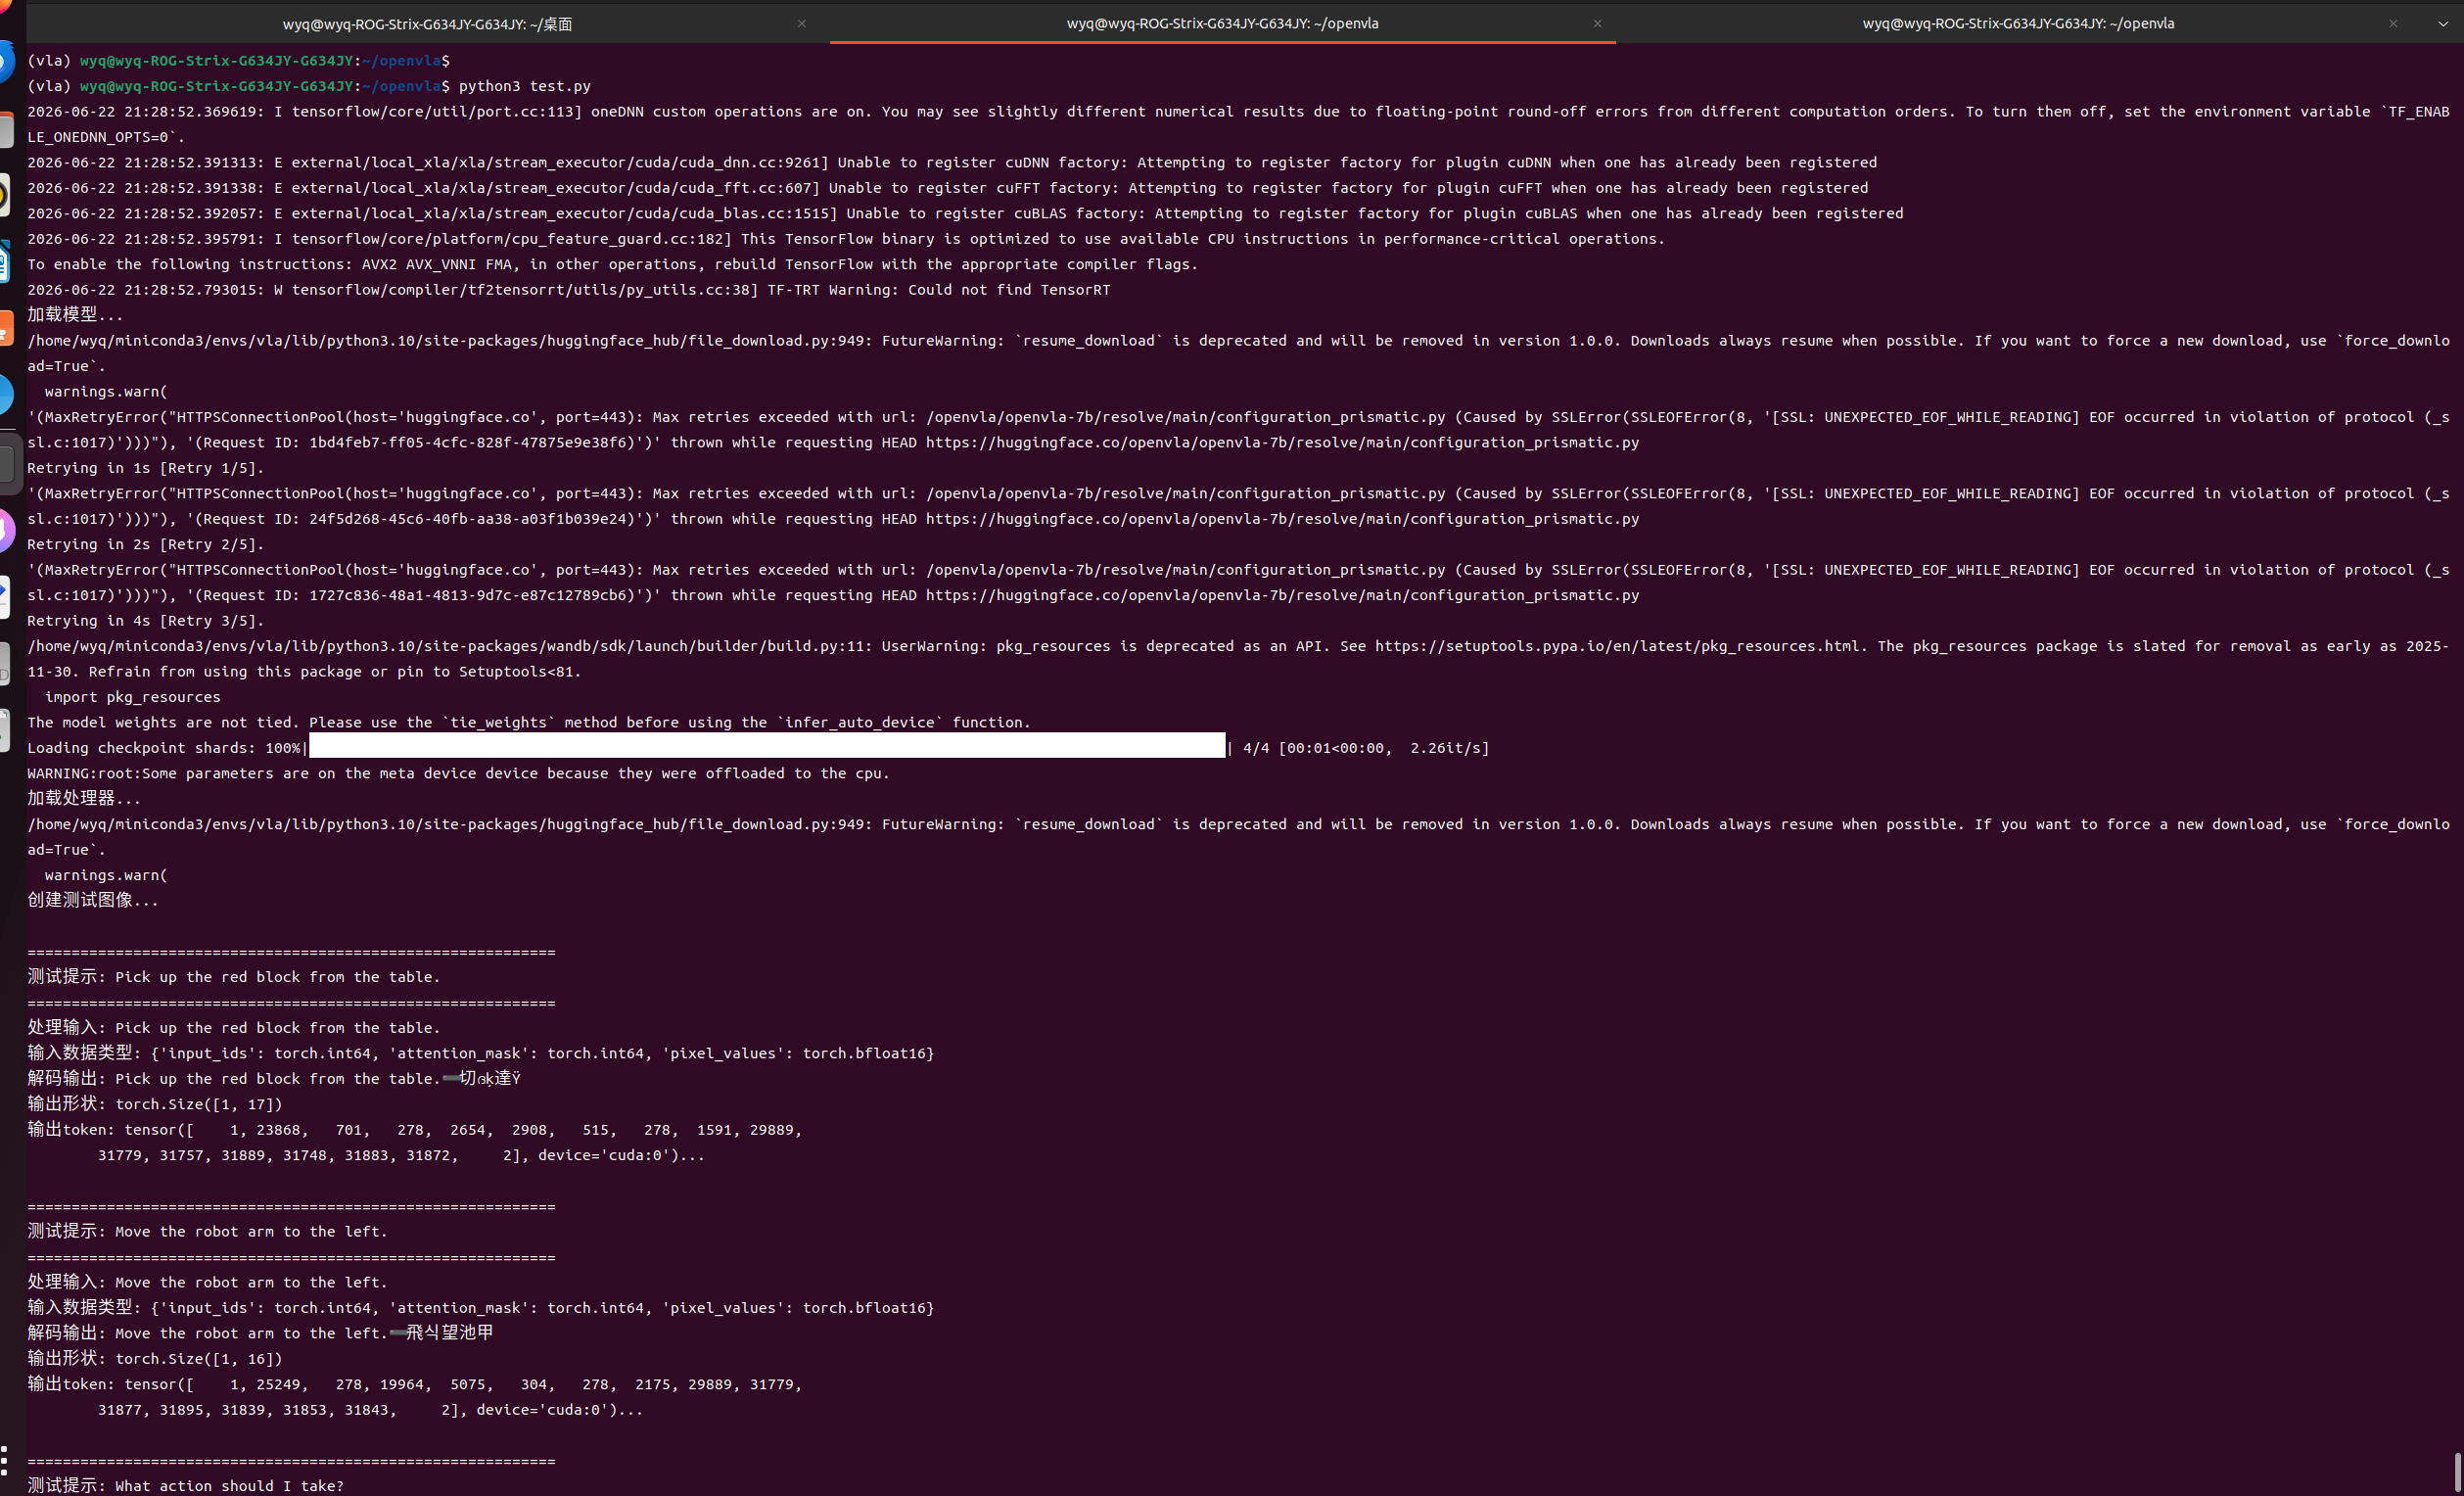
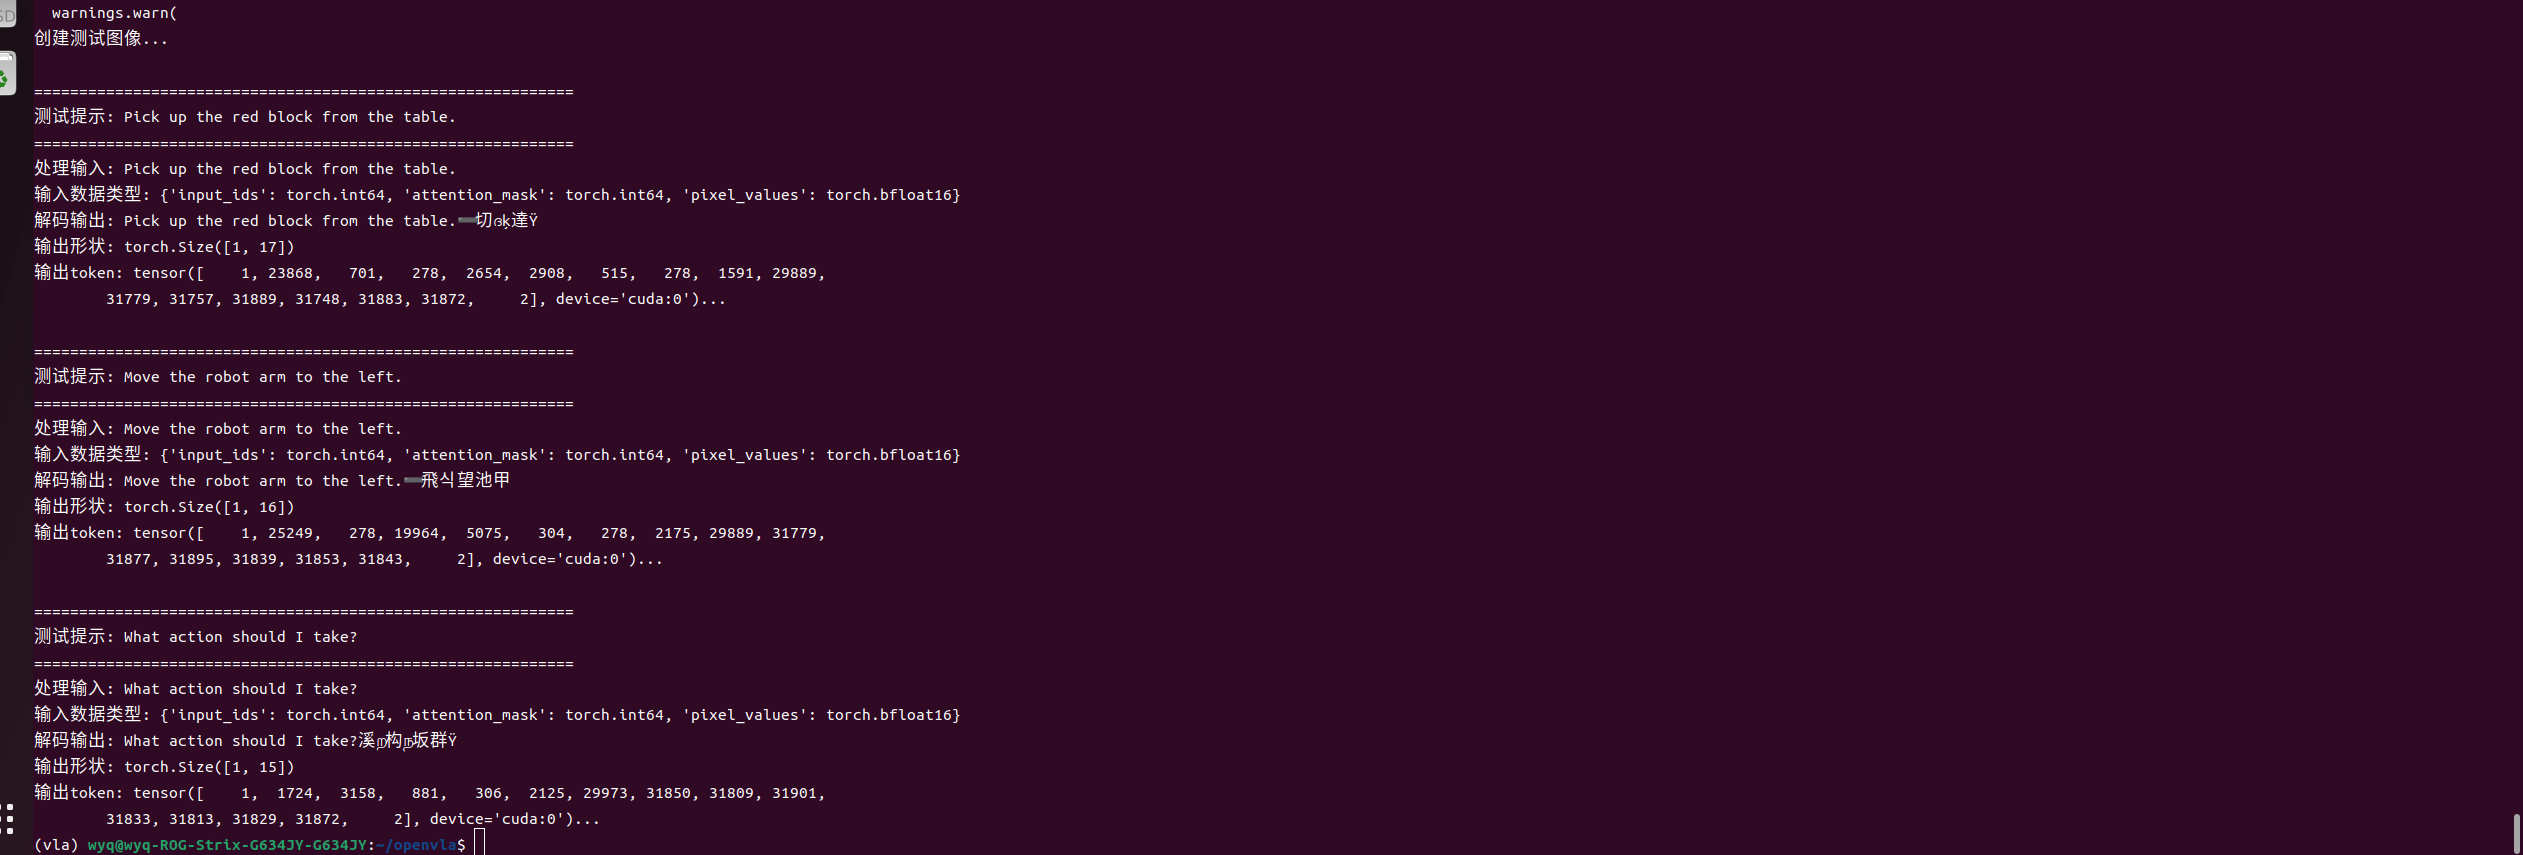
运行结果如下:
四、数据准备(VLA 核心:视觉 + 语言 + 动作三元组)
4.1 数据格式(统一要求)
- 视觉:
rgb(H,W,3 uint8)、depth(H,W float32,可选) - 语言:
instruction(字符串,如 “把红色方块放到盘子里”) - 动作:
action(连续 / 离散,如末端执行器 6D + 夹爪) - 存储:HDF5 / RLDS / Parquet
4.2 公开数据集(快速起步)
- Open X-Embodiment:1M+ 机器人轨迹(RLDS 格式)
bash
# 下载脚本(需 gsutil)
gsutil -m cp -r gs://open-x-embodiment/data/bridge ./data/
- ALOHA / Mini-ALOHA:低成本双臂操作数据集
4.3 自定义数据采集(仿真 / 真机)
- 仿真:用
Mujoco + Robosuite或VLA-Arena收集
python scripts/collect_demo.py --task pick_place --num_episodes 100
2. 真机:用 ROS2 订阅 /camera/color、/joint_states、/cmd_vel,同步时间戳存 HDF5
五、模型结构与配置(以 OpenVLA 为例)
5.1 核心架构
- 视觉编码器:ViT-L/14(CLIP)→ 图像特征
- 语言编码器:LLaMA-2-7B → 指令特征
- 动作解码器:Transformer Decoder → 连续动作序列
5.2 配置文件(configs/train/openvla.yaml)
model:
  vision_encoder: "clip-vit-large-patch14"
  lang_encoder: "llama-2-7b-chat"
  action_dim: 7  # 6D pose + 1夹爪
  max_seq_len: 256
training:
  batch_size: 8
  lr: 1e-4
  epochs: 10
  precision: "bf16"
data:
  dataset_path: "./data/bridge"
  image_size: [224, 224]
6.2 多卡分布式训练(DeepSpeed,≥2 卡)
accelerate launch --num_processes 4 --config_file ds_config.json train.py ...
6.3 训练监控
- 自动启动 WandB:loss、action_error、任务成功率
- 关键指标:
action_mse、instruction_accuracy、task_success_rate
七、模型推理(仿真 + ROS2 真机部署)
7.1 仿真推理(Mujoco)
from openvla import VLA
import gymnasium as gym

# 加载模型
model=VLA.from_pretrained("./checkpoints/openvla-finetune")
model.to("cuda")

# 环境
env=gym.make("RobosuitePickPlace-v0", render_mode="human")
obs, info=env.reset()

# 推理循环
for _ in range(500):
    rgb=obs["rgb"]  # (224,224,3)
    instruction="pick up the red cube"
    action=model.predict(rgb, instruction)  # (7,)
    obs, reward, done, truncated, info=env.step(action)
    if done:
        break
7.2 ROS2 真机部署(和你之前代码打通)
- 订阅彩图 / 深度 / 相机内参(你已有的代码)
- 回调中调用 VLA 模型生成动作
- 发布动作到
/cmd_vel或/joint_trajectory_controller
# 在你现有的 callback 里加
def sync_rgbd_data(self):
    # ... 你已有的缓存逻辑 ...
    # 推理
    rgb_img=cv2.resize(self.cached_color_image, (224,224))
    instruction="put the box on the shelf"
    action=self.model.predict(rgb_img, instruction)  # (7,)
    # 发布动作(示例:发布到 ROS2 话题)
    action_msg=JointTrajectory()
    action_msg.joint_names=["joint1", "joint2", ...]
    action_msg.points=[JointTrajectoryPoint(positions=action[:6])]
    self.action_pub.publish(action_msg)
八、性能优化(必做,否则 4090 也不够用)
- 精度:训练用
bf16,推理用fp16 - 量化:
bitsandbytes 4bit加载 LLM,显存减少 60%+
pip install bitsandbytes
- 模型轻量化:用 TinyVLA / MobileVLA(速度提升 5 倍,参数 < 1B)
- TensorRT 加速:推理延迟从 200ms → 20ms
九、常见坑与避坑
- CUDA 版本不匹配:严格按上面命令装 PyTorch,不要混装
- 显存爆炸:开启
--bf16、梯度累积、4bit 量化 - 动作抖动:推理后加 EMA 平滑(
action=0.7*last_action+0.3*new_action) - 数据不同步:ROS2 中用
message_filters.TimeSynchronizer对齐彩图 / 深度
十、下一步建议
- 先跑通 仿真训练 + 推理(用 OpenVLA + Bridge 数据集)
- 再迁移到 ROS2 真机(复用你已有的相机订阅代码)
- 最后做 自定义数据采集 + 微调,适配你的任务
十一、常见出错
11.1 OpenVLA 依赖冲突
1.修正你openvla/__init__.py
from .prismatic.models.vla import VLA, VLAConfig
__all__ = ["VLA", "VLAConfig"]
2.检查并修正目录结构
cd /home/wyq/public/openvla
mv prismatic/ openvla/
3.强制重装 OpenVLA
pip uninstall -y openvla
pip install -e . --force-reinstall --no-cache-dir
4.验证
python -c "
from openvla import VLA, VLAConfig
print('✅ OpenVLA 导入成功!')
"
5.写一个test.py文件验证
import sys
sys.path.insert(0, "/home/wyq/public/openvla/openvla")

from prismatic.models.vlas.openvla import OpenVLA
import torch
import numpy as np
from PIL import Image

print("✅ 导入成功!")

# 加载模型(注意:类名是 OpenVLA,不是 VLA)
model = OpenVLA.from_pretrained("openvla/openvla-7b")
model.to("cuda" if torch.cuda.is_available() else "cpu")
print("✅ 模型加载成功!")

# 模拟图片
dummy_image = Image.fromarray(np.random.randint(0, 255, size=(224, 224, 3), dtype=np.uint8))
instruction = "pick up the red cube"

# 推理(根据源码,方法名可能是 predict 或 forward,这里先用 predict)
action = model.predict(dummy_image, instruction)
print(f"✅ 生成动作: {action}")

DAMO开发者矩阵,由阿里巴巴达摩院和中国互联网协会联合发起,致力于探讨最前沿的技术趋势与应用成果,搭建高质量的交流与分享平台,推动技术创新与产业应用链接,围绕“人工智能与新型计算”构建开放共享的开发者生态。
更多推荐
 10
10 0
0- 0


 已为社区贡献7条内容

所有评论(0)