Yolo训练无人机视角斑马线目标检测数据集 检测车辆违停识别 使用 YOLOv5 来处理无人机视角下的斑马线目标检测任务
Yolo训练无人机视角斑马线目标检测数据集 检测车辆违停识别 使用 YOLOv5 来处理无人机视角下的斑马线目标检测任务。
文章目录
无人机视角斑马线目标检测数据集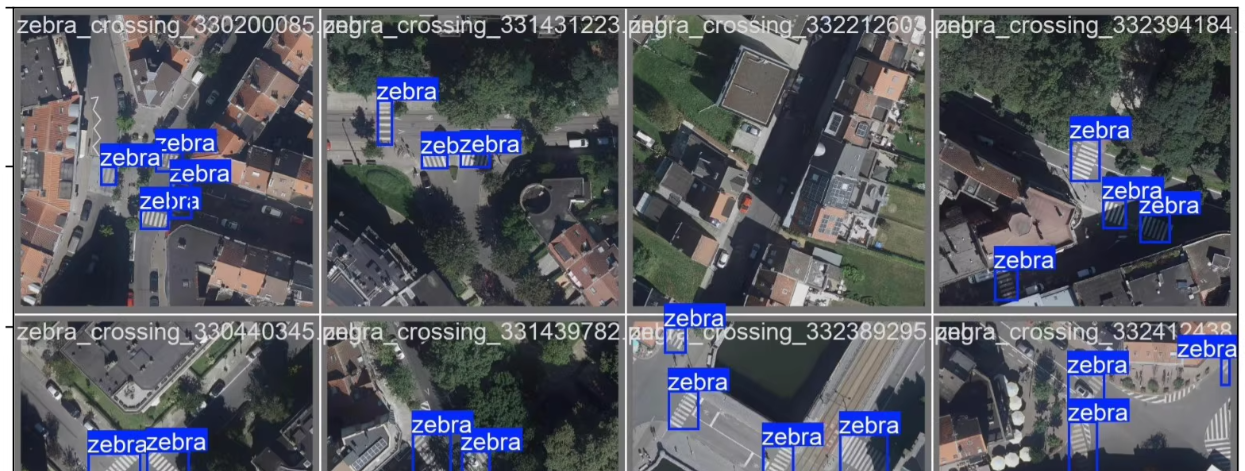
数据类型:图片+yolo格式标签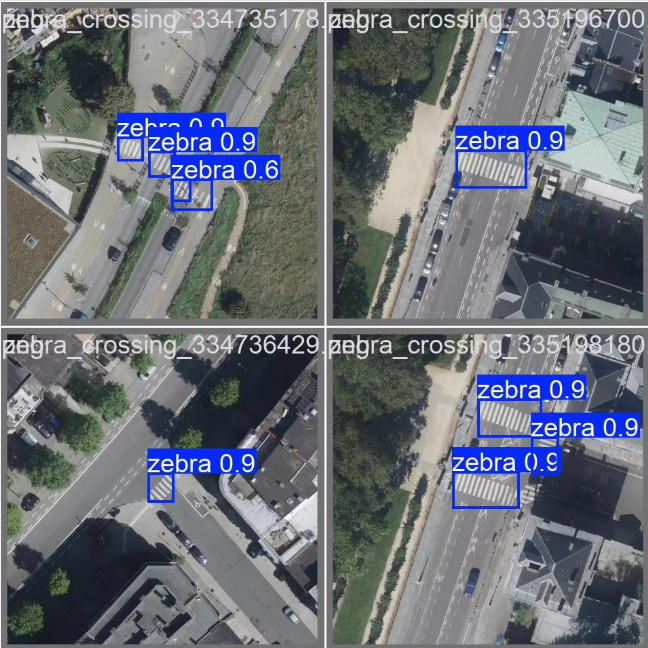
类别:斑马线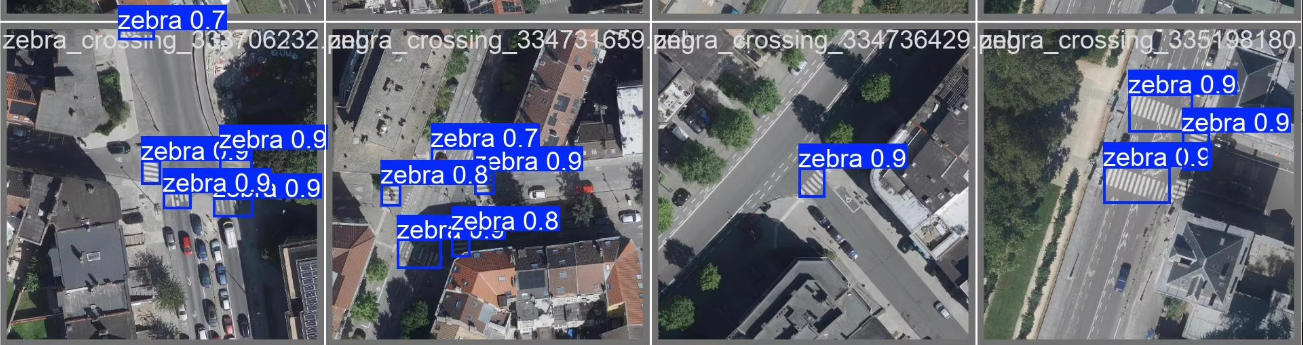
数据准备到模型训练、推理和性能评估的详细步骤。使用 YOLOv5 来处理无人机视角下的斑马线目标检测任务。
1. 环境搭建
安装依赖
# 创建虚拟环境(可选)
conda create -n zebra_crossing_detection python=3.8
conda activate zebra_crossing_detection

# 安装 PyTorch 和 torchvision
pip install torch torchvision

# 克隆 YOLOv5 仓库
git clone https://github.com/ultralytics/yolov5
cd yolov5

# 安装 YOLOv5 的依赖
pip install -r requirements.txt
2. 数据准备
假设你的数据集已经按照 YOLO 格式标注,文件结构如下:
dataset/
├── images/
│   ├── train/
│   ├── val/
│   └── test/
├── labels/
│   ├── train/
│   ├── val/
│   └── test/
每个图像文件在 images/ 文件夹中,对应的标注文件(.txt)在 labels/ 文件夹中。
创建一个 data.yaml 文件,用于描述数据集路径和类别信息:
# data.yaml
train: dataset/images/train
val: dataset/images/val
test: dataset/images/test

nc: 1  # 类别数量(斑马线)
names: ['zebra_crossing']  # 类别名称
3. 数据增强(可选)
为了提高模型的泛化能力,可以对数据进行增强。YOLOv5 提供了内置的数据增强功能,无需额外代码。
如果需要自定义增强策略,可以在 yolov5/data/hyps/hyp.scratch.yaml 中调整参数,例如增加随机裁剪或翻转的概率。
4. 模型训练
配置超参数
编辑 yolov5/data/hyps/hyp.scratch.yaml 文件,调整超参数以适应你的数据集。例如:
lr0: 0.01  # 初始学习率
momentum: 0.937
weight_decay: 0.0005
开始训练
运行以下命令开始训练:
python train.py --img 640 --batch 16 --epochs 50 --data data.yaml --cfg models/yolov5s.yaml --weights yolov5s.pt --name zebra_crossing_detection
--img 640: 输入图像大小。--batch 16: 批量大小。--epochs 50: 训练轮数。--data data.yaml: 数据集配置文件。--cfg models/yolov5s.yaml: 使用 YOLOv5 的小型模型(适合小数据集)。--weights yolov5s.pt: 加载预训练权重。--name zebra_crossing_detection: 训练结果保存目录。
5. 模型推理
单张图片推理
训练完成后,可以使用以下命令对单张图片进行推理:
python detect.py --weights runs/train/zebra_crossing_detection/weights/best.pt --img 640 --conf 0.25 --source dataset/images/test/image_001.jpg
--weights: 使用训练好的模型权重。--img 640: 输入图像大小。--conf 0.25: 置信度阈值。--source: 输入图像路径。
推理结果会保存在 runs/detect/exp/ 文件夹中。
6. 批量推理
如果需要对多张图片或视频进行批量推理,可以将 --source 参数设置为文件夹路径或视频路径:
# 对文件夹中的所有图片进行推理
python detect.py --weights runs/train/zebra_crossing_detection/weights/best.pt --img 640 --conf 0.25 --source dataset/images/test/

# 对视频进行推理
python detect.py --weights runs/train/zebra_crossing_detection/weights/best.pt --img 640 --conf 0.25 --source video.mp4
7. 性能评估
mAP 和其他指标
训练完成后,YOLOv5 会自动生成性能评估报告,包括 mAP(mean Average Precision)、Precision、Recall 等指标。这些信息会保存在 runs/train/zebra_crossing_detection/results.csv 文件中。
你也可以手动运行验证脚本:
python val.py --data data.yaml --weights runs/train/zebra_crossing_detection/weights/best.pt --img 640
8. 构建 GUI 应用程序
使用 PyQt5 构建一个简单的 GUI 应用程序,用于加载图像、运行检测并显示结果。
import sys
from PyQt5.QtWidgets import QApplication, QMainWindow, QLabel, QPushButton, QVBoxLayout, QWidget, QFileDialog
from PyQt5.QtGui import QPixmap
from PIL import Image, ImageQt
import torch
from pathlib import Path

class DetectionApp(QMainWindow):
    def __init__(self):
        super().__init__()
        self.initUI()
        self.model = torch.hub.load('ultralytics/yolov5', 'custom', path='runs/train/zebra_crossing_detection/weights/best.pt')

    def initUI(self):
        self.setWindowTitle("斑马线检测系统")
        self.setGeometry(100, 100, 800, 600)

        layout = QVBoxLayout()

        self.image_label = QLabel(self)
        self.image_label.setText("请选择一张图片进行检测")
        self.image_label.setAlignment(Qt.AlignCenter)
        layout.addWidget(self.image_label)

        self.load_button = QPushButton("加载图像", self)
        self.load_button.clicked.connect(self.load_image)
        layout.addWidget(self.load_button)

        self.detect_button = QPushButton("检测斑马线", self)
        self.detect_button.clicked.connect(self.detect_zebra_crossing)
        layout.addWidget(self.detect_button)

        container = QWidget()
        container.setLayout(layout)
        self.setCentralWidget(container)

    def load_image(self):
        options = QFileDialog.Options()
        file_name, _ = QFileDialog.getOpenFileName(self, "选择图像文件", "", "Images (*.png *.jpg *.jpeg)", options=options)
        if file_name:
            self.image_path = file_name
            pixmap = QPixmap(file_name)
            self.image_label.setPixmap(pixmap.scaled(640, 640))

    def detect_zebra_crossing(self):
        if hasattr(self, 'image_path'):
            results = self.model(self.image_path)
            img_with_boxes = results.render()[0]

            # 将结果转换为 QImage 并显示
            height, width, channel = img_with_boxes.shape
            bytes_per_line = 3 * width
            q_img = ImageQt.Image.fromarray(img_with_boxes).convert("RGB").rgbSwapped()
            self.image_label.setPixmap(QPixmap.fromImage(q_img))
        else:
            self.image_label.setText("请先加载一张图片")

if __name__ == '__main__':
    app = QApplication(sys.argv)
    window = DetectionApp()
    window.show()
    sys.exit(app.exec_())
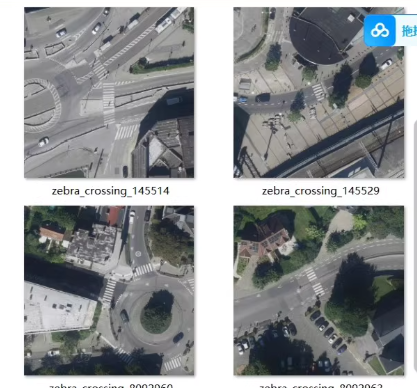
仅供参考。

DAMO开发者矩阵,由阿里巴巴达摩院和中国互联网协会联合发起,致力于探讨最前沿的技术趋势与应用成果,搭建高质量的交流与分享平台,推动技术创新与产业应用链接,围绕“人工智能与新型计算”构建开放共享的开发者生态。
更多推荐

 1
1 0
0- 0


 已为社区贡献17条内容

所有评论(0)