RF-DETR训练YOLO格式数据集(目标检测)
·
声明:本文受到RF-DETR的官方文档和其他博客内容启发而创作记录
可参考的文章:
RF-DETR训练自建数据集代码及训练过程Debug-CSDN博客
一.下载RF-DEFR
备注:这个模型是啥,性能如何自己看代码的README文档和后续自己测试
二.环境搭建
1.创建虚拟环境(在 Python>=3.10 环境中使用):
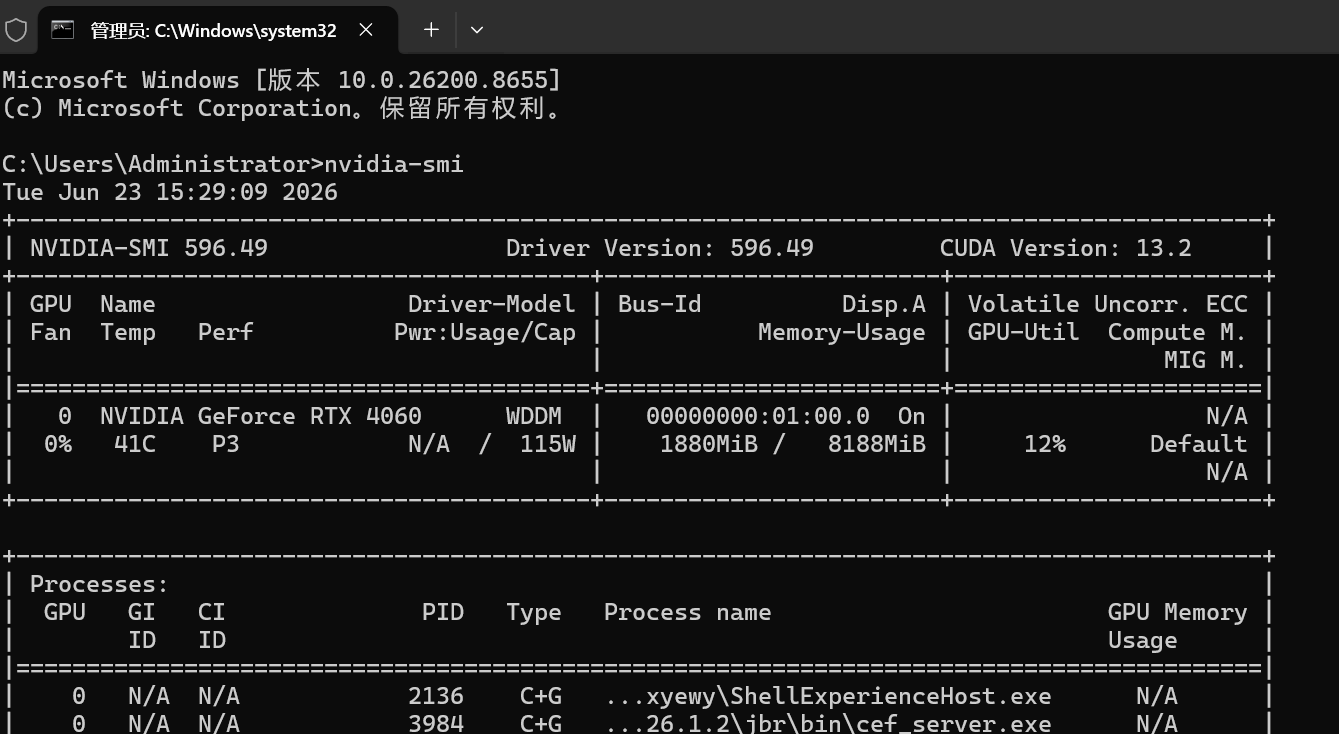
conda create -n detr python=3.122.看一下自己电脑支持的CUDA版本(在命令行输入:nvidia-smi),如下,本机支持到13.2
3.安装PyTorch(地址:Previous PyTorch Versions)
根据自己的实际情况选择,我选择如下:
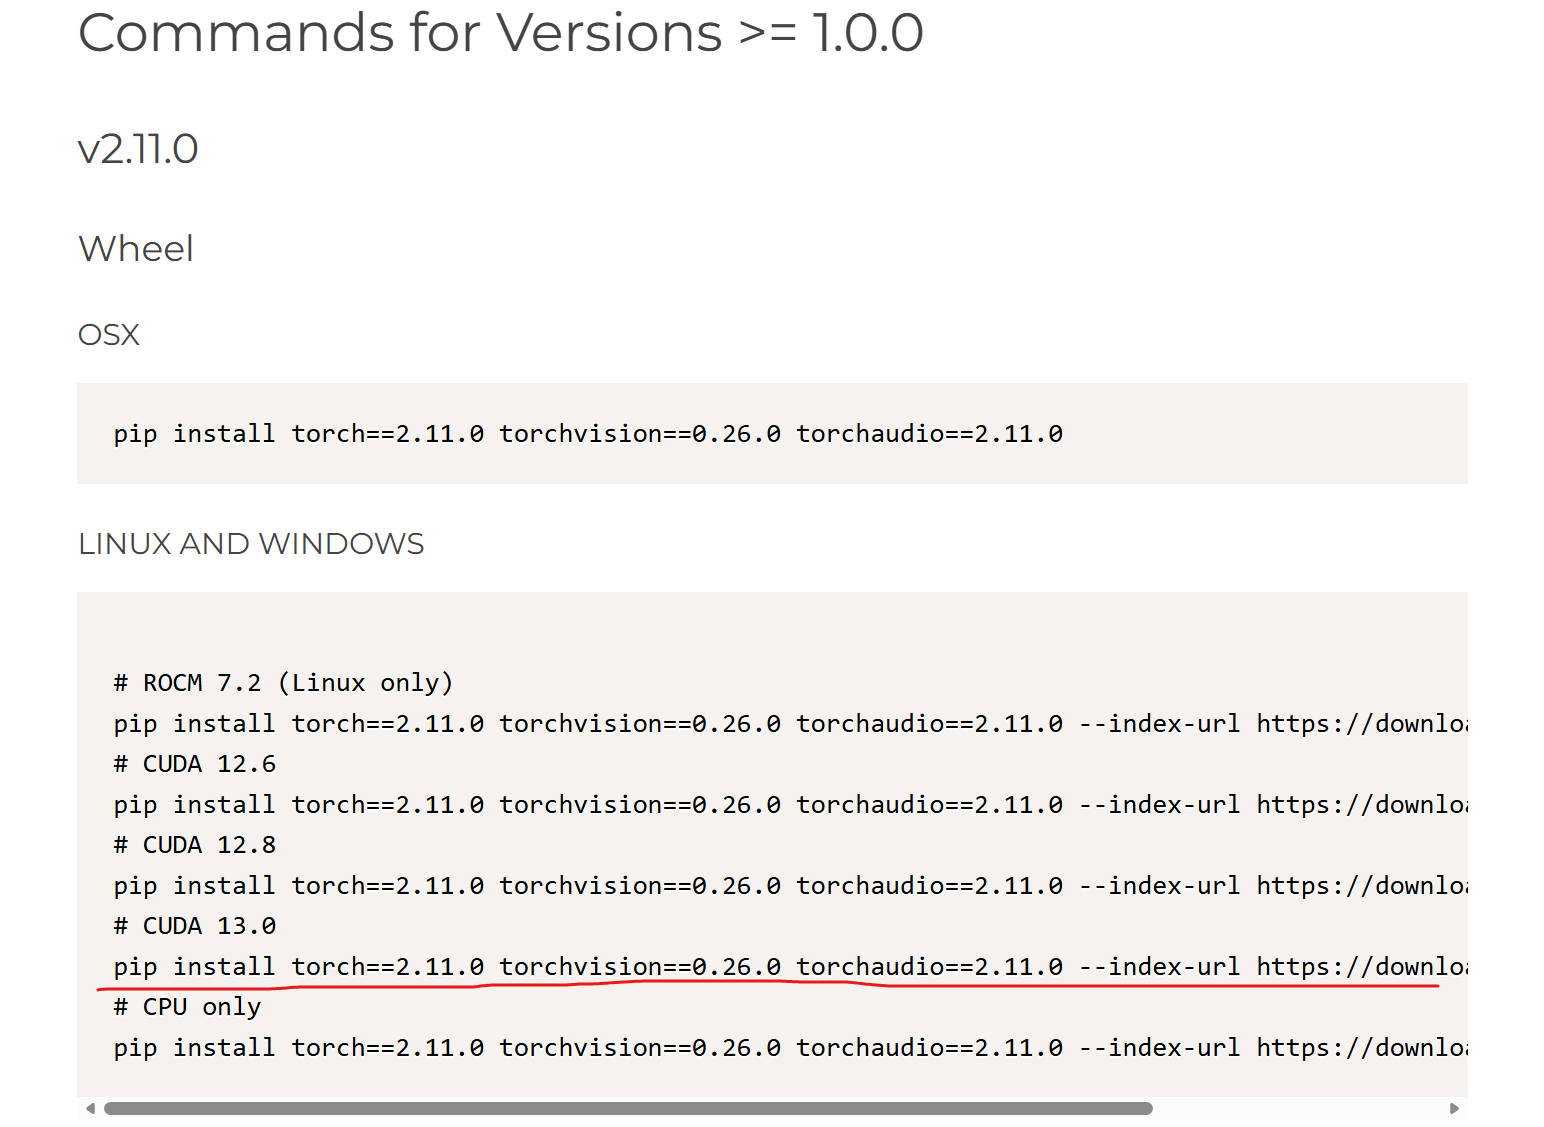
在虚拟环境中安装:

4.安装rf-detr包
pip install rfdetr如下:

三.运行测试Demo和训练脚本
1.创建一个demo.py,能运行即可,如下:
import supervision as sv
from rfdetr import RFDETRMedium
from rfdetr.assets.coco_classes import COCO_CLASSES
import cv2

# 加载模型
model = RFDETRMedium()

# 检测图片
detections = model.predict("https://media.roboflow.com/dog.jpg", threshold=0.5)

# 原来的代码(只显示类别)
#labels = [f"{COCO_CLASSES[class_id]}" for class_id in detections.class_id]
# 生成带置信度的标签
labels = [f"{COCO_CLASSES[class_id]}: {conf:.2%}"
          for class_id, conf in zip(detections.class_id, detections.confidence)]

# 标注图片
annotated_image = sv.BoxAnnotator().annotate(detections.metadata["source_image"], detections)
annotated_image = sv.LabelAnnotator().annotate(annotated_image, detections, labels)

# 显示结果
cv2.imshow("Detection Result", annotated_image)
cv2.waitKey(0)
cv2.destroyAllWindows()

# 保存结果(可选)
cv2.imwrite("detected_dog.jpg", annotated_image)
print("检测完成!结果已保存。")
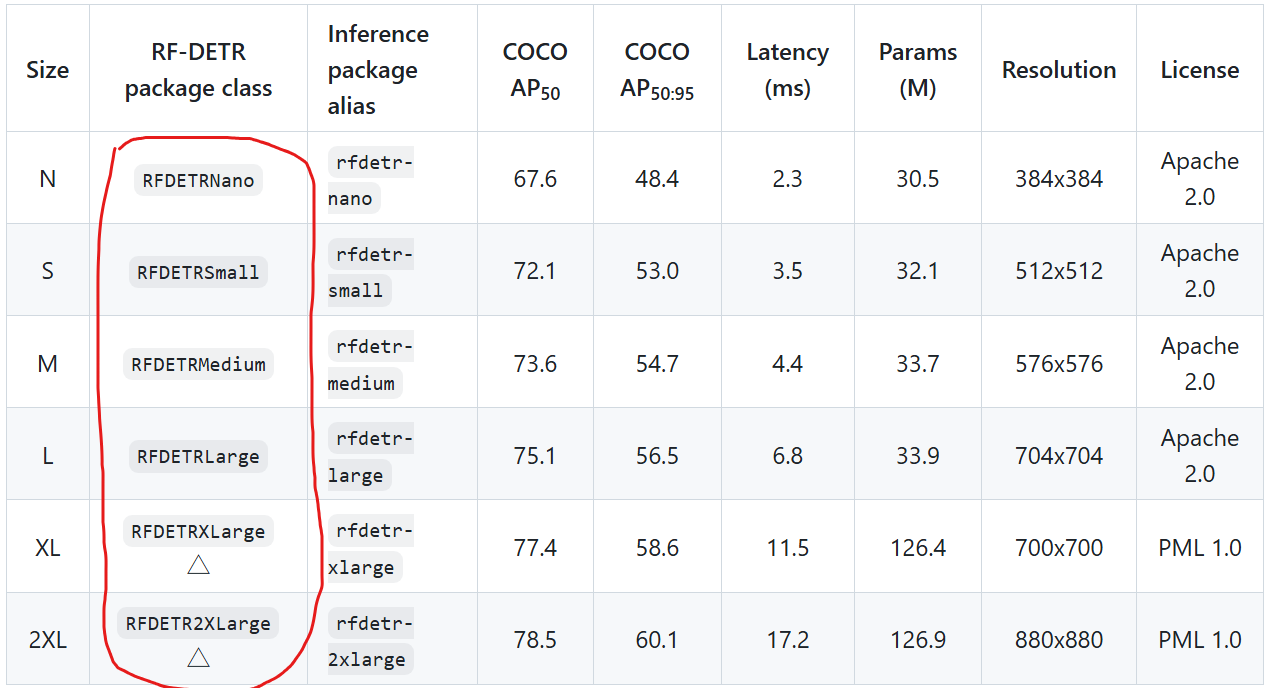
注:因为没有本地模型,会根据你的选择自动下载到C:\Users\Administrator\.roboflow\models下,此处会下载rf-detr-medium.pth模型,要用别的模型就改加载模型那句话,别的模型名称如下:
2.训练脚本(可以参考我这个或者自己结合官网或者AI修改,目前RF-DETR模型除了支持目标检测,还支持实例分割,姿态估计是目前最新的进展,当前的脚本是目标检测用)
from rfdetr import RFDETRMedium
import warnings

# 忽略 FutureWarning(可选)
warnings.filterwarnings("ignore", category=FutureWarning)

if __name__ == '__main__':
    model = RFDETRMedium()

    model.train(
        dataset_dir=r"D:\Data",  # 数据集路径
        epochs=100,  # 训练轮数
        batch_size=2,  # 根据显存调整
        output_dir="output",  # 输出目录
        num_workers=0,  # Windows 下建议设为 0
        accelerator="auto",  # 自动选择 GPU
        devices=1,  # GPU 数量
        precision="16-mixed"  # 混合精度训练(节省显存)
    )
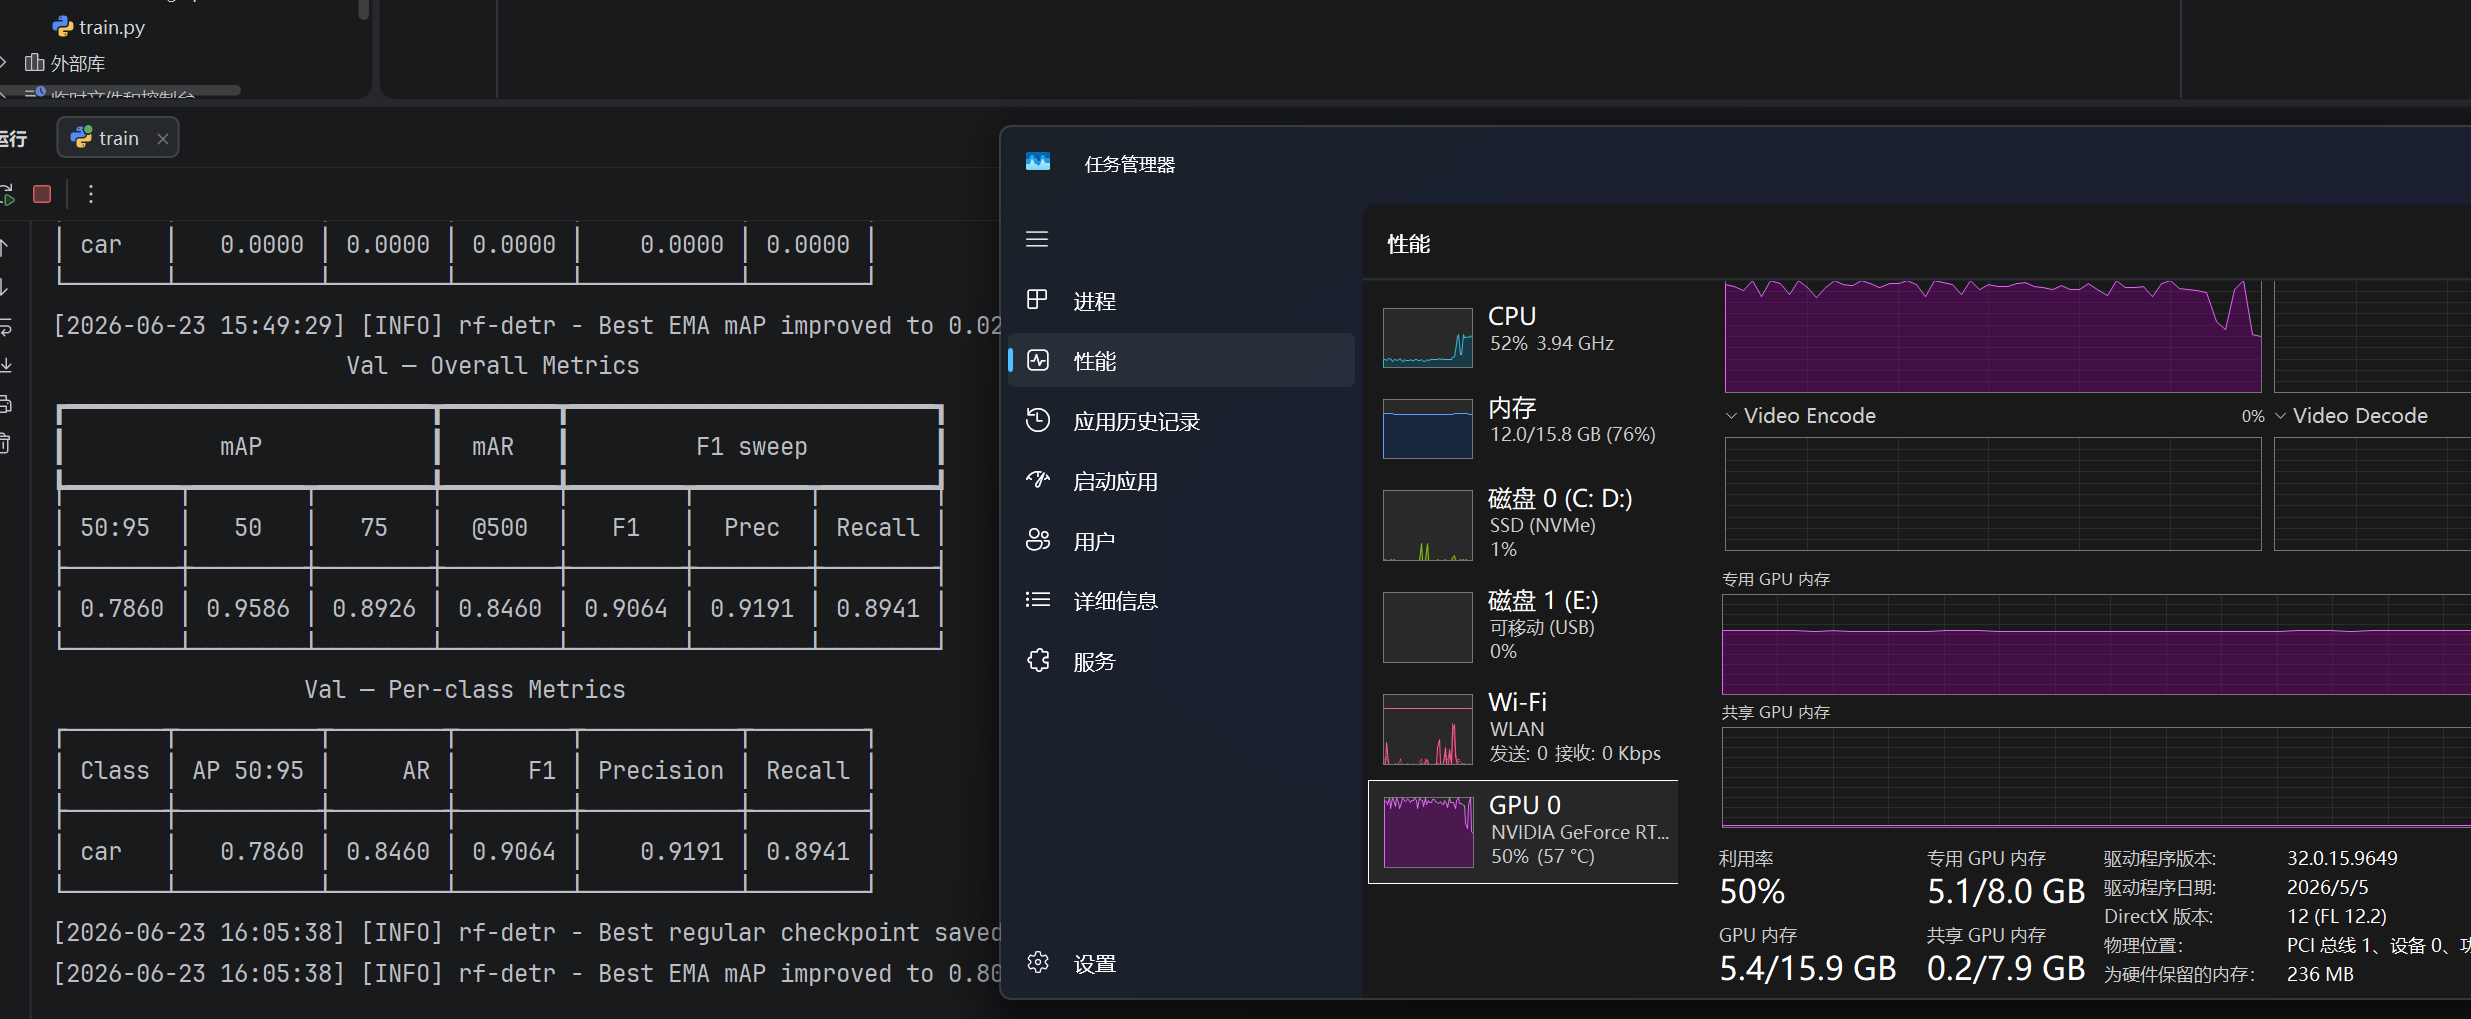
此处看起来是运行上了,但是巨慢!
注:本次选用的YOLO格式的目标检测数据集,格式如下:
dataset/
├── data.yaml
├── train/
│   ├── images/
│   │   ├── image1.jpg
│   │   ├── image2.jpg
│   │   └── ...
│   └── labels/
│       ├── image1.txt
│       ├── image2.txt
│       └── ...
├── valid/
│   ├── images/
│   │   ├── image1.jpg
│   │   ├── image2.jpg
│   │   └── ...
│   └── labels/
│       ├── image1.txt
│       ├── image2.txt
│       └── ...
└── test/
    ├── images/
    │   ├── image1.jpg
    │   └── ...
    └── labels/
        ├── image1.txt
        └── ...
3.Debug
运行的时候可能提示环境缺少什么什么包,缺啥补啥,自己pip install xxx添加吧。

DAMO开发者矩阵,由阿里巴巴达摩院和中国互联网协会联合发起,致力于探讨最前沿的技术趋势与应用成果,搭建高质量的交流与分享平台,推动技术创新与产业应用链接,围绕“人工智能与新型计算”构建开放共享的开发者生态。
更多推荐


 4
4 0
0- 0


 已为社区贡献2条内容

所有评论(0)